When you have a well-structured data table, you can use several simple techniques within your spreadsheet to ensure the data you enter is free of errors.
Validating data on input
When we input data into a cell of a spreadsheet we are typically not constrained in the type of data we enter. In any one column, the spreadsheets software will not warn us if we start to enter a mix of text, numbers or dates in different rows. Even if we are not facing constraints from the software, as a researcher we often anticipate that all data in one column will be of a certain type. It is also possible that the nature of the data contained in the table allows us to place additional restrictions on the acceptable values for cells in a column. For example a column recording age in years should be numeric, greater than 0 and is unlikely to be greater than 120.
Excel allows us to specify a variety of data validations to be applied to cell contents. If the validation fails, an error is raised and the data we entered does not go into the particular cell. In addition to providing validation when we enter data, Excel allows us to add validations to data that has already been entered. The validation is not applied retrospectively, so that data are removed. Instead, if a particular cell would fail the validation check a triangle is placed in the top left corner of the cell as a warning.
We will be working with a couple of examples of data validation rules but many others exist. For an overview of data validation rules available in Excel, check out the Excel support page on data validation.
We will look at two examples:
- Restricting data to a numeric range
- Restricting data to entries from a list
Restricting data to a numeric range
Looking again at the clean version of the SAFI dataset, we see that there are several columns with numeric data. One example of this is the column no_membrs representing the number of people in the household. We would expect this always to be a positive integer, and so we should reject values like 1.5 and -8 as entry errors. We would also reject values over a certain maximum - for example an entry like 90 is probably the result of the researcher inputting 9 and their finger slipping and also hitting the 0 key. It is up to you as the researcher to decide what a reasonable maximum value would be for your data, here we will assume that there are no families with greater than 30 members.
1. Select the no_membrs column.
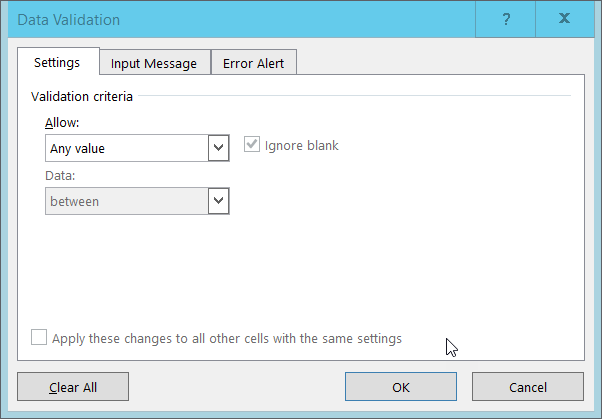
2. In Excel on the Data tab select Data Tools and then Data Validation or Validation Tools (depending on your version of Excel). The following popout will appear:
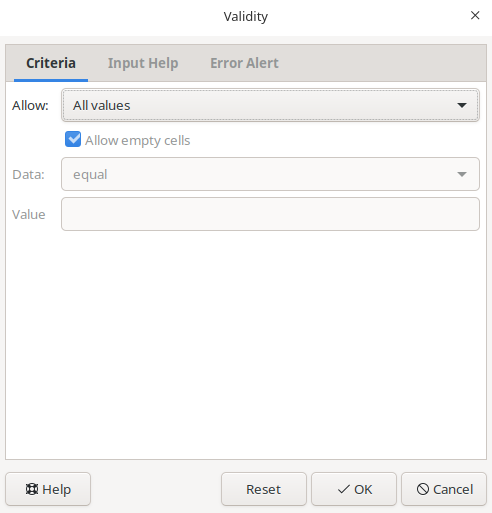
In Libre Office on the Data tab select Validity... the following popup will appear:
3. In Excel, select ‘Whole number’ from the Allow drop down options.
In Libre Office choose Allow: Whole Numbers and then Data: valid range.
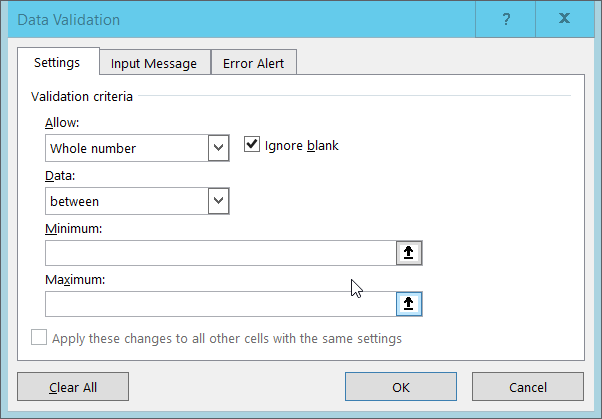
4. The window content will change. The value in the data box will say ‘between’ and Minimum and Maximum boxes will be provided for you to specify an allowed range. In Excel you will see:
In LibreOffice, you will see:
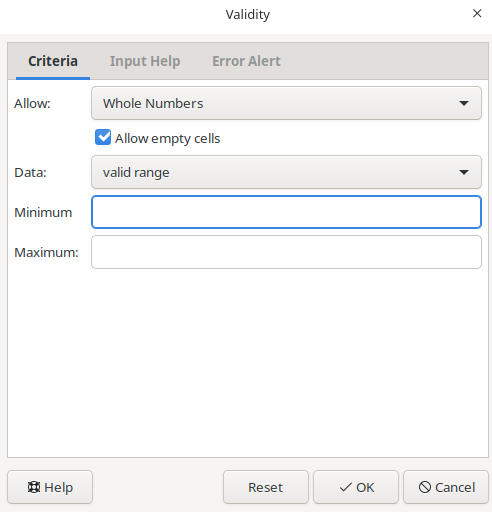
5. Fill in the minimum and maximum values that make sense for your data and click Ok. Here we will choose a minimum of 1 and a maximum of 30.
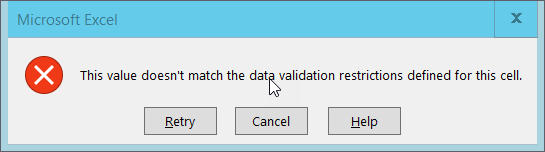
Your data table will now not allow you to enter a value that violates the data validation rule you have created. To test this out, try to enter a new value into the no_membrs column that is not valid. The following error box will appear in Excel:
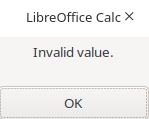
The following error box will appear in LibreOffice:
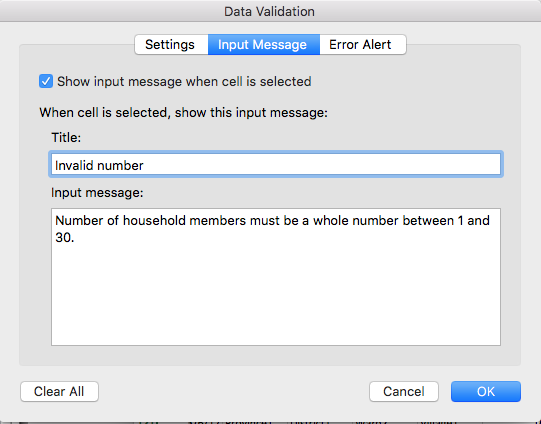
You can also customize the resulting message to be more informative by entering your own message in the Input Message tab when creating a data validation rule. In Excel, you will see:
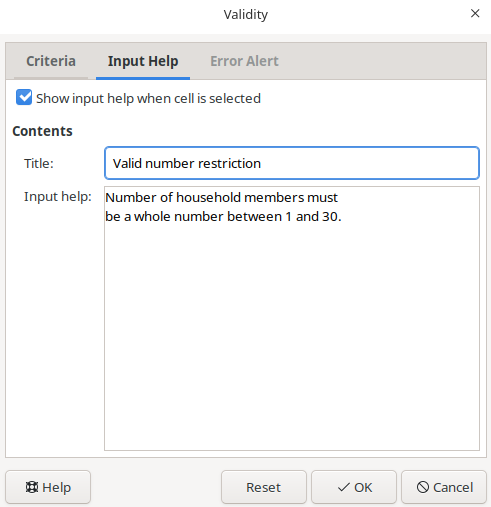
In LibreOffice, you will see:
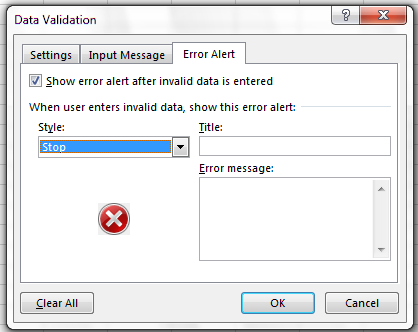
You can also allow invalid data to result in a warning rather than an error by modifying the Style option on the Error Alert tab. For Excel you will see:
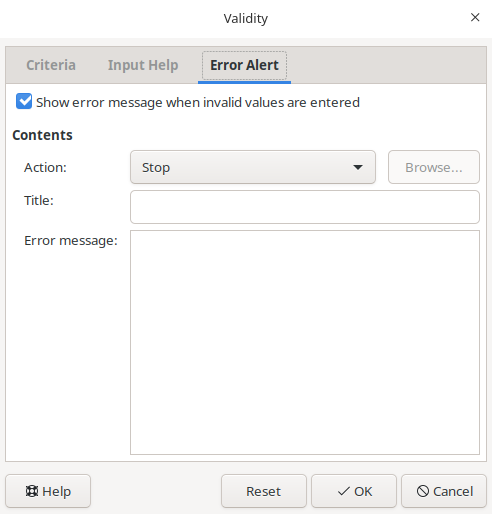
In LibreOffice, you will see:
Activity
Step 1
Looking at the other columns in the clean version of the SAFI dataset, what is another numeric column that would benefit from having a data validation rule applied to it?
Restricting data to entries from a list
Quality assurance can make data entry easier as well as more robust. For example, if you use a list of options to restrict data entry, the spreadsheet will provide you with a drop-downlist of the available items. So, instead of trying to remember how to spell “mabatisloping”, or whether or not you capitalized “cement” you can select the right option from the list.
1. Select the respondent_wall_type column.
2. In Excel, on the Data tab select Data Tools and then Data Validation or Validation Tools (depending on your version of Excel). The following popout will appear:
In LibreOffice, on the Data tab select Validity...
3. In Excel, select List from the Allow drop-down menu, and in LibreOffice, choose the List option.
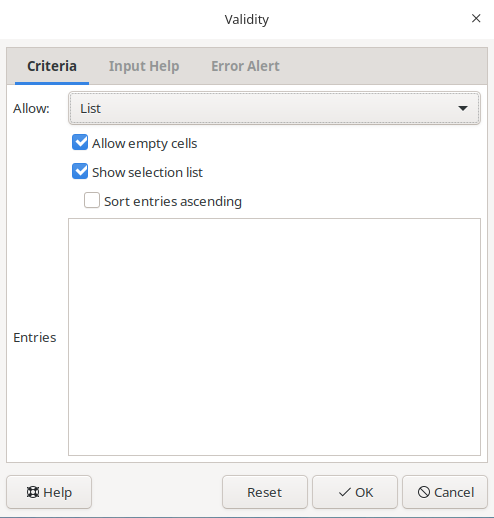
4. In Excel, the window will change to include a Source box, you will see,
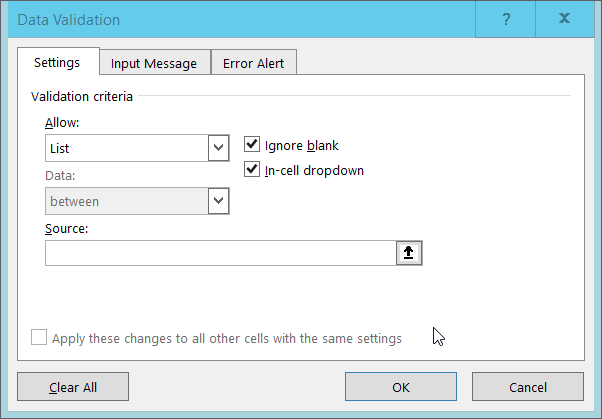
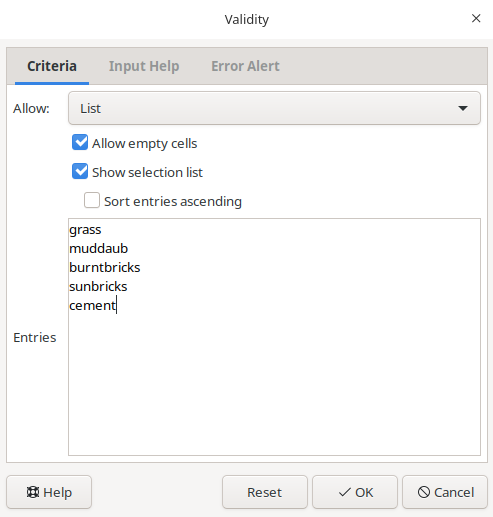
In LibreOffice, you will see,
5. Type a list of all the values that you want to be accepted in this column, separated by a comma (with no spaces). For us this will be “grass, muddaub, burntbricks, sunbricks, cement”.
In LibreOffice, your entries of grass, muddaub, burntbricks, sunbricks and cement should be on new lines as shown below
6. In Excel, create a meaningful input message, then click OK. In LibreOffice, there is no need to create an input message.
We have now provided a restriction that will be validated each time we try and enter data into the selected cells. When a cell in this column is selected, a drop-down arrow will appear. When you click the arrow, you will be able to select a value from your list. If you type a value which is not on the list, you will get an error message. This not only prevents data input errors, but also makes it easier and faster to enter data.
Tip
Typing a list of values where only a few possible values exist (like “grass, muddaub, burntbricks, sunbricks, cement”) might be convenient, but if the list is longer it makes sense to create it as a small table (in a separate tab of the workbook). We can give the table a name and then reference the table name as the source of acceptable inputs when the source box appears in the Data Validation pop-out.
Using a table in this way makes the data entry process more flexible. If you add or remove contents from the table, then these are immediately reflected in any new cell entries based on this source.
Tip
In the examples above we have applied data validation rules to an existing spreadsheet to demonstrate how they work, however, you may have noticed that data validation rules are not applied retroactively to data that is already present in the cell. This means, for example, that if we had already entered 150 in the no_membrs column before applying our data validationrule, that cell would not be flagged with a warning.
In some versions of Excel, you can click in the Data tab on Data Validation and then Circle invalid data. This will put red circles around invalid data entries. Note that it can be a bit slow with large data files.
When using spreadsheets for data entry, it is a good idea to set up data validation rules for each column when you set up your spreadsheet (i.e. before you enter any data).