Setup
You’re welcome to just watch the sessions, but if you prefer to follow along on your own computer please setup GitHub and GitHub Copilot before the second workshop (Part 2: Set Up GitHub Copilot).
1. Create a GitHub account
If you don’t already have one, create a free GitHub account at github.com/signup. Be sure to check your email and confirm your account to complete the registration process.
2. Enable GitHub Copilot
To use GitHub Copilot you will need to enable it for your GitHub account.
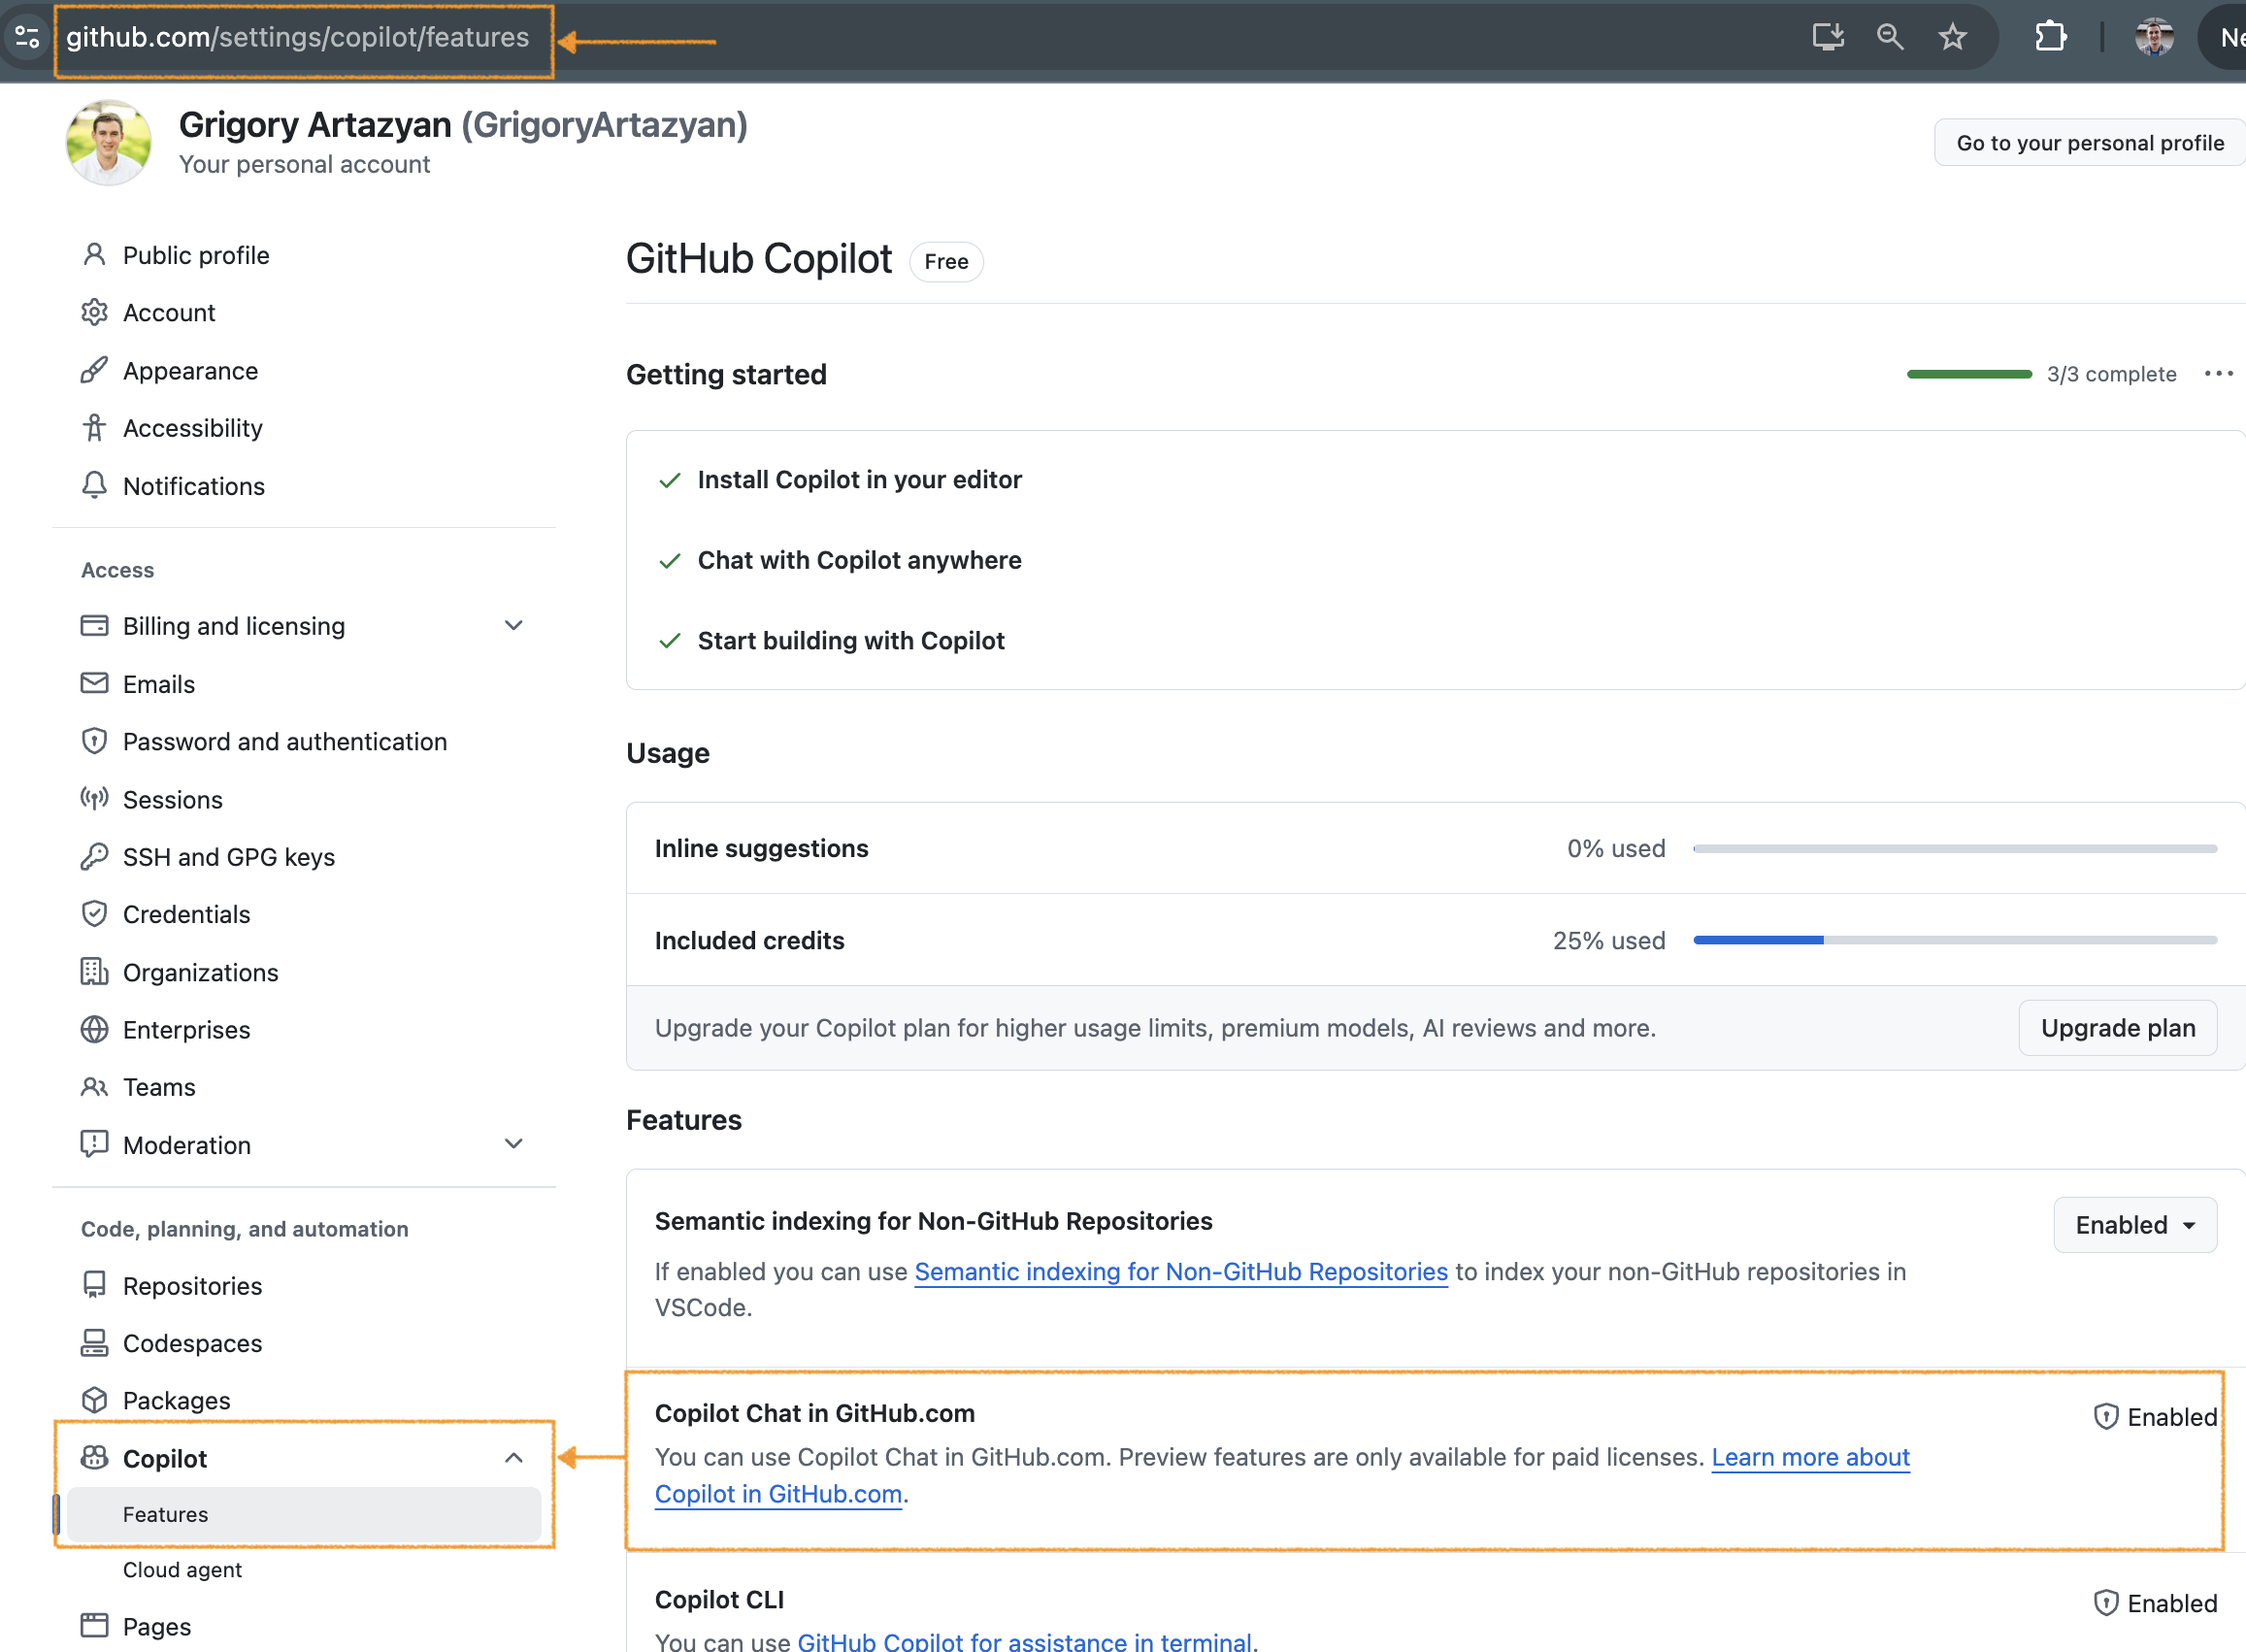
- Sign in to GitHub, then visit github.com/settings/copilot/features
- If you haven’t set up Copilot yet, click Start using Copilot Free
- On the Copilot → Features page, enable Copilot Chat in GitHub.com — this is the only Copilot feature you will need for these workshops
There are several Copilot plans; Copilot Free is sufficient to participate in this workshop and learn how AI can support coding tasks.
Loading last updated date...