Part 2. Set Up GitHub Copilot
Creating an AI working environment with Copilot
Learning Objectives
By the end of this workshop, you will:
- Understand the necessary components of an AI-assisted coding environment.
- Integrate an AI assistant (Copilot) into your workflow to enhance learning and coding.
- Explore how a personal, sandboxed environment lets you experiment safely.
Why all this setup?
We designed this workshop environment so you have a safe, personal space to try things out, experiment, and learn by doing.
The workshop files are saved in a GitHub repository. Before you start, you’ll make your own personal copy of the repository (in GitHub this process is called forking). This copy is yours alone — to experiment without worrying about breaking anything. You will also set up a GitHub Codespace, an online environment where you can develop code and chat with the Copilot AI assistant without installing anything on your own computer.
A GitHub Codespace is a virtual environment where you can interact with Copilot and develop code. It’s a convenient teaching tool, but for your own projects consider setting up a similar environment on your own computer (e.g. with VS Code or Positron).
Prior experience with GitHub is not required to follow along, but to participate fully you’ll need a free GitHub account (see Setup). Later activities in the workshop depend on the Codespace environment you set up here.
Launch your GitHub Codespace
Follow the steps below to open your copy of the workshop in a Codespace — a full coding environment that runs right in your browser, with nothing to install.
The slides below walk you through forking and launching the workshop exercise repository: ubc-library-rc/ai-for-coding-exercise
Open the setup slides in a new tab →
Orientation to the Codespace environment
Once your Codespace opens in the browser, you’ll see a full coding environment ready to use—just like in the screenshot below.
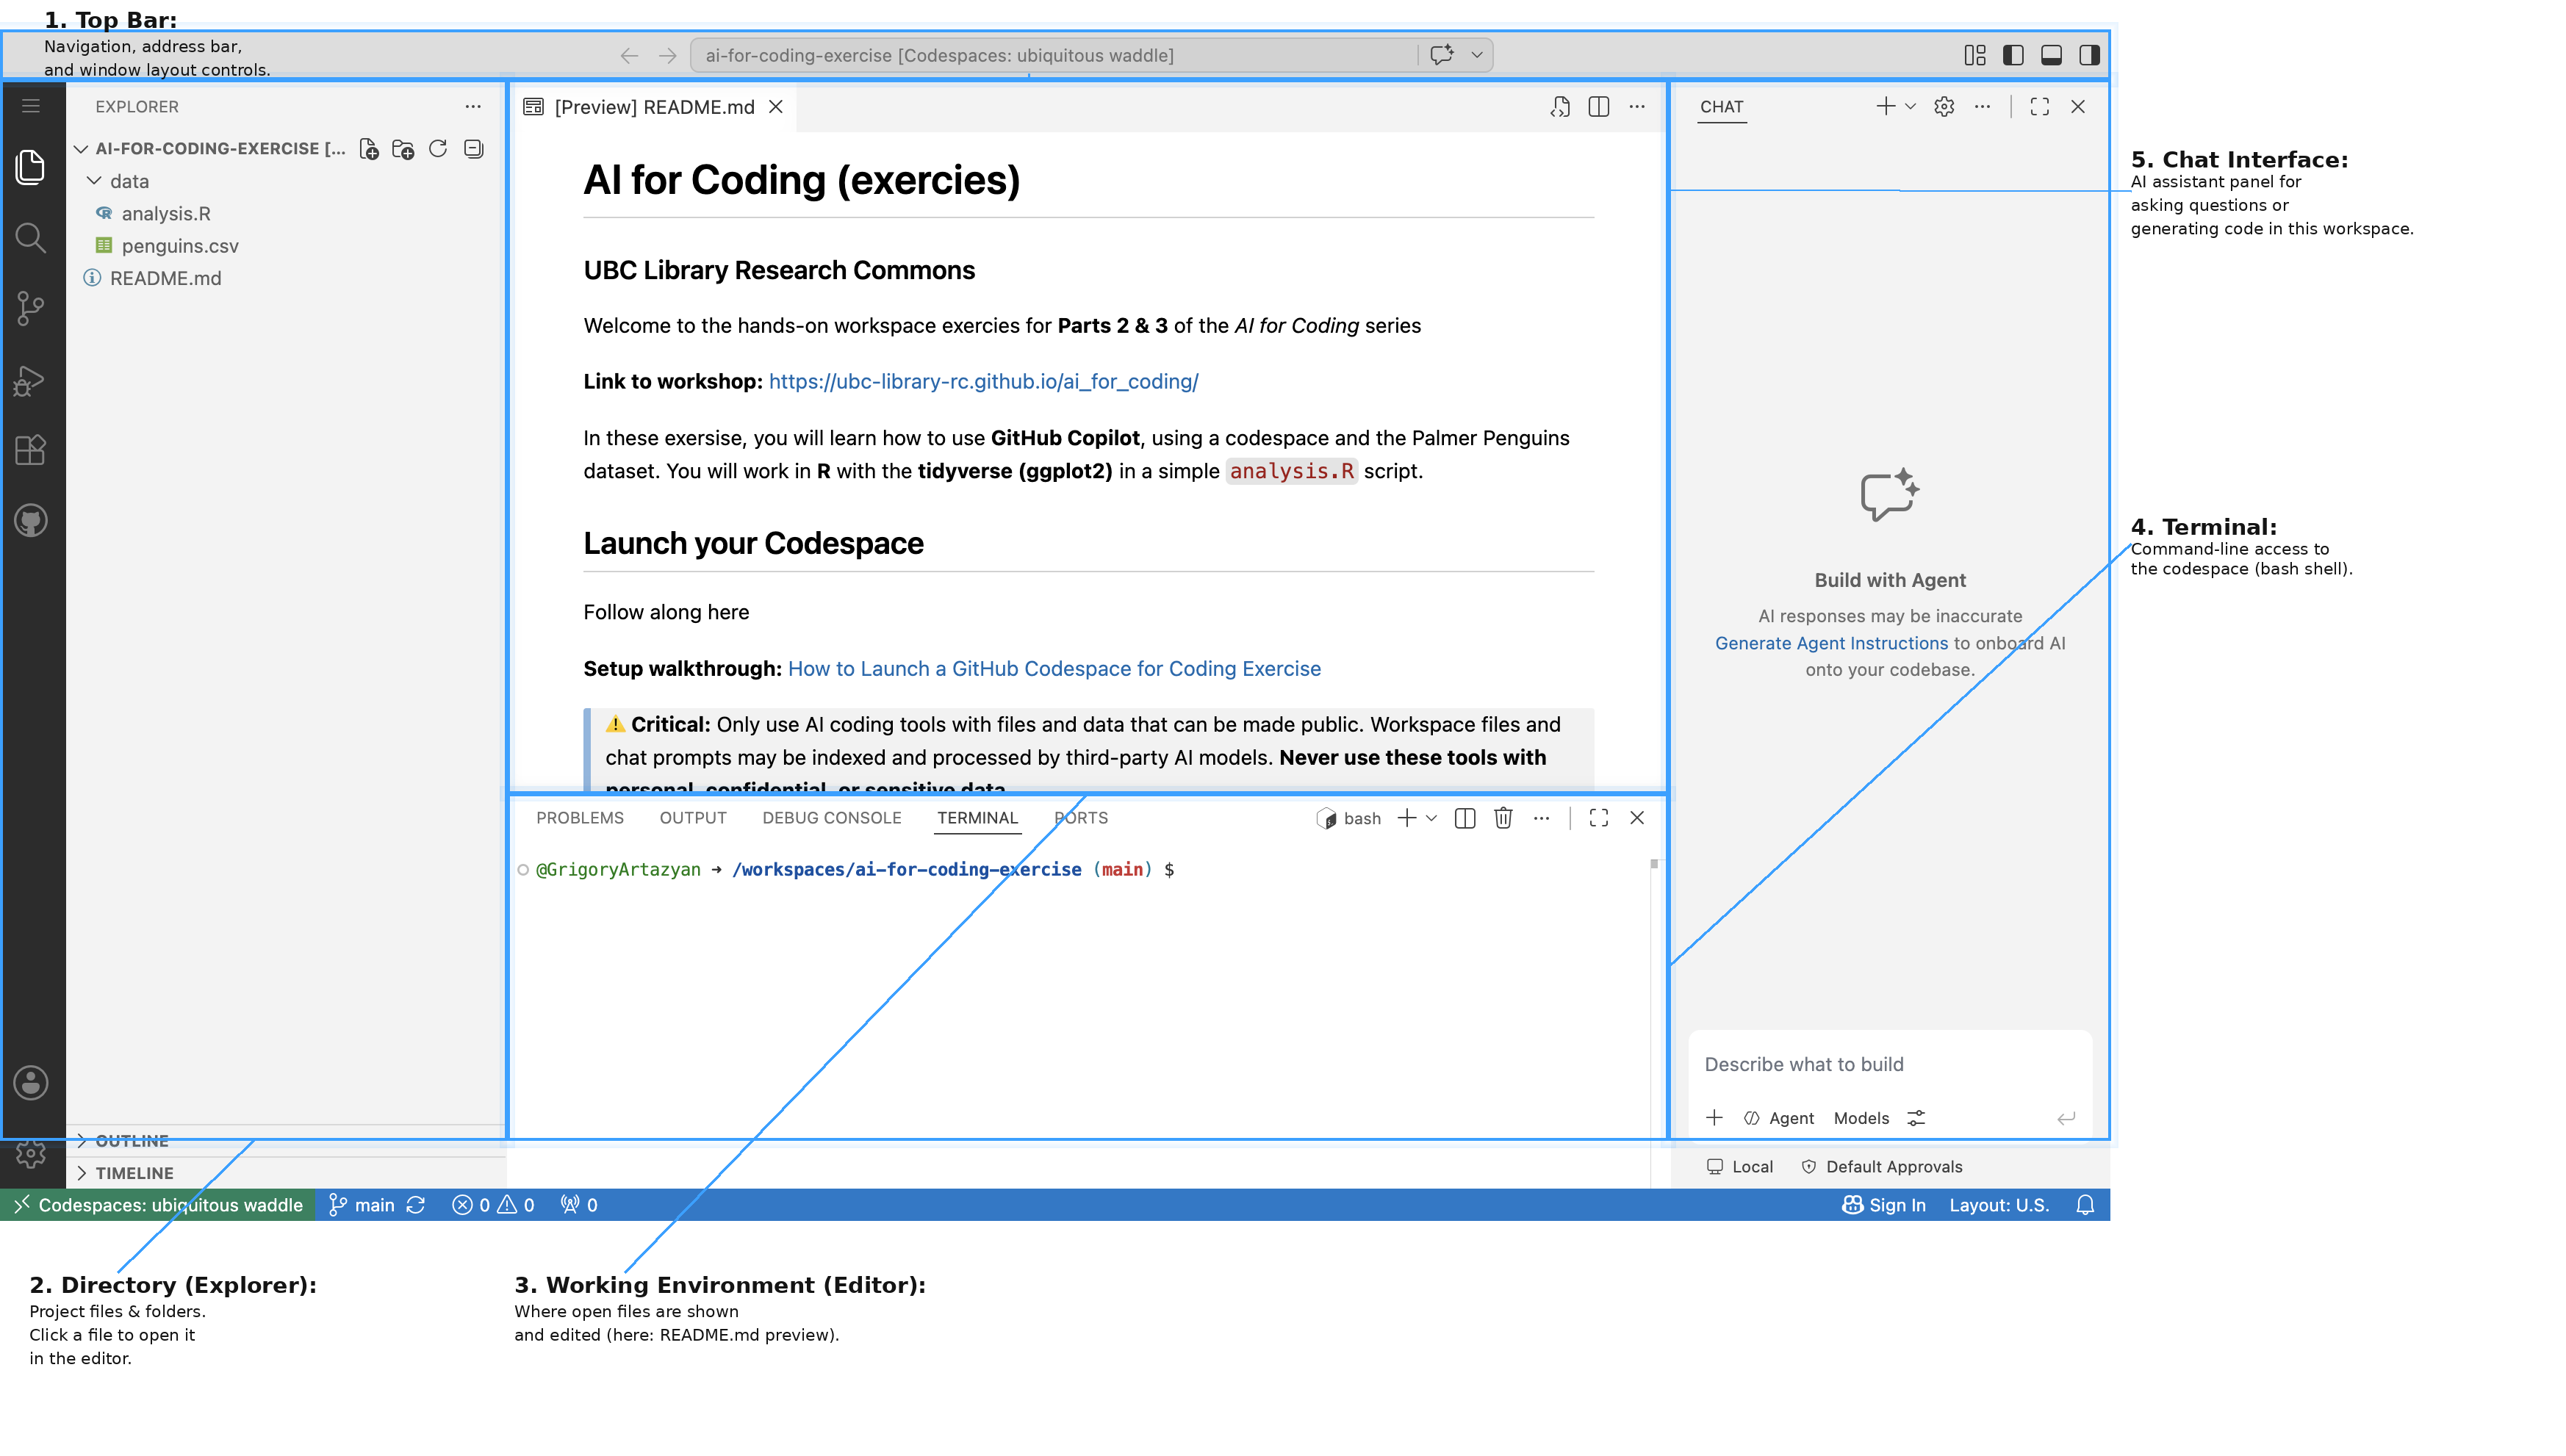
- Top bar — navigation, address bar, and window layout controls.
- Directory (Explorer) — your project files and folders; click a file to open it in the editor.
- Working environment (Editor) — where your open files are shown and edited (here, the README.md preview).
- Terminal — command-line access to the Codespace (a bash shell).
- Chat interface — the AI assistant (Copilot) panel for asking questions or generating code in this workspace.
Note: Your Codespace gets an automatically generated name, so it won’t exactly match the example above.
Explore Copilot in your Codespace
Now let’s open the tool we’ll use. Open Copilot Chat with Ctrl+Cmd+I (macOS) or Ctrl+Alt+I (Windows/Linux).
Inside the chat panel, there are two dropdown menus worth understanding:
- Mode — how Copilot helps. Set this to Agent, which can carry out multi-step tasks across your files (what we’ll use in Part 3). Other modes include Ask (quick questions), Edit (change specific code), and Plan (outline a task).
- Model — which AI model answers. Set this to Auto, which lets Copilot pick a model for you — the simplest choice on the free plan.
Good to know: working in your Codespace
A few things that often come up once you start working hands-on:
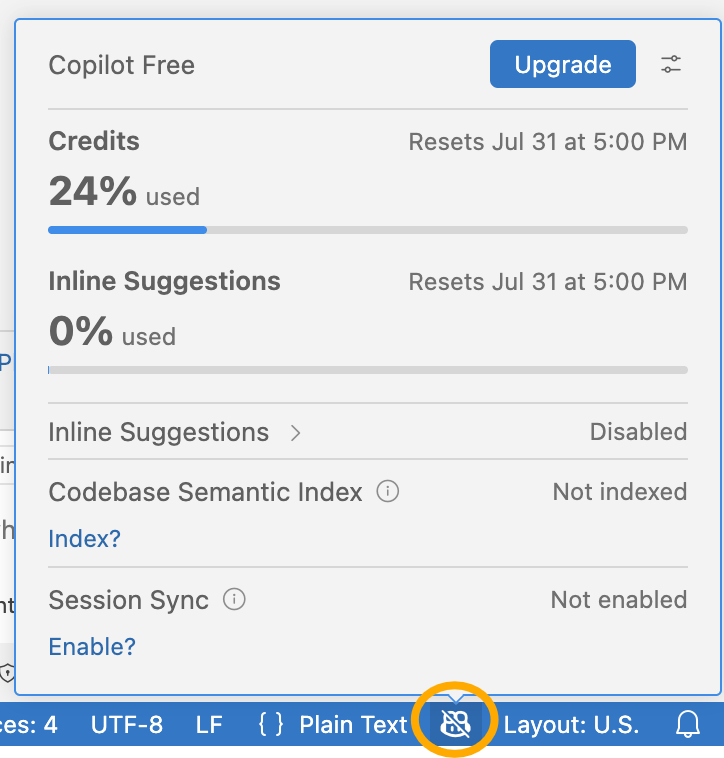
Check your Copilot usage
The free plan has a monthly limit. To see how much you’ve used, click the Copilot icon in the bottom-right status bar.
Re-open the Copilot chat if you close it
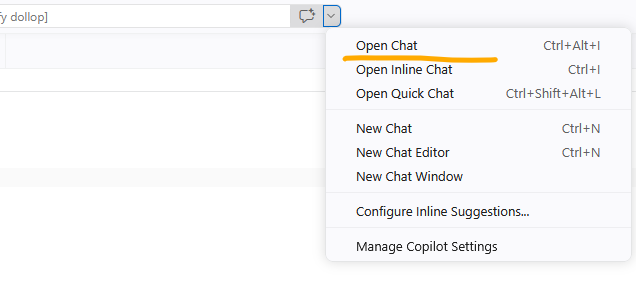
Closed the chat by accident? Open it again from the chat icon dropdown in the top bar (or press Ctrl+Cmd+I on macOS / Ctrl+Alt+I on Windows/Linux).
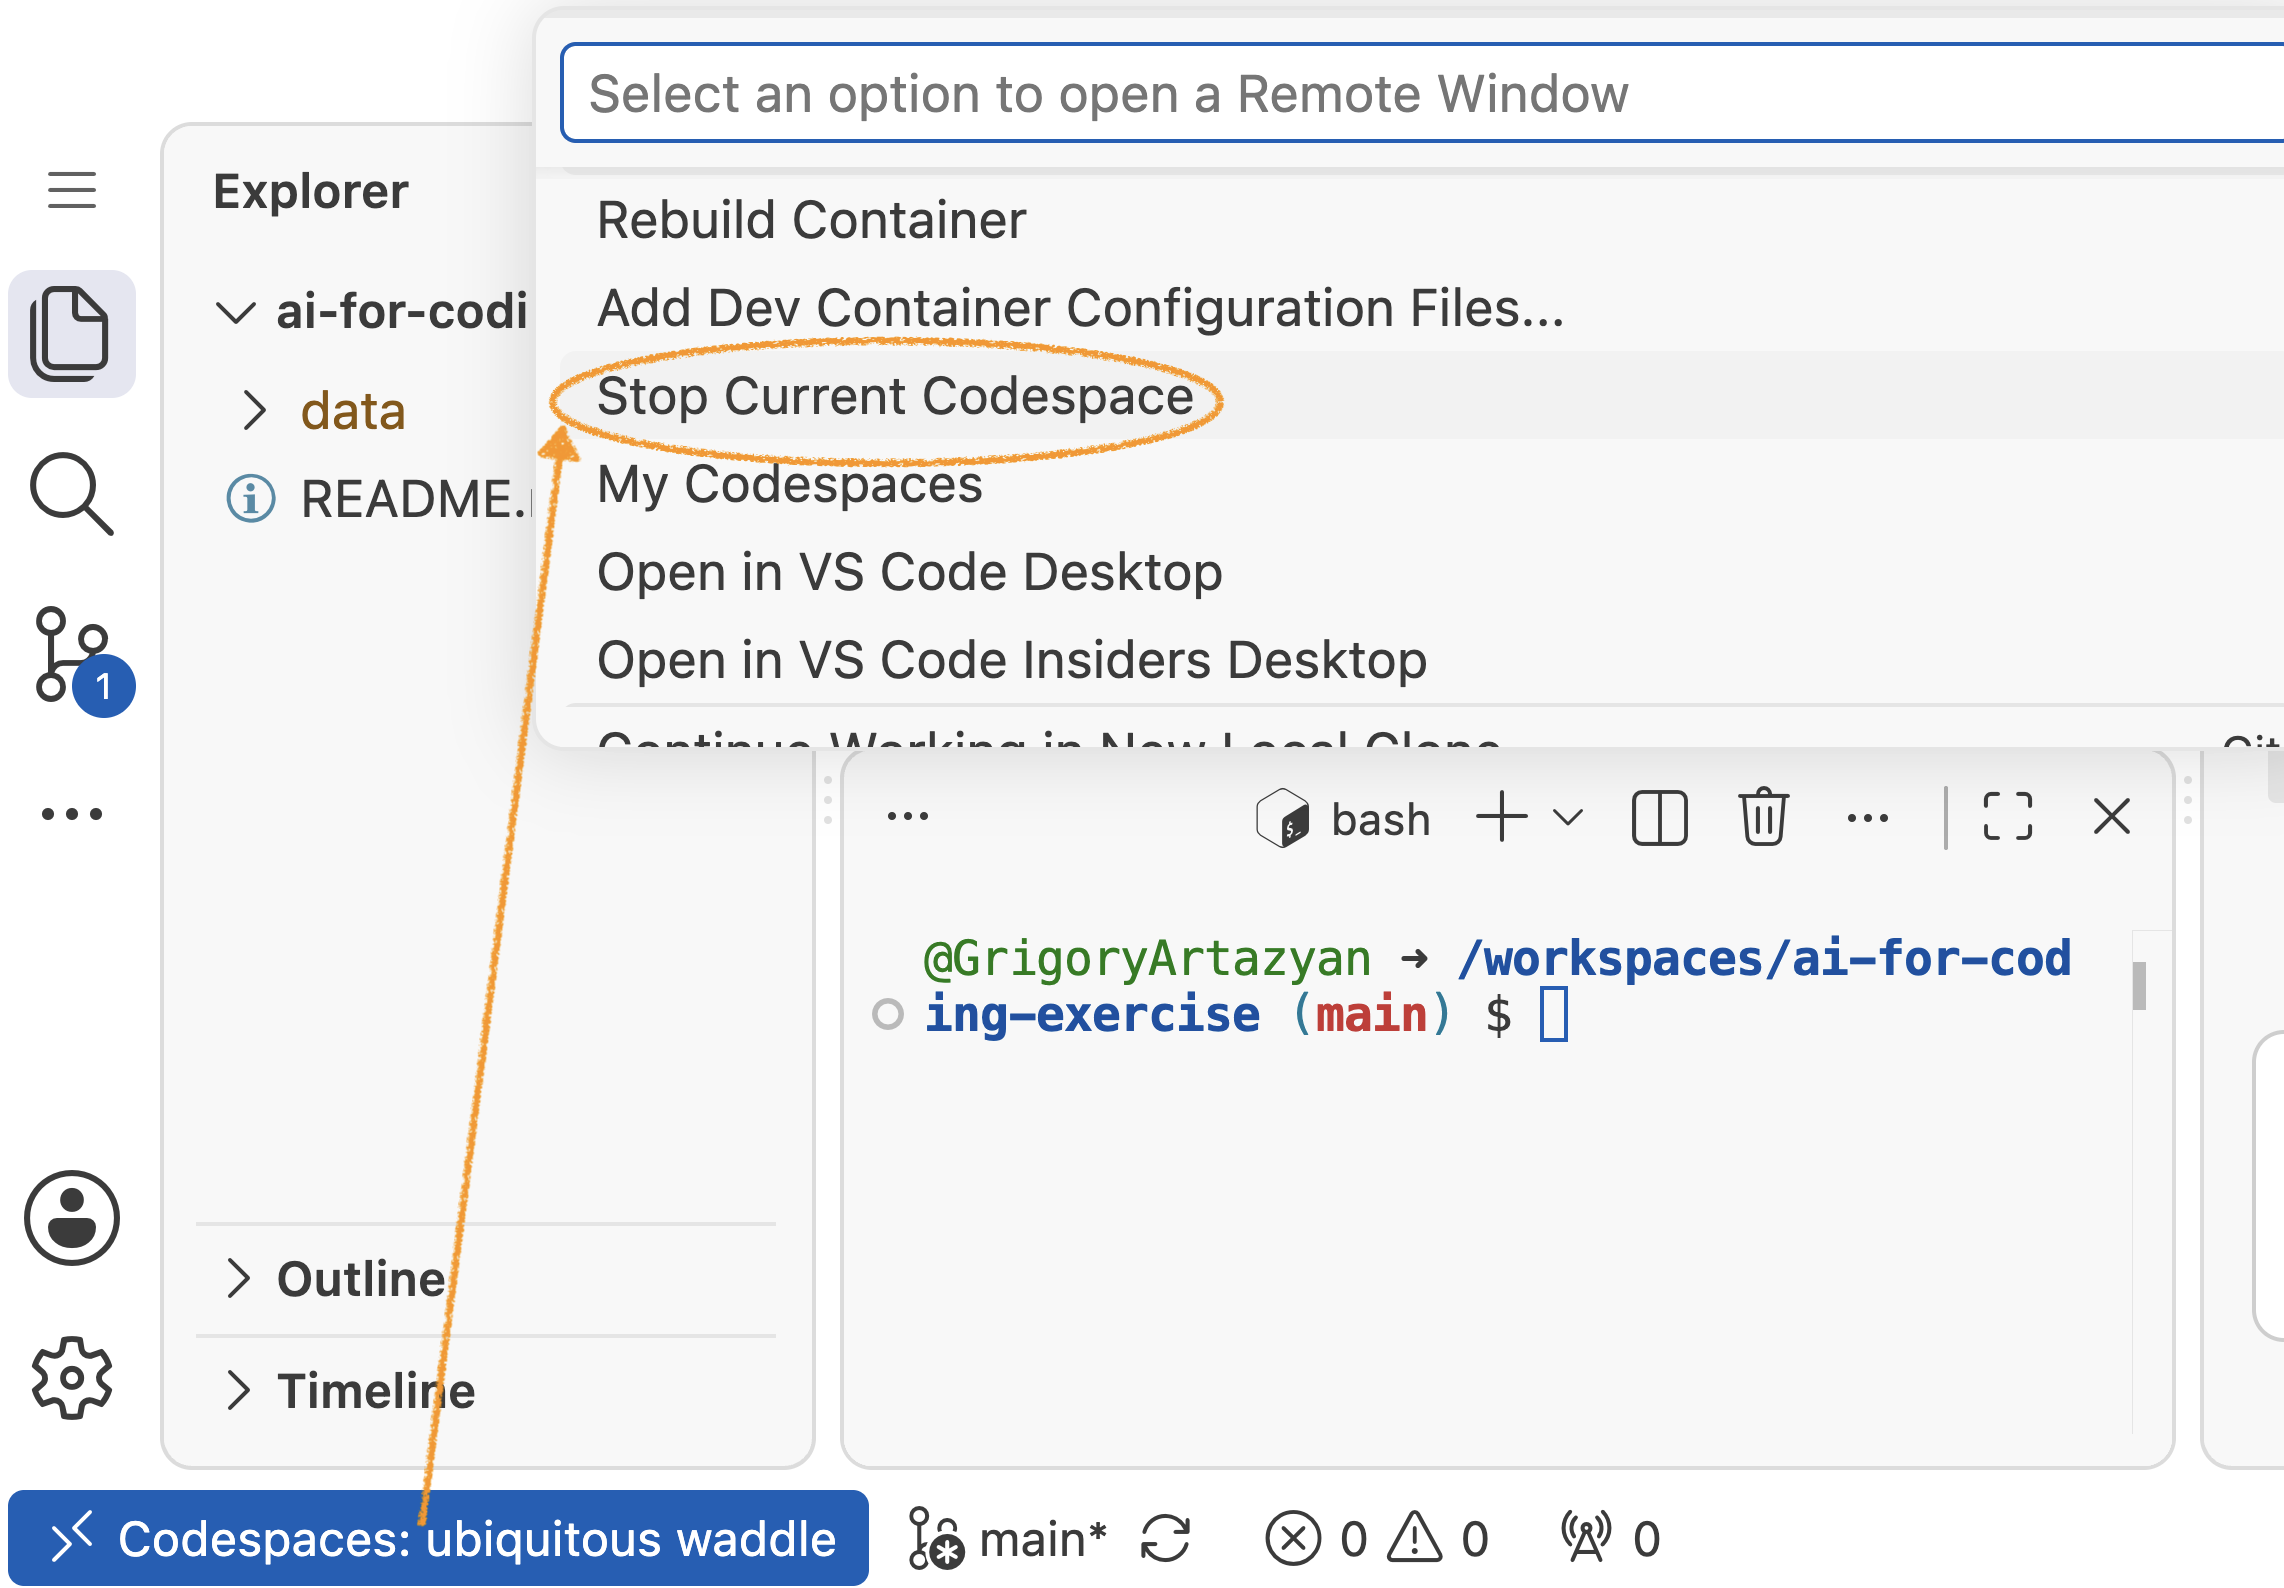
Stop your Codespace when you’re done
A Codespace keeps running for a while after you close the tab, using up your free hours. To stop it, click the Codespaces label in the bottom-left corner and choose Stop Current Codespace. Stopping a Codespace saves your files. You can reopen it later right where you left off.
You can also manage all your Codespaces — including to see which are running and how much of your free quota has been used — at github.com/codespaces.
Resources
Previous: Part 1. Concepts and Context
Next: Part 3. Explore, Prompt, and Build with GitHub Copilot
Loading last updated date...