Creating a webmap with qgis2web plugin
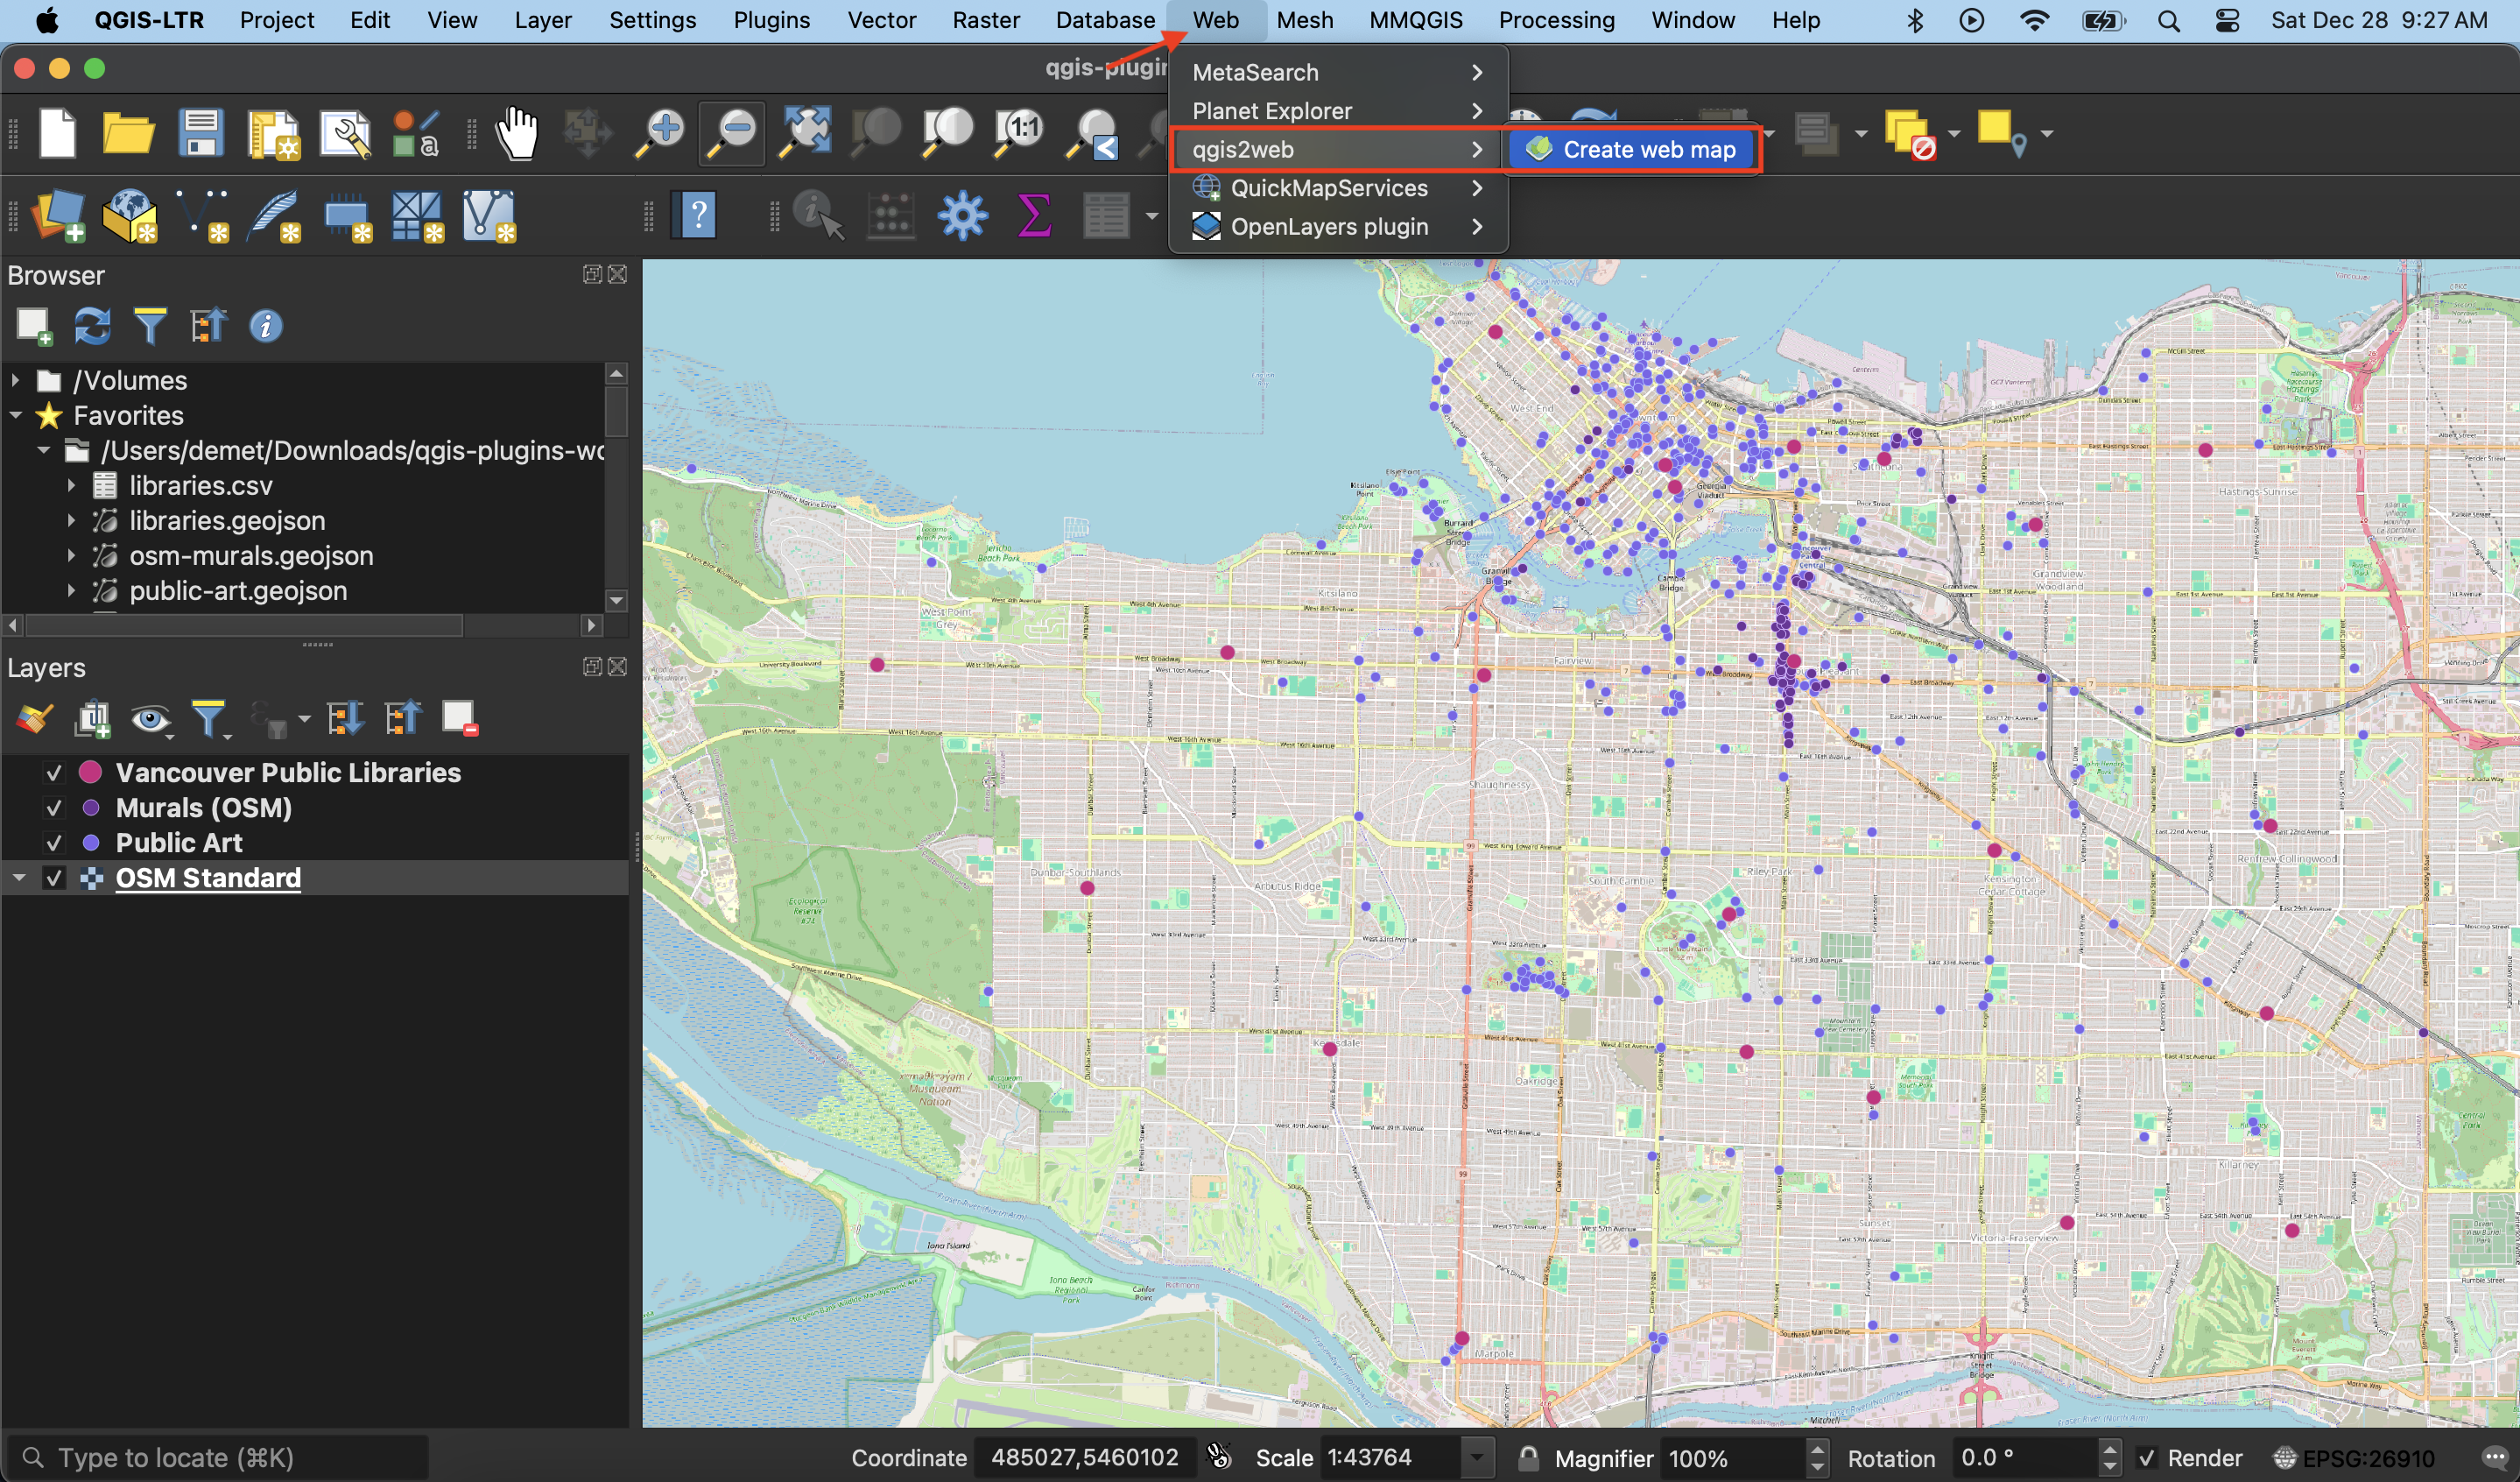
1. Open qgis2web
Open the qgis2web plugin from the Web menu at the top of your screen. Chose Create web map.
2. Power your webmap with Leaflet
Change the code library powering your webmap to Leaflet. Leaflet is a free and open-source code library that powers the interactivity and symbology of webmaps.

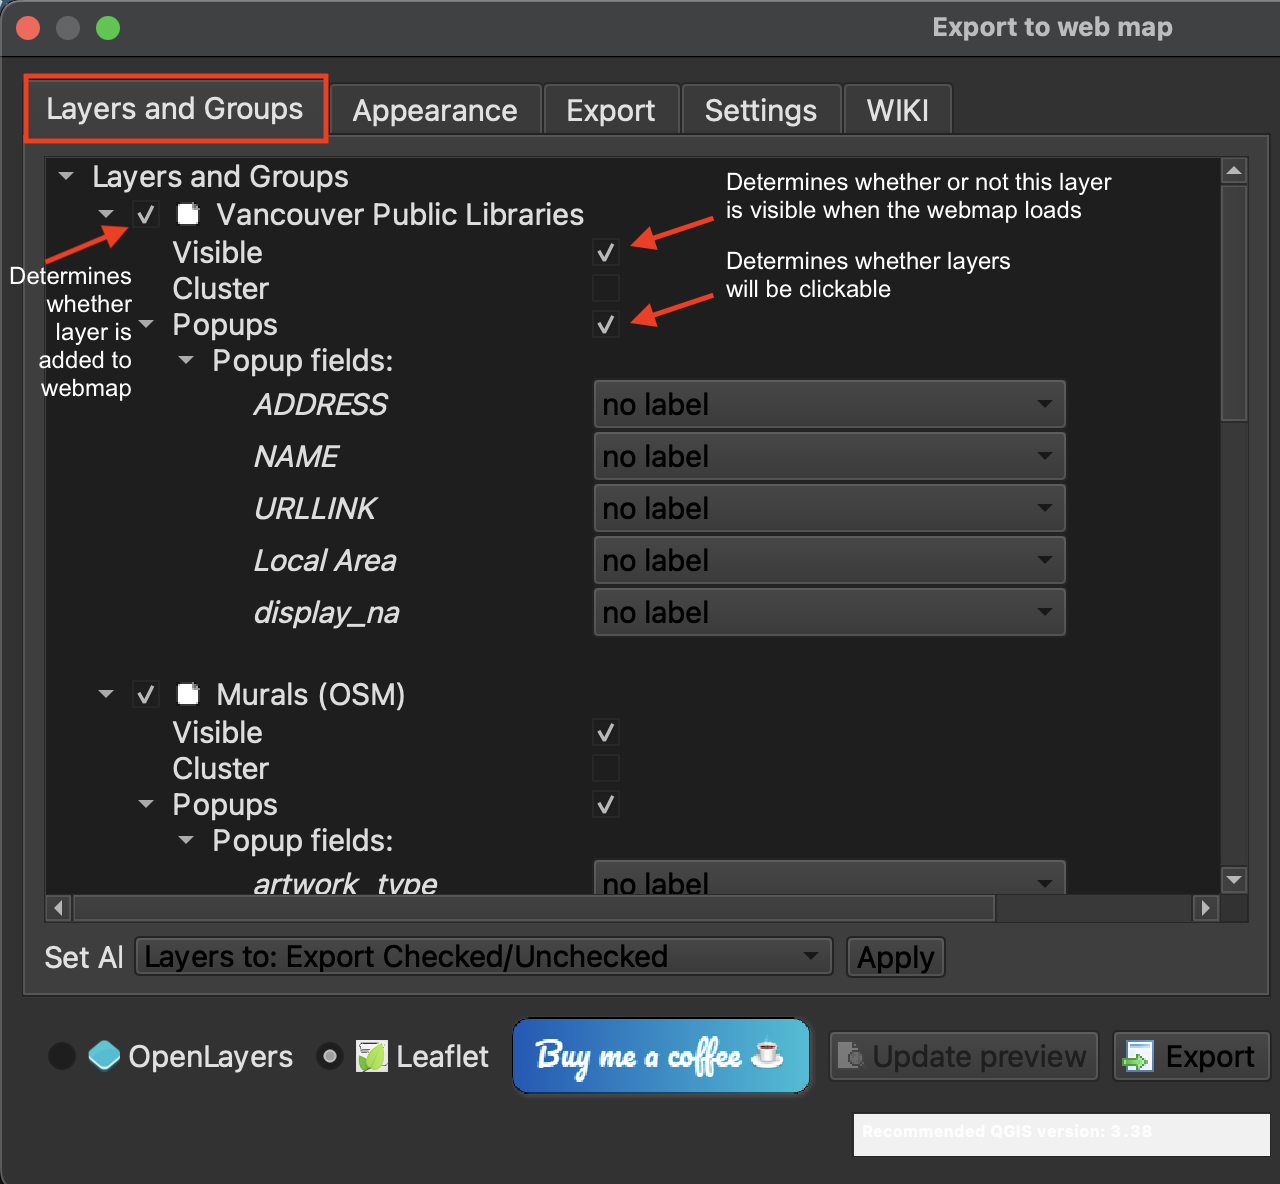
3. Specify Layers and Groups
Layers and Groups refers to everything that was in your Layers Panel. At this point, you can decide which layers are added to your webmap, whether they are visible upon initial load, and whether or not they have popups (and if so, whether the contents of these popups are labeled). Notice that the popup fields listed are only the ones you left visible when setting field visibility. If you choose to give your popups labels, they will reflect any aliases you made.
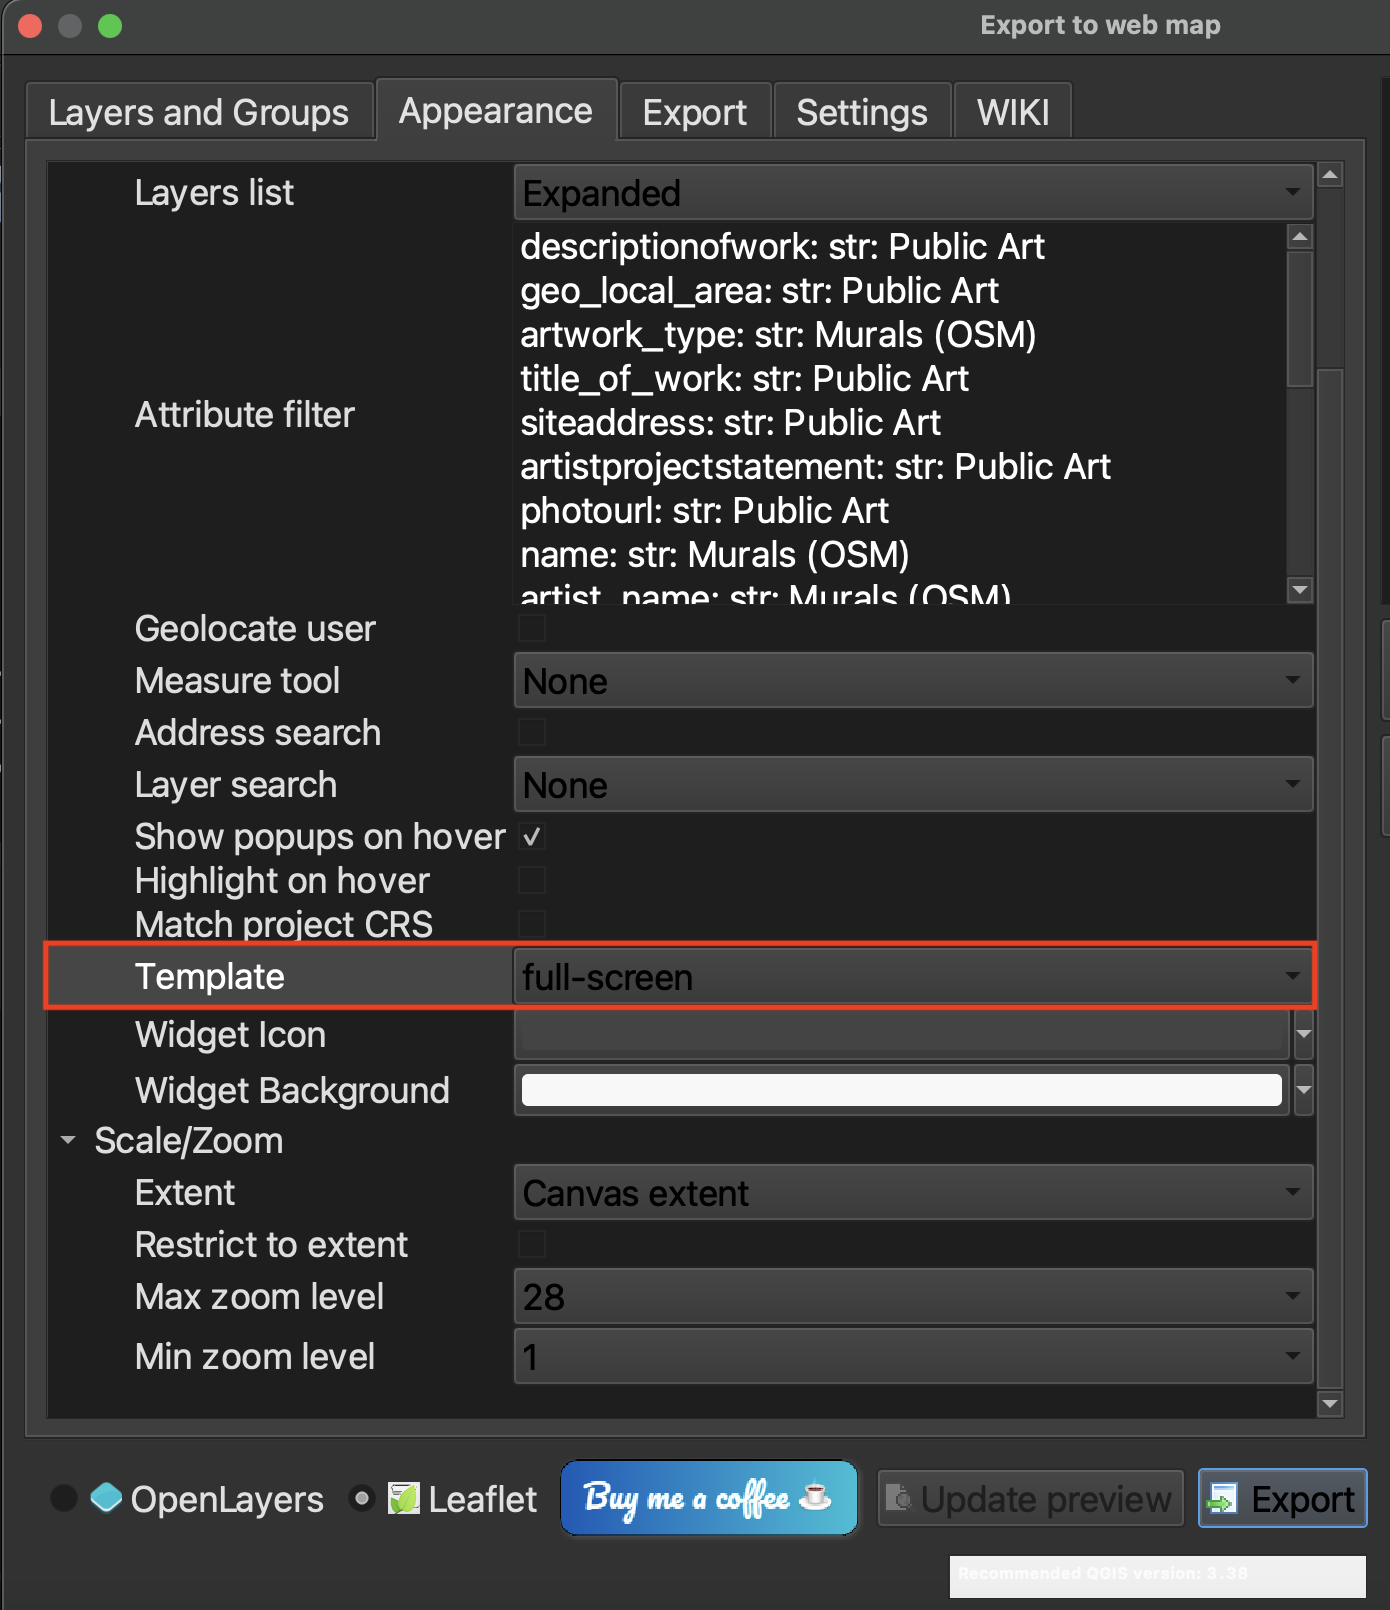
4. Set Appearance
In the Appearance tab, you can specify whether your webmap has a title and abstract, or description. You can also indicate whether you want your Layers list, or legend, expanded or collapsed upon initial load.
Change the Template to fullscreen. This will ensure your map takes up 100% of the screen by default, making it easier to adjust the size down the road. If we begin with it taking up only a portion of the screen, resizing becomes uncessary difficult.
5. Export
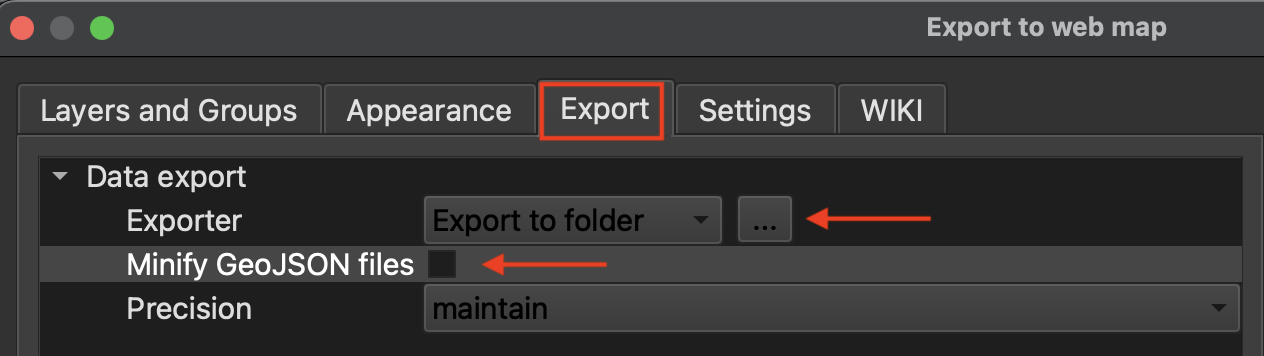
It’s now time to export your map. Set the export folder to the workshop folder, but not the data subfolder. When the qgis2web tool runs, it will output a separate folder containing your data as well as the associated styling.
Uncheck minify geojson files. The files are not that large so this is not necessary.
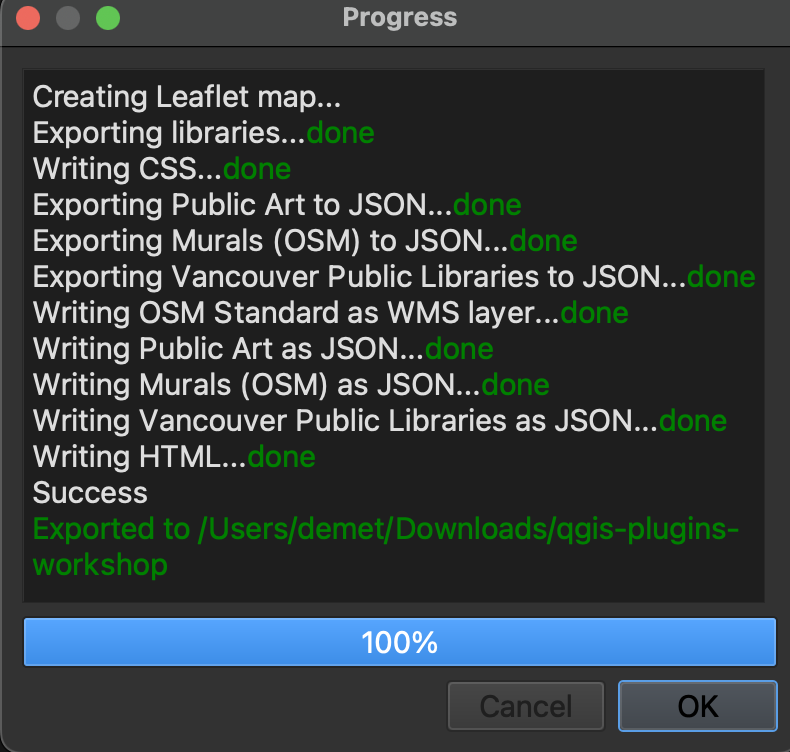
Finally, hit export. The run time should only be a moment as the datasets are not that large. You should get green messages if it works.
Loading last updated date...