Next Steps: Hosting a webmap
As is, your webmap created from QGIS project is a folder of files on your computer. You can open it locally, but no one else can access it unless you send them the folder to download to their own computer. This is where web hosting platforms come in. If you upload this folder to a cloud service then you can make the map viewable in web browsers anywhere with internet connection (and no access restrictions).
If you have a website and access to local server, that’s an option too. However, if not, Github is a low-barrier solution. Github is an internet hosting service used by code developers that allows you to upload files into a repository, or project folder, where they can be shared and collaboratively tracked and edited by a team. Conventionally you’d work between your local computer and the web account, tracking changes as you go with git, a file control software. See the Research Common’s introduction to git and Github for more. However, we can work directly and exclusively from the web interface. The steps to host your dynamic on the web using Github are as follows:
- Create a free Github account
- Make a new repository
- Upload your data folder to the repository
- Create an index file
- Make a Github page from that index file
Let’s take this step by step…
1. Create a Github account
Go to github.com and create a free Github account.
2. Make a new repository
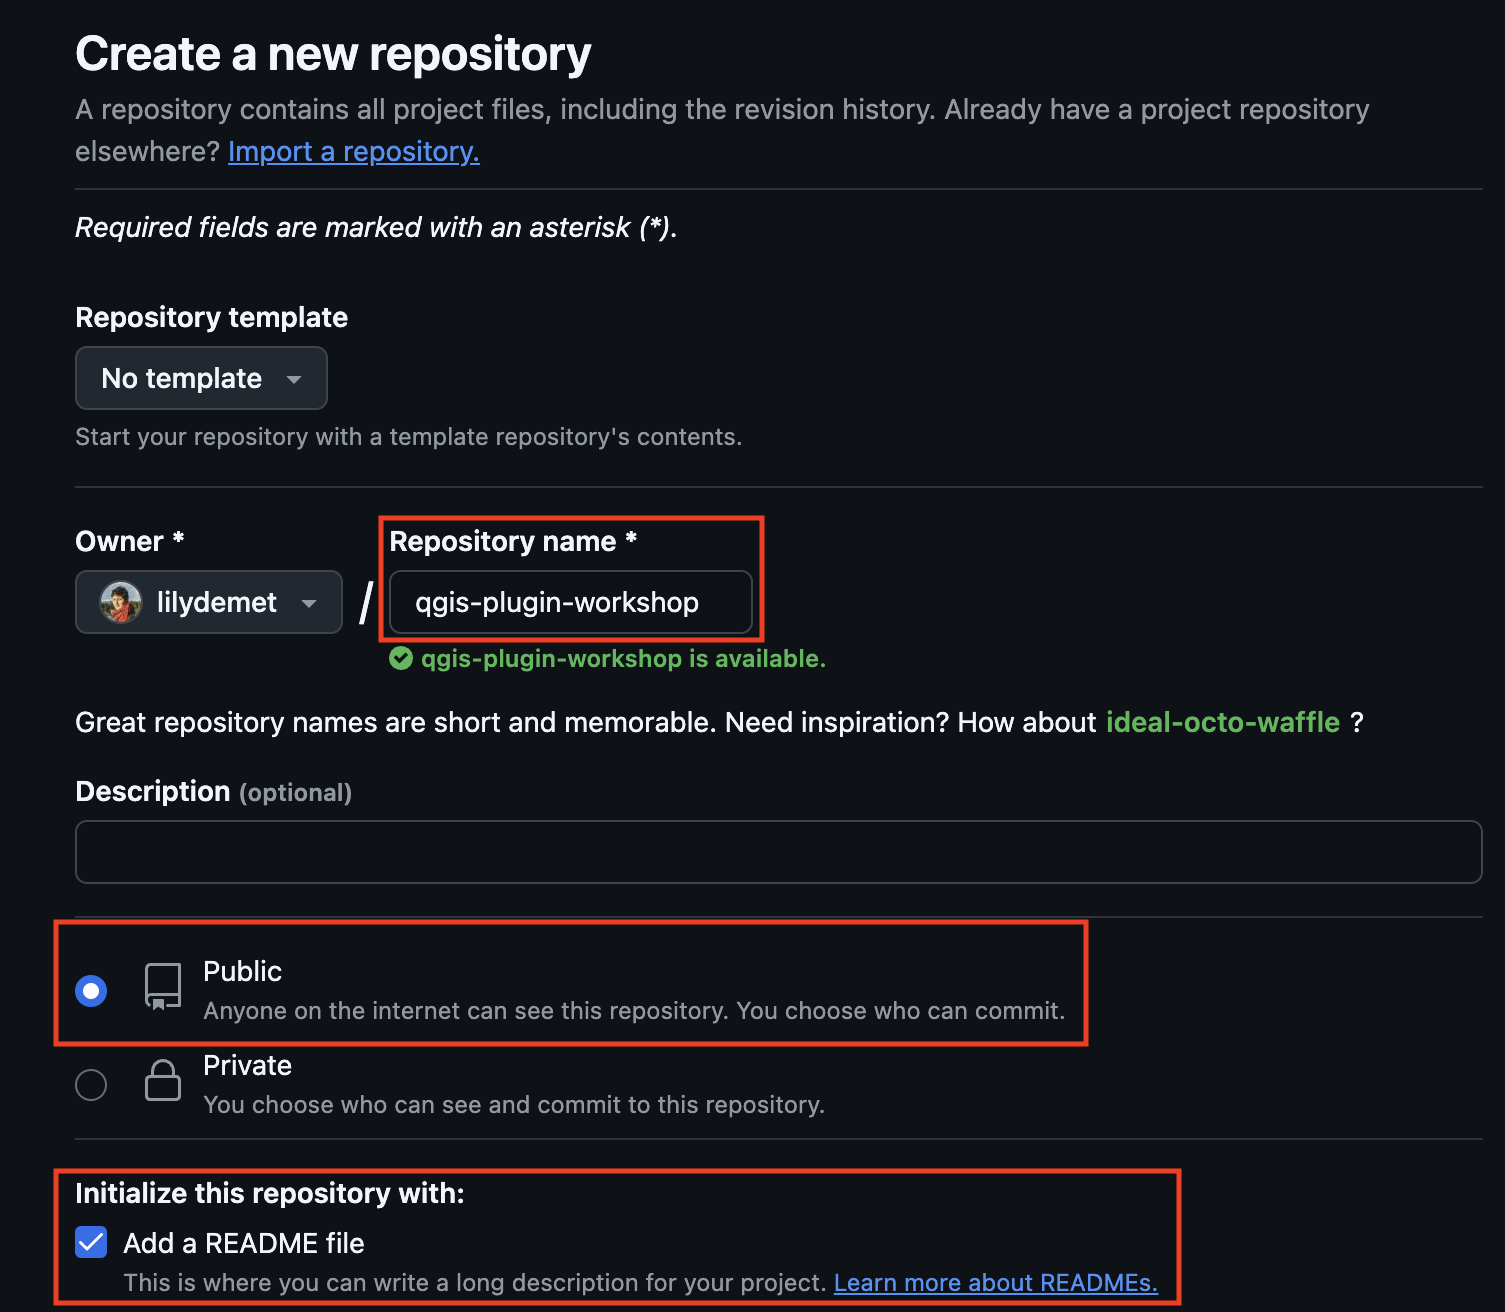
Once you’ve made an account, go to Repositories and make a new repository (also known as a “repo”). A repository is like a folder that contains a project.

- Call the repository
qgis-plugin-workshopfollowed by your initials.
- Set the visibility to Public.
- Add a README.md. This is where you can give a brief description of what the project is.
- When working on your own projects, if you choose to set a license at this stage, ensure you have permissions to use all the data you do in the way you are licensing it. Never upload confidential datasets to a publicly visible Github repository.
- Scroll down to the bottom and Create repository.
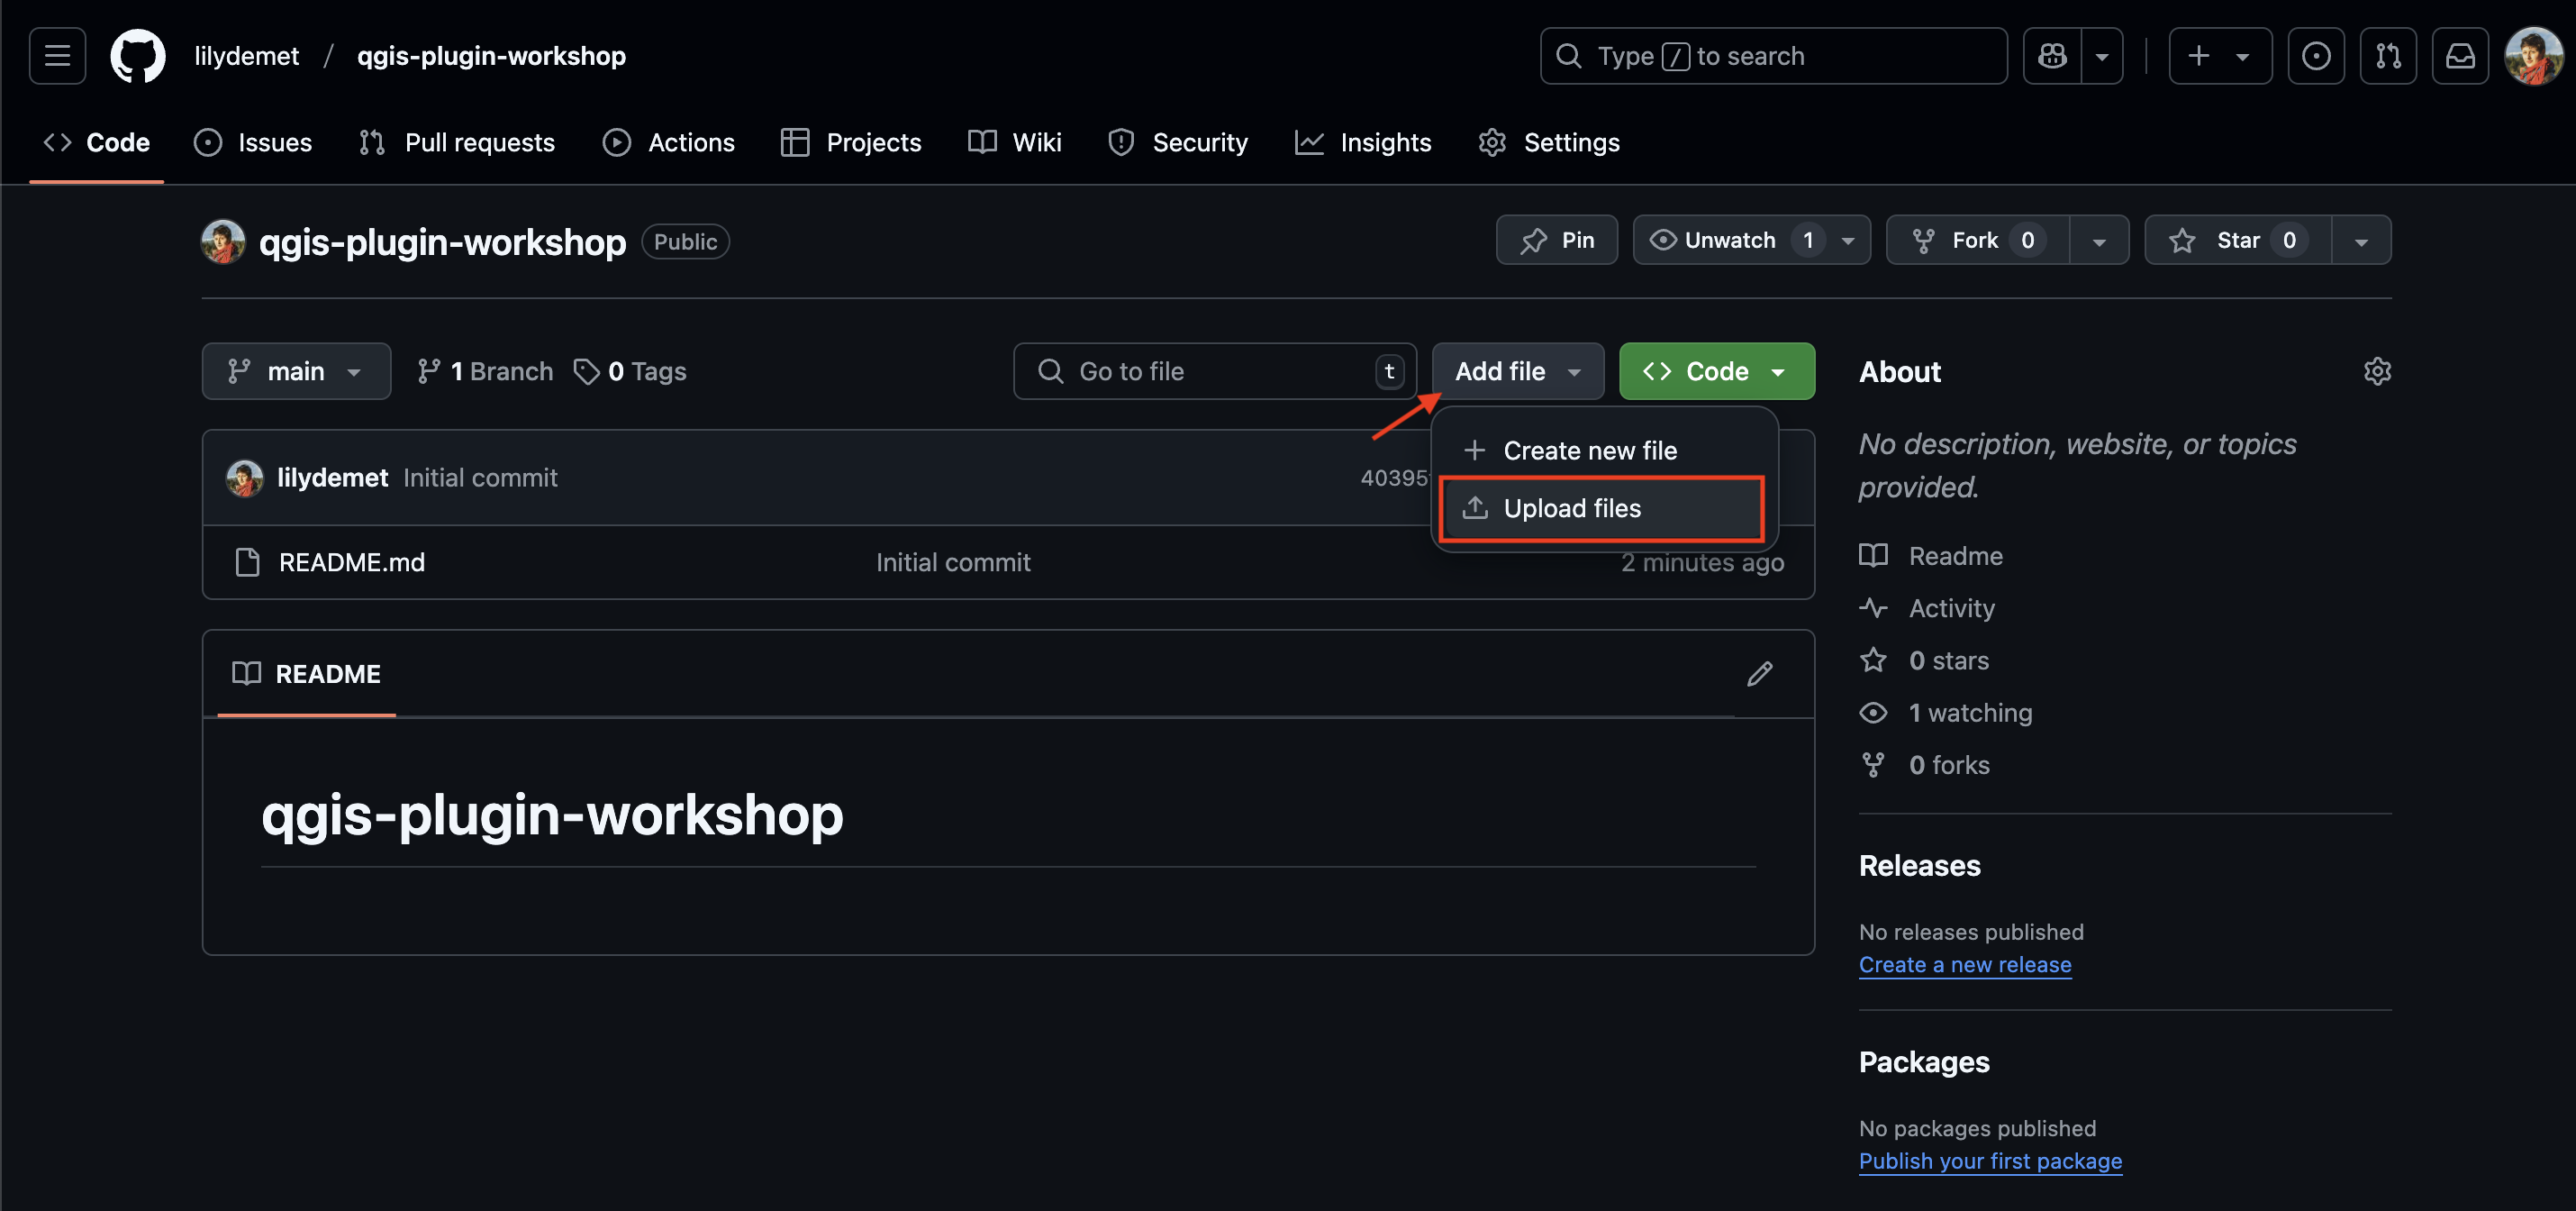
3. Upload your webmap folder to your repository
IMPORTANT: before uploading your webmap folder, delete the numbers trailing the name so that the folder is now named only qgis2web.
- Drag and drop your folder to upload.
- When done, scroll down to bottom of screen and commit changes with message
added webmap folder.
You should now see your file in your repository: 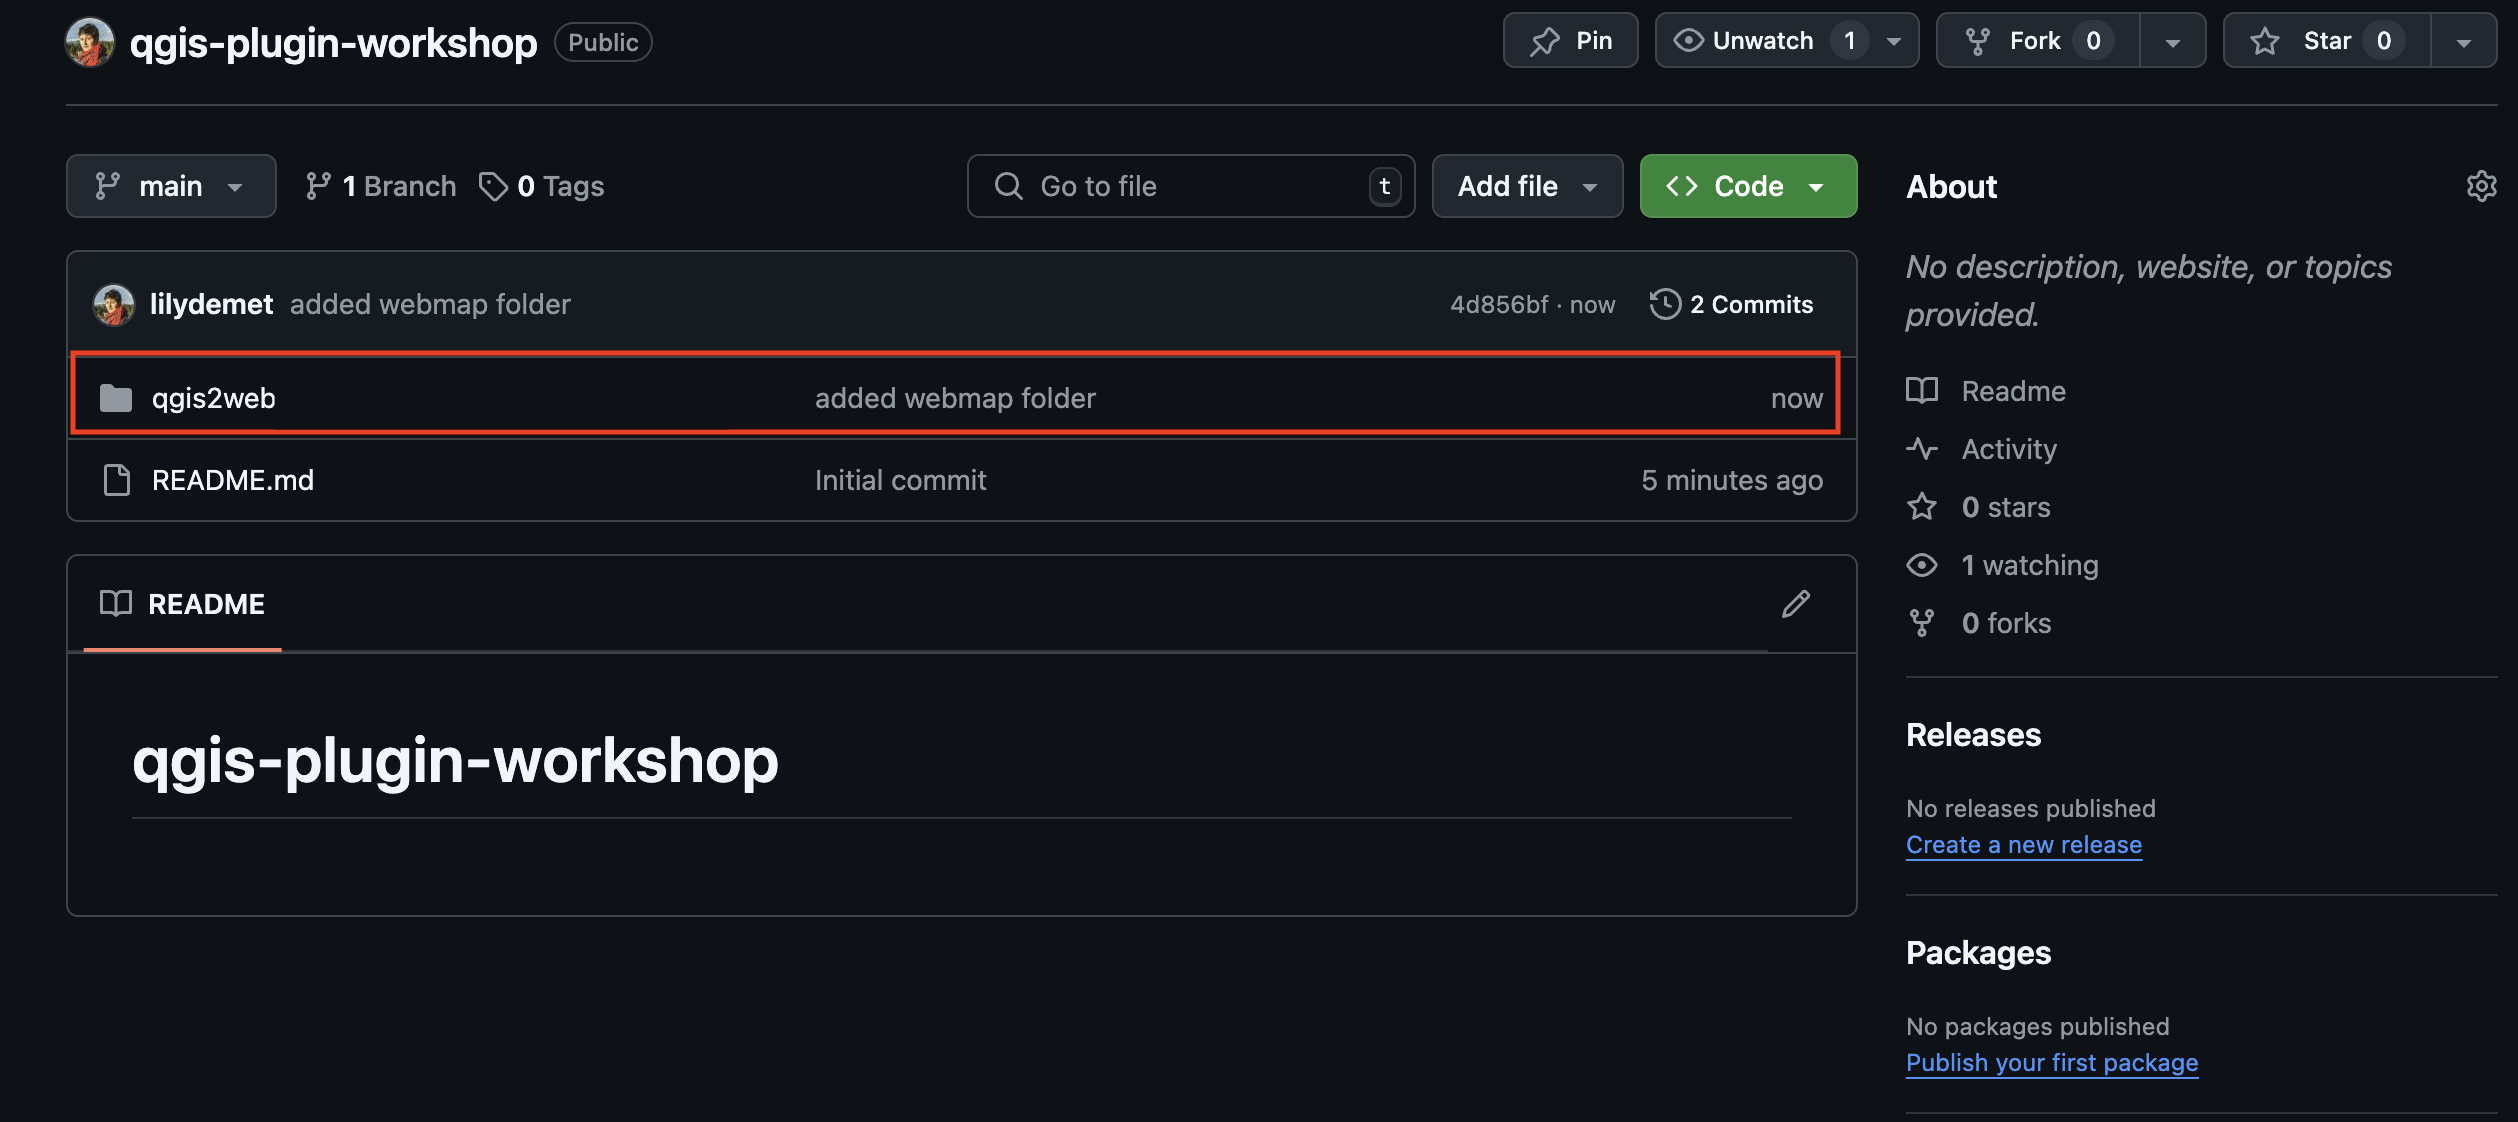
4. Create index file
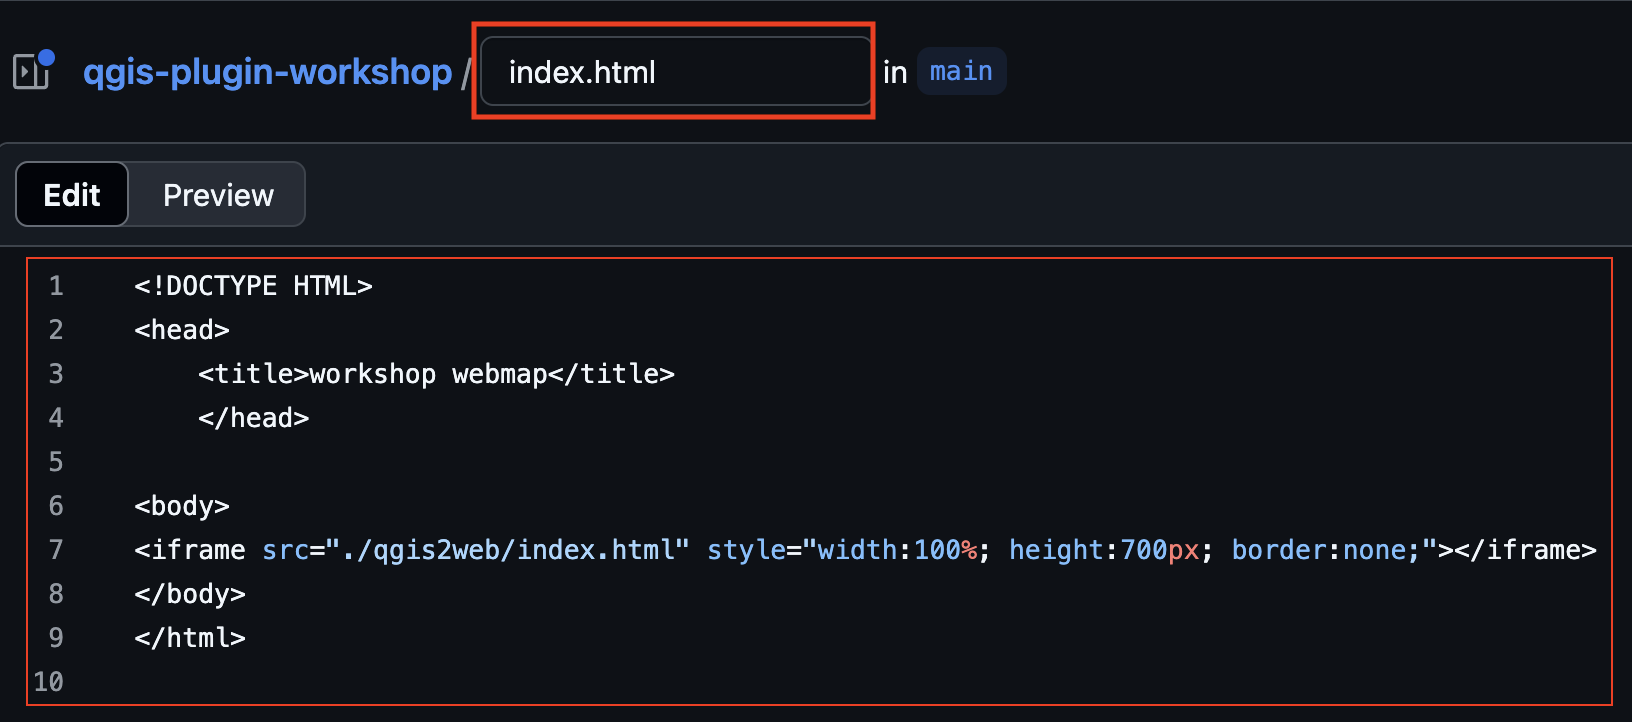
Now create an index.html file wherein your map can be embedded for display.
Go to Add file and this time select +Create new file. Copy and paste the below code into the file:
<!DOCTYPE HTML>
<head>
    <title>workshop webmap</title>
    </head>

<body>
<iframe src="./qgis2web/index.html" style="width:100%; height:700px; border:none;"></iframe>
</body>
</html>
Give the file name index.html and commit.
5. Make a Github page from the index file
Github Pages allow you to create a little website from a code repository. The non-nested index.html file of your repository will be the landing page of your site. I say non-nested because you have another index.html file inside your qgis2web folder. In the step above, we embedded this inside the main index.html file.
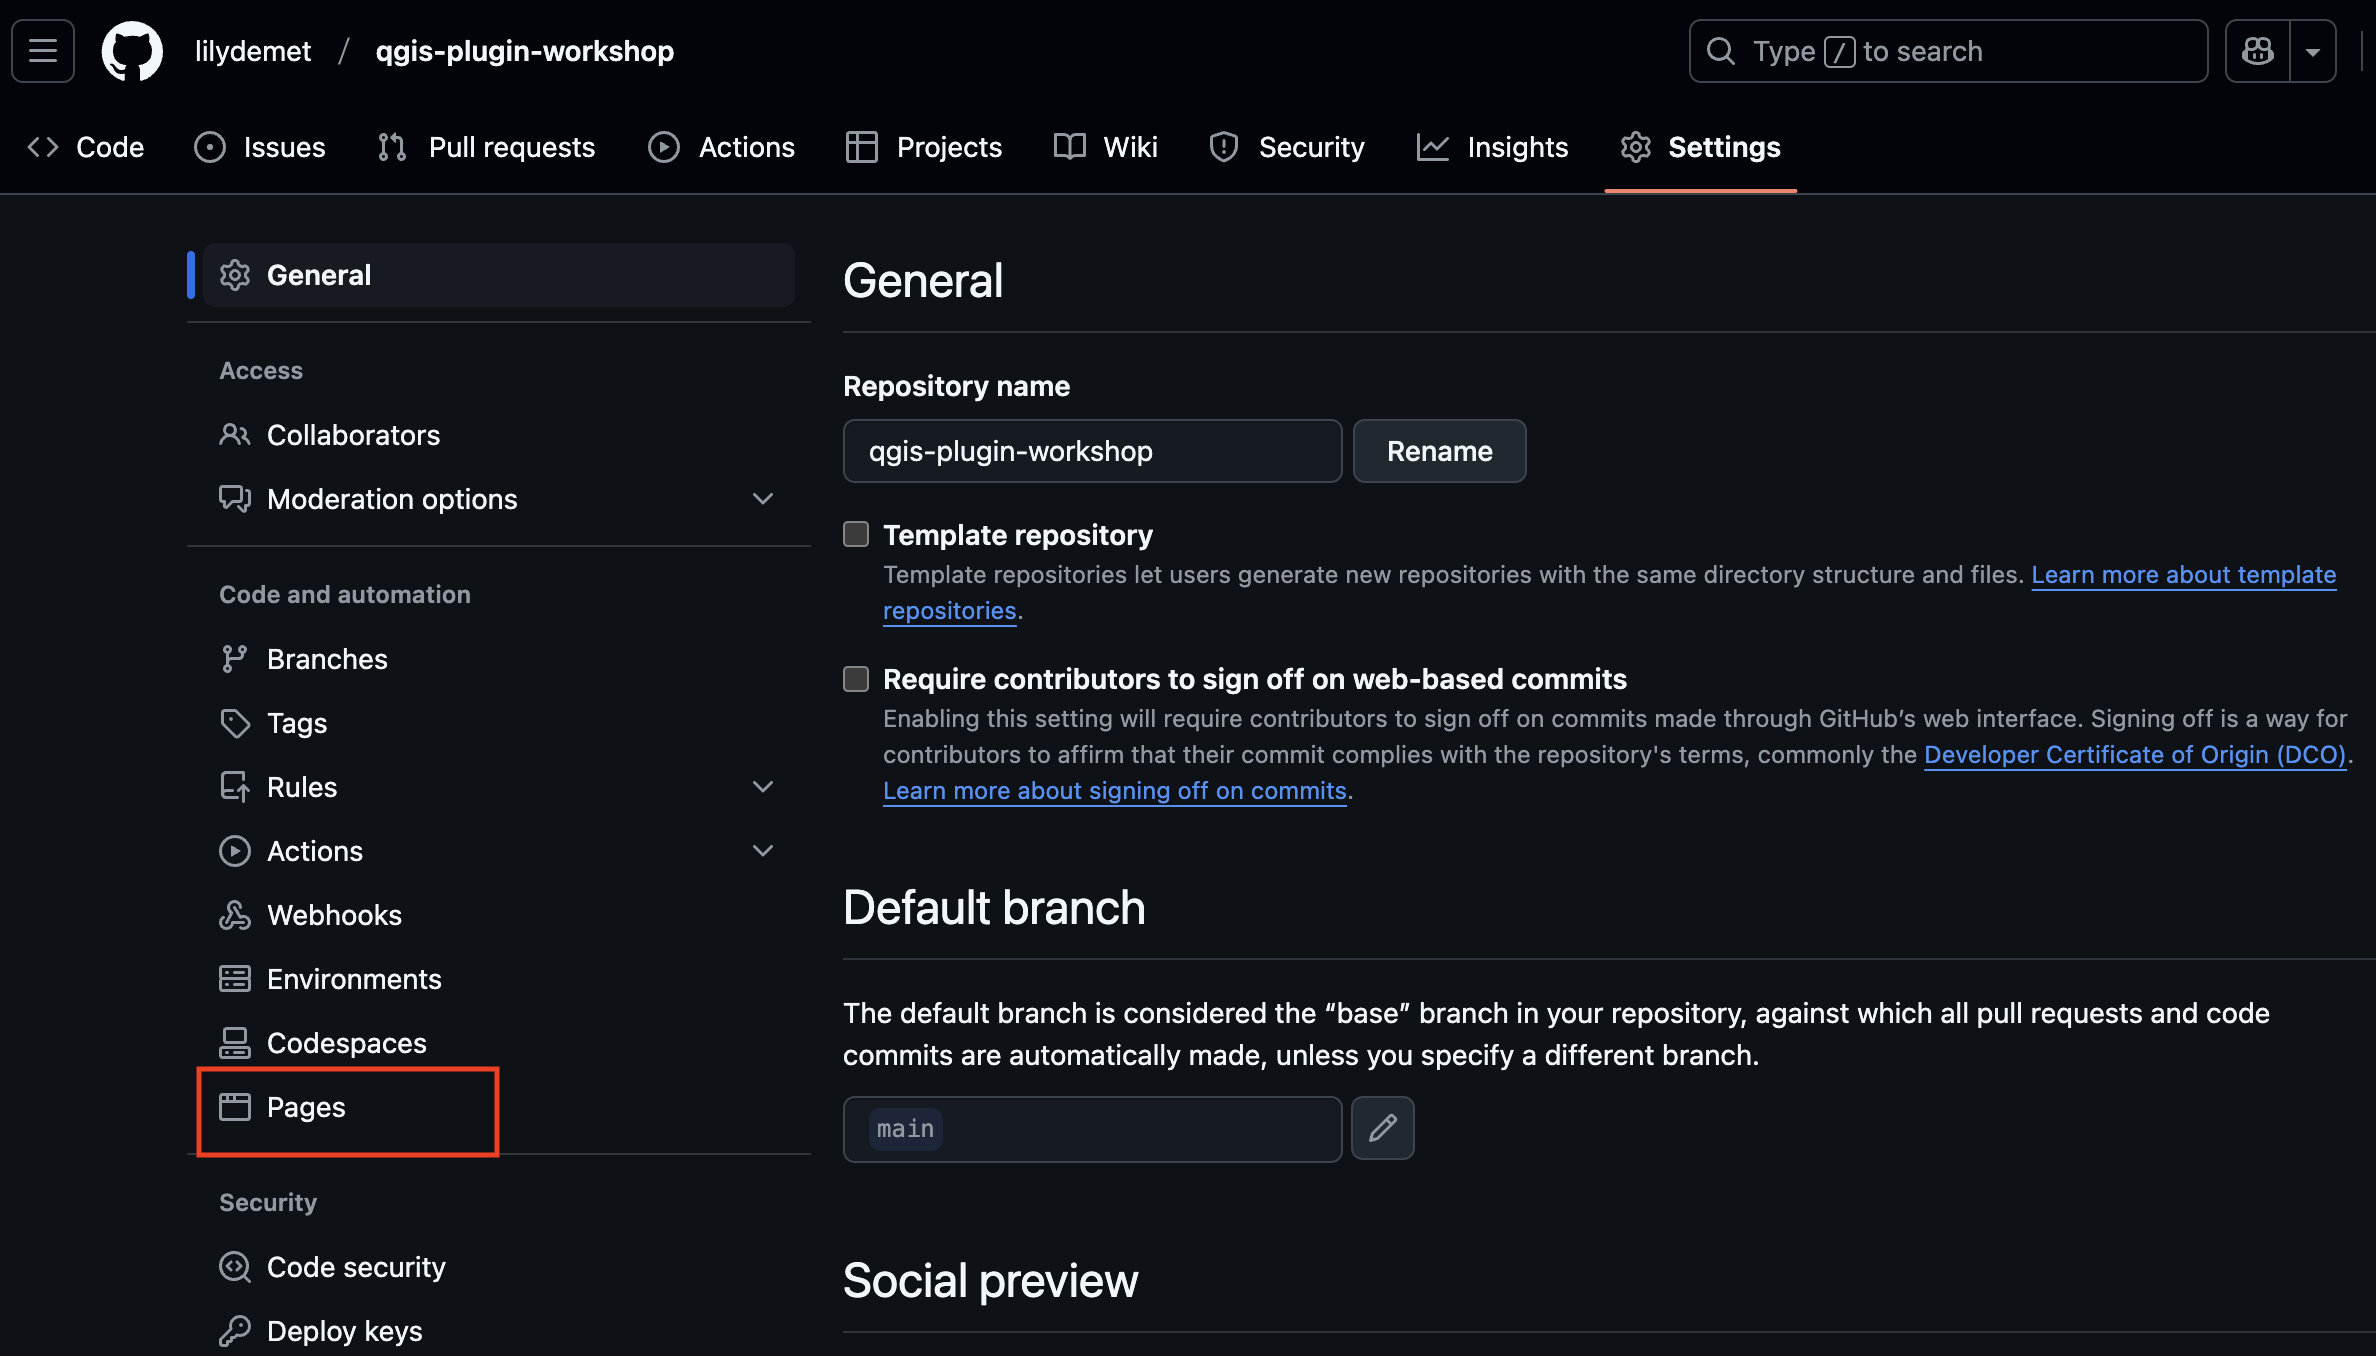
To activate Github Pages, go to your repository’s Settings.

Then go to Pages:
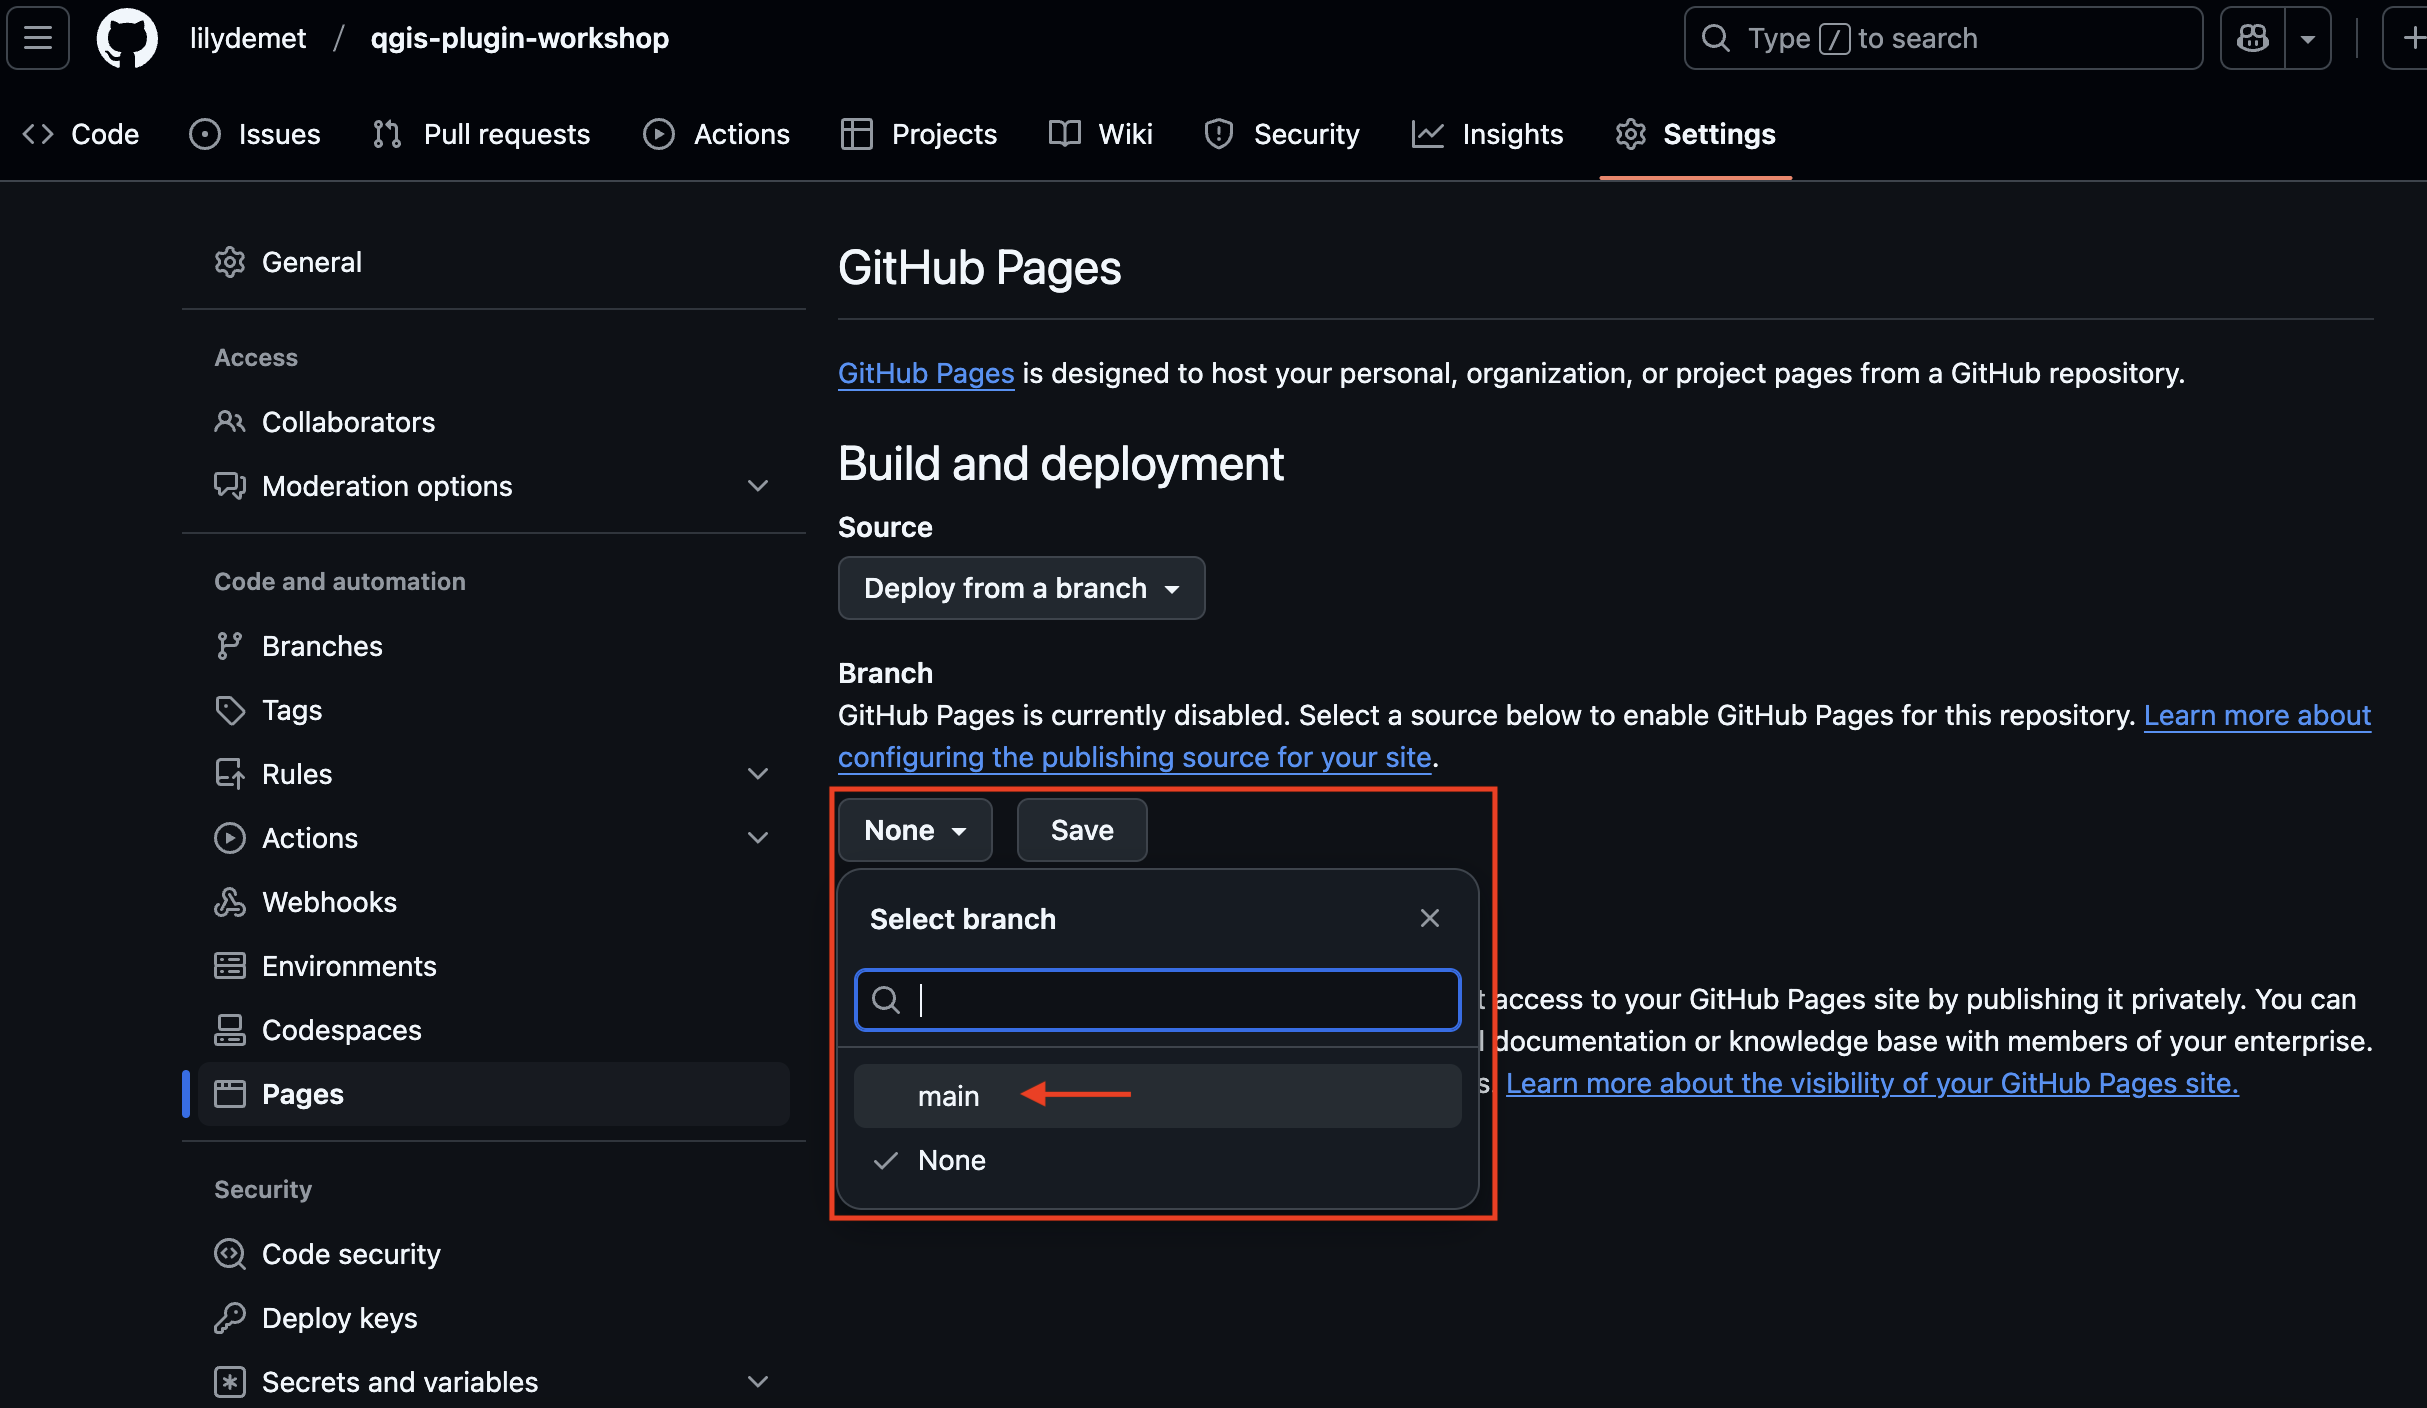
Change branch from Non to main and SAVE.
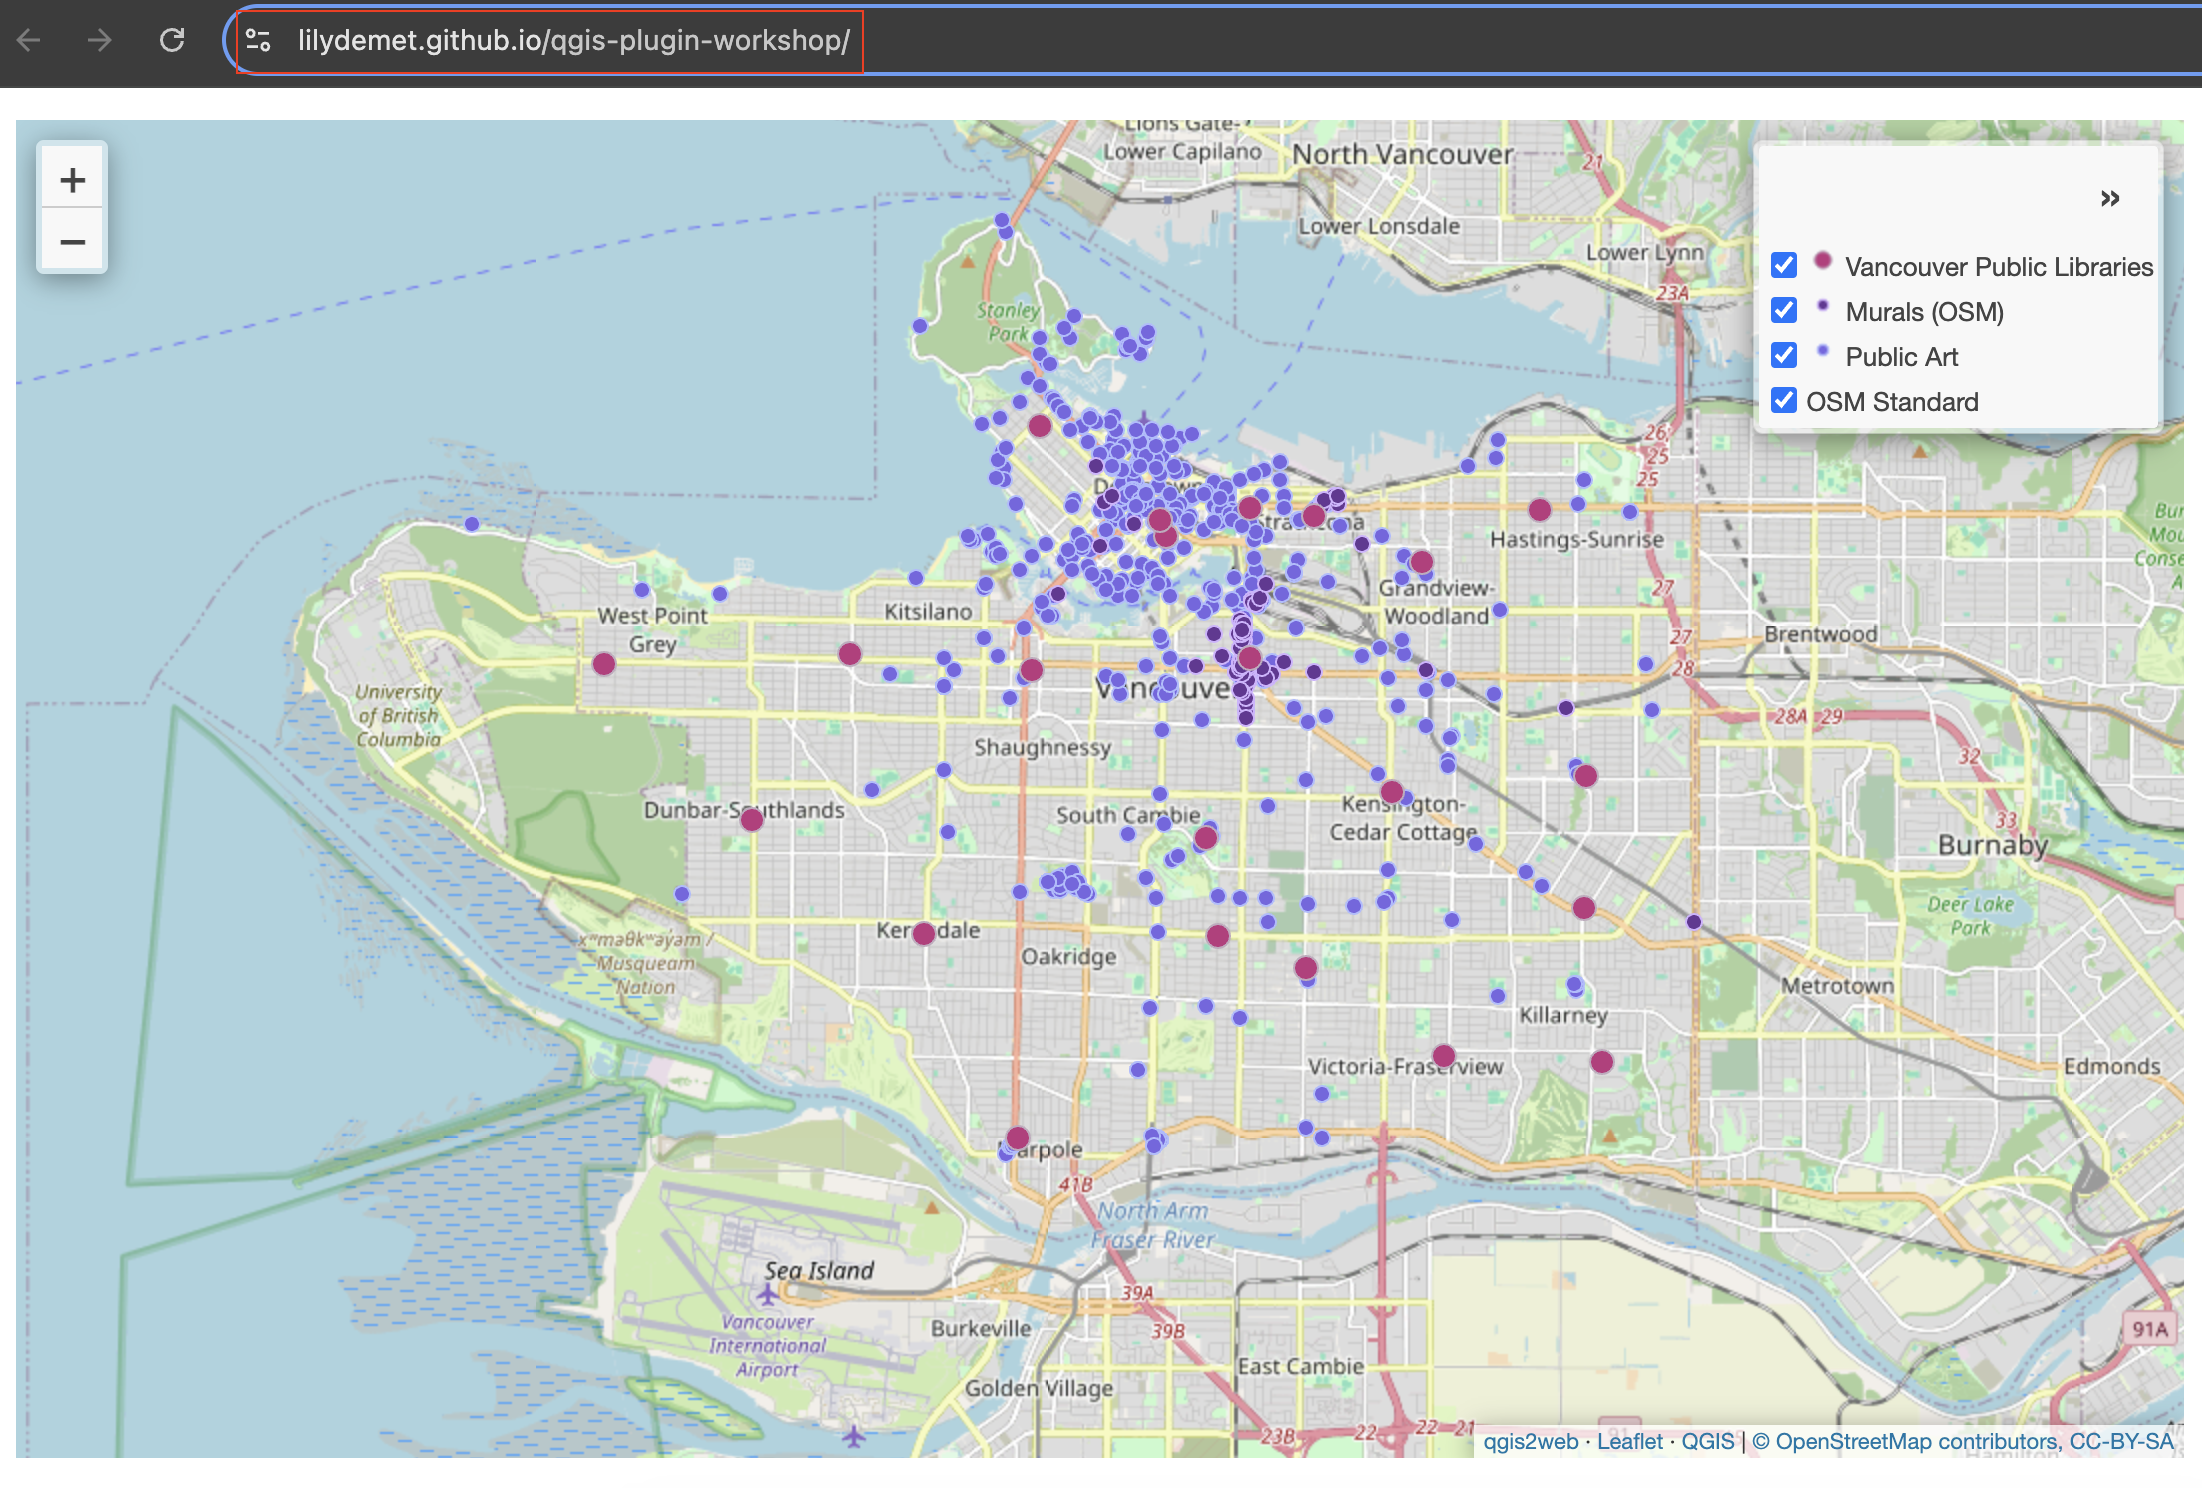
Once you hit save, give it a moment to build. After a minute or two, refresh your browser window. You should see a link now to your new website! Visit the site and explore your map once again. Now you can share it far and wide!
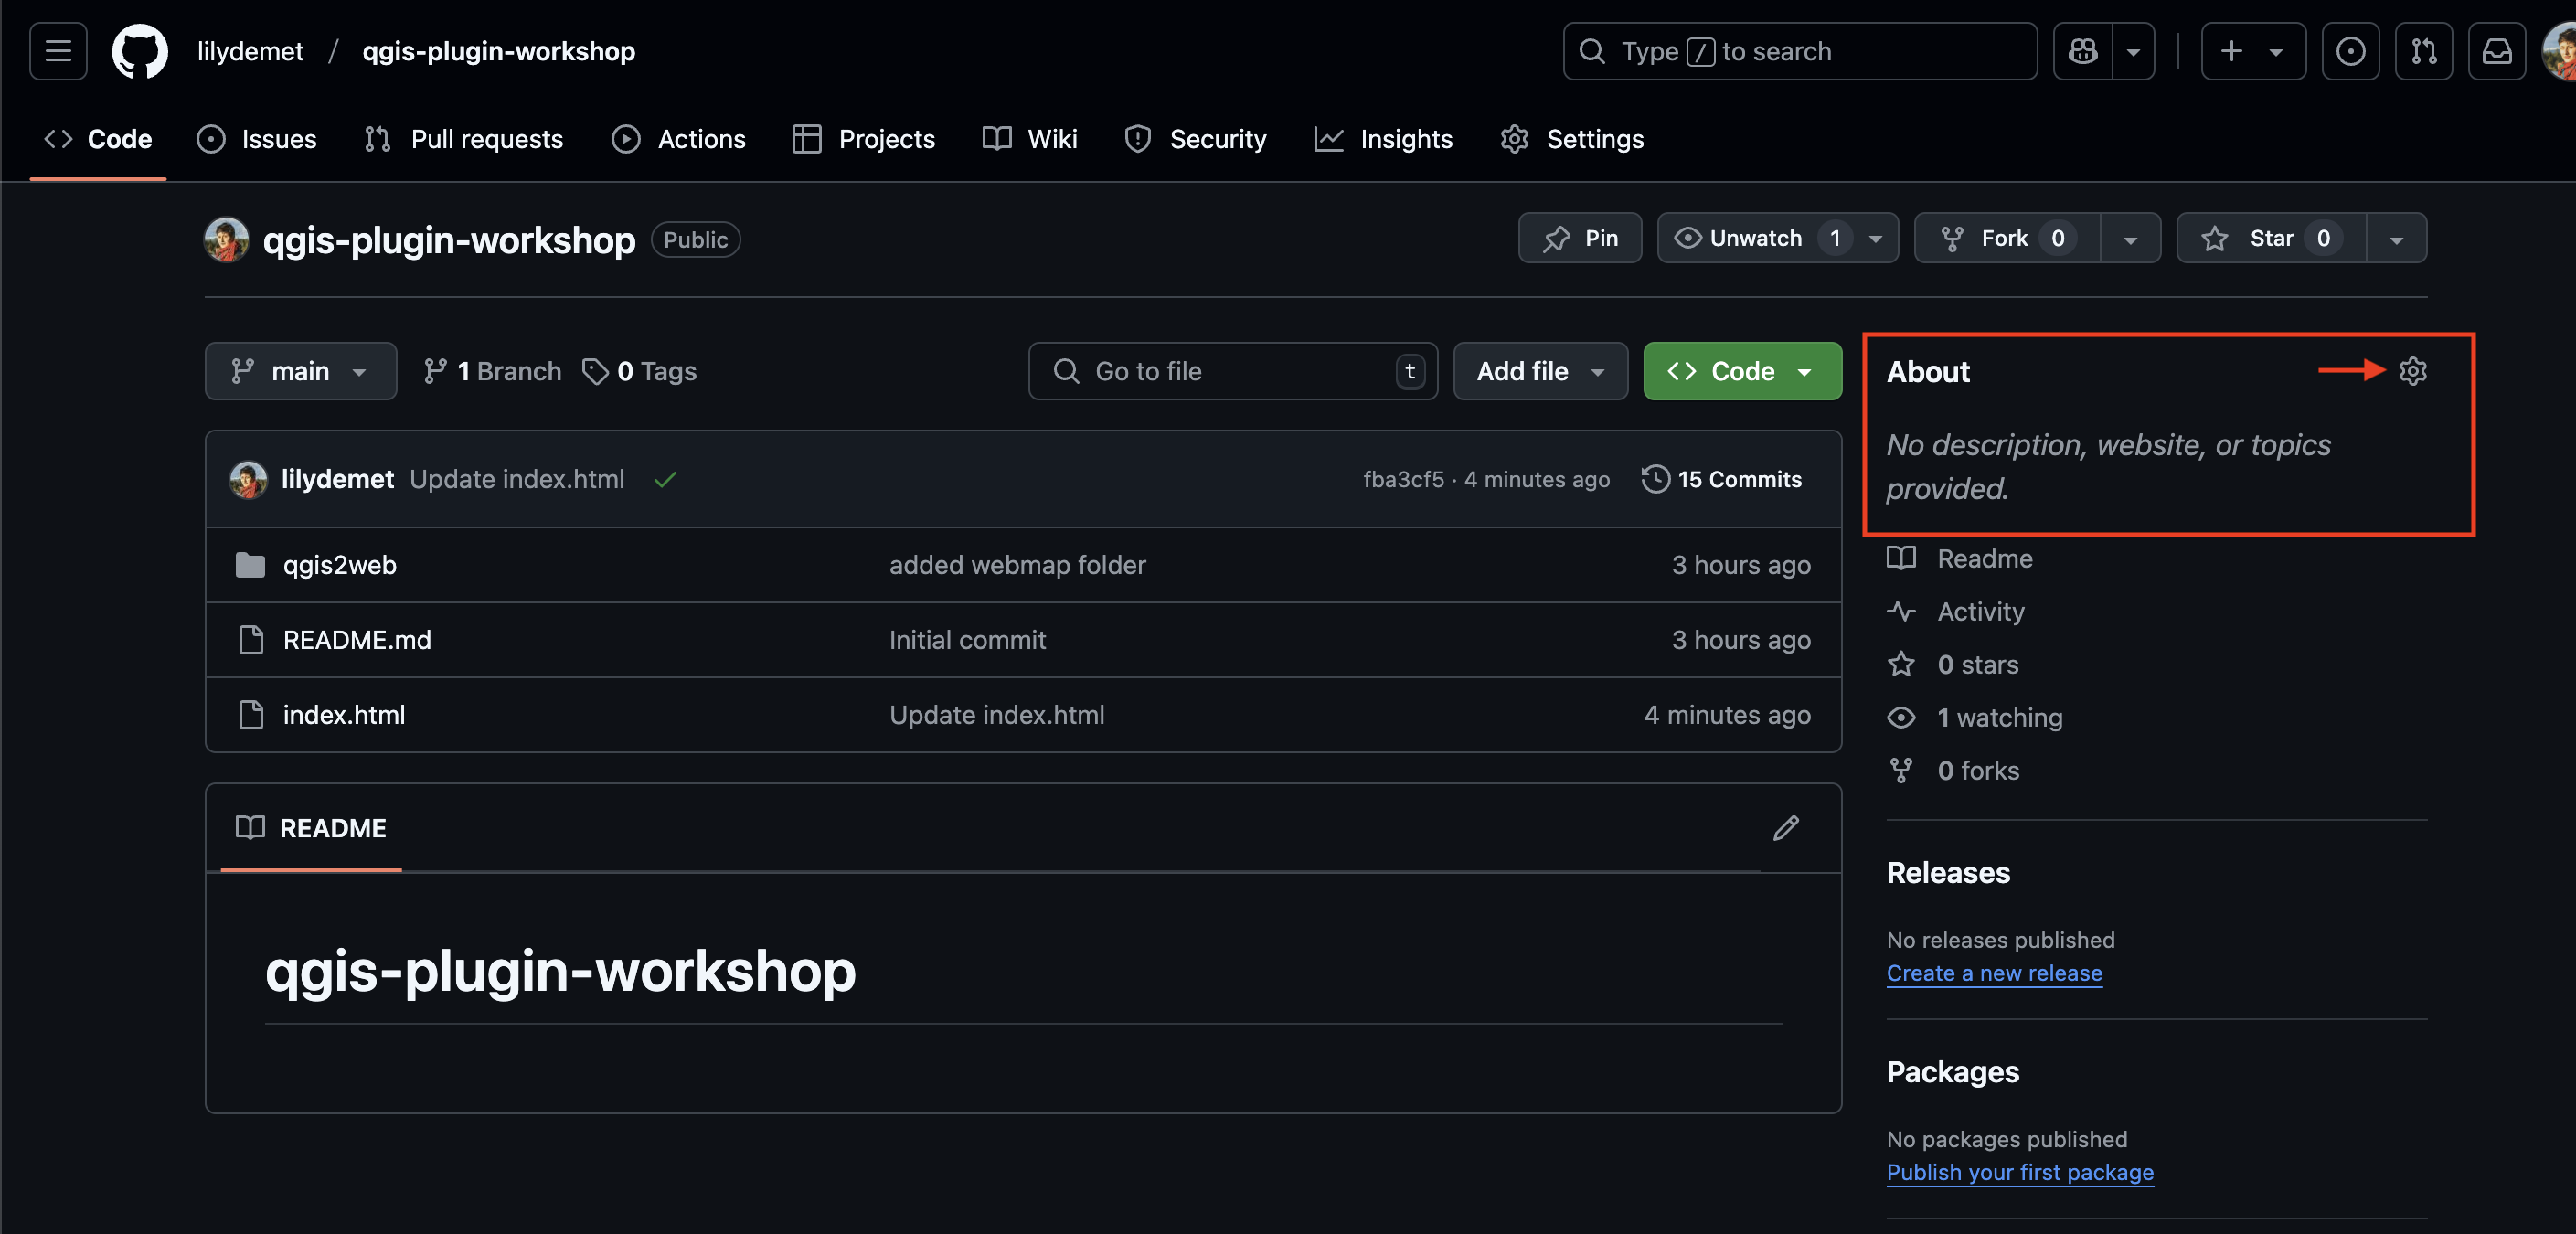
One last step: Copy the link and return to your repo code. In the About section at the top right, add this link so that visitors to your repository can also access your website.
Loading last updated date...