Group Project: Collaborative uMap
Throughout the week, we thought it would be fun to collectively develop a collective map of our time in Montreal by asynchronously adding points of interest to a group web map. The platform we will use is called uMap. uMap is a browser-based platform for individual and collaborative web mapping — that is, making interactive maps that live on the web and can be shared with others via a link. You will learn more about uMap and other webmapping platforms on Day 4.
We encourage all course participants to add between 2 and 5 points of interest from your everyday in Montreal. These could be cafes, bookstores, parks, or other lookouts and attractions you visited or happened upon that you particularly enjoyed. For each place, you’ll add a new point to our collective map, give it a title, short description, and add a photo. Please note that the data you contribute will be publicly visible, and downloadable by workshop instructors and participants. Therefore, please do not include sensitive of confidential information, and credit your photos if you so wish.
Below you can find step-by-step documentation for adding a point to the group map. Let us know if you have any questions! There will be time Thursday and Friday for individual assistance adding to this map.
Adding points of interest to a group uMap
1 Upload your image(s) to the following Google Drive folder: https://drive.google.com/drive/folders/1qTKyPgz7K9g83tEFuREzxsIH38wU2k8q?usp=sharing. Make sure their sharing visibility is set to Editor so that everyone has access to it. Copy the link to the image associated with your first point of interest.
2 Make sure you’ve created a uMap Account as directed in the Course Preparation Tasks.
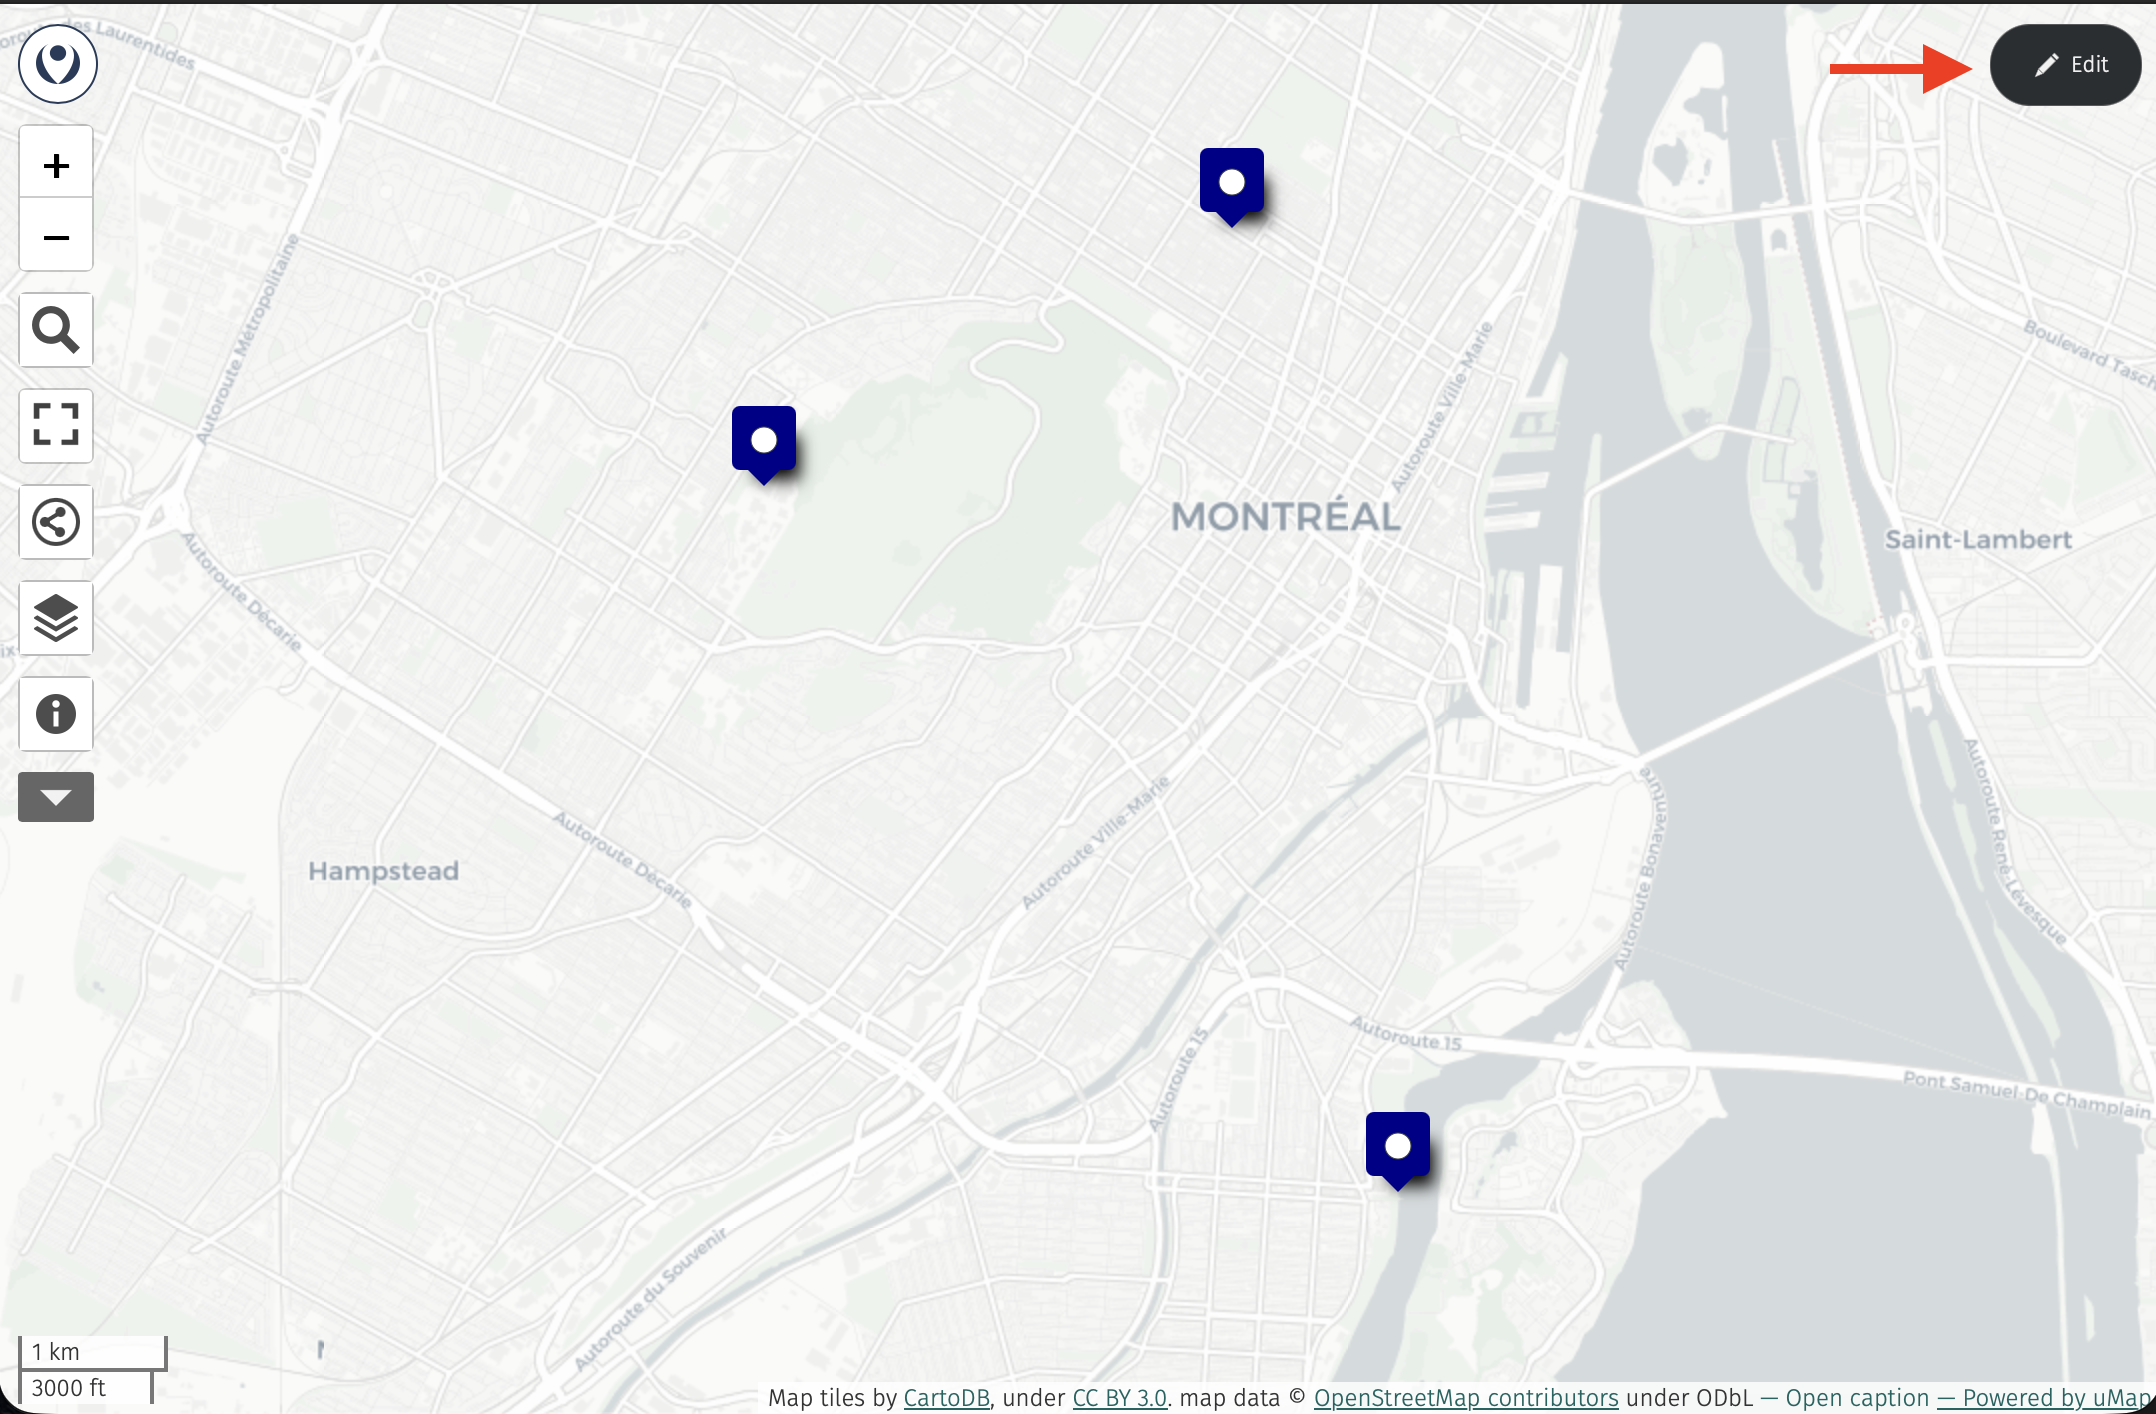
3 In a web-browser, open the group uMap: https://umap.openstreetmap.fr/en/map/dhsi-group-map_1415666#13/45.491367/-73.587456 Then, click the edit button in the top left-hand corner.
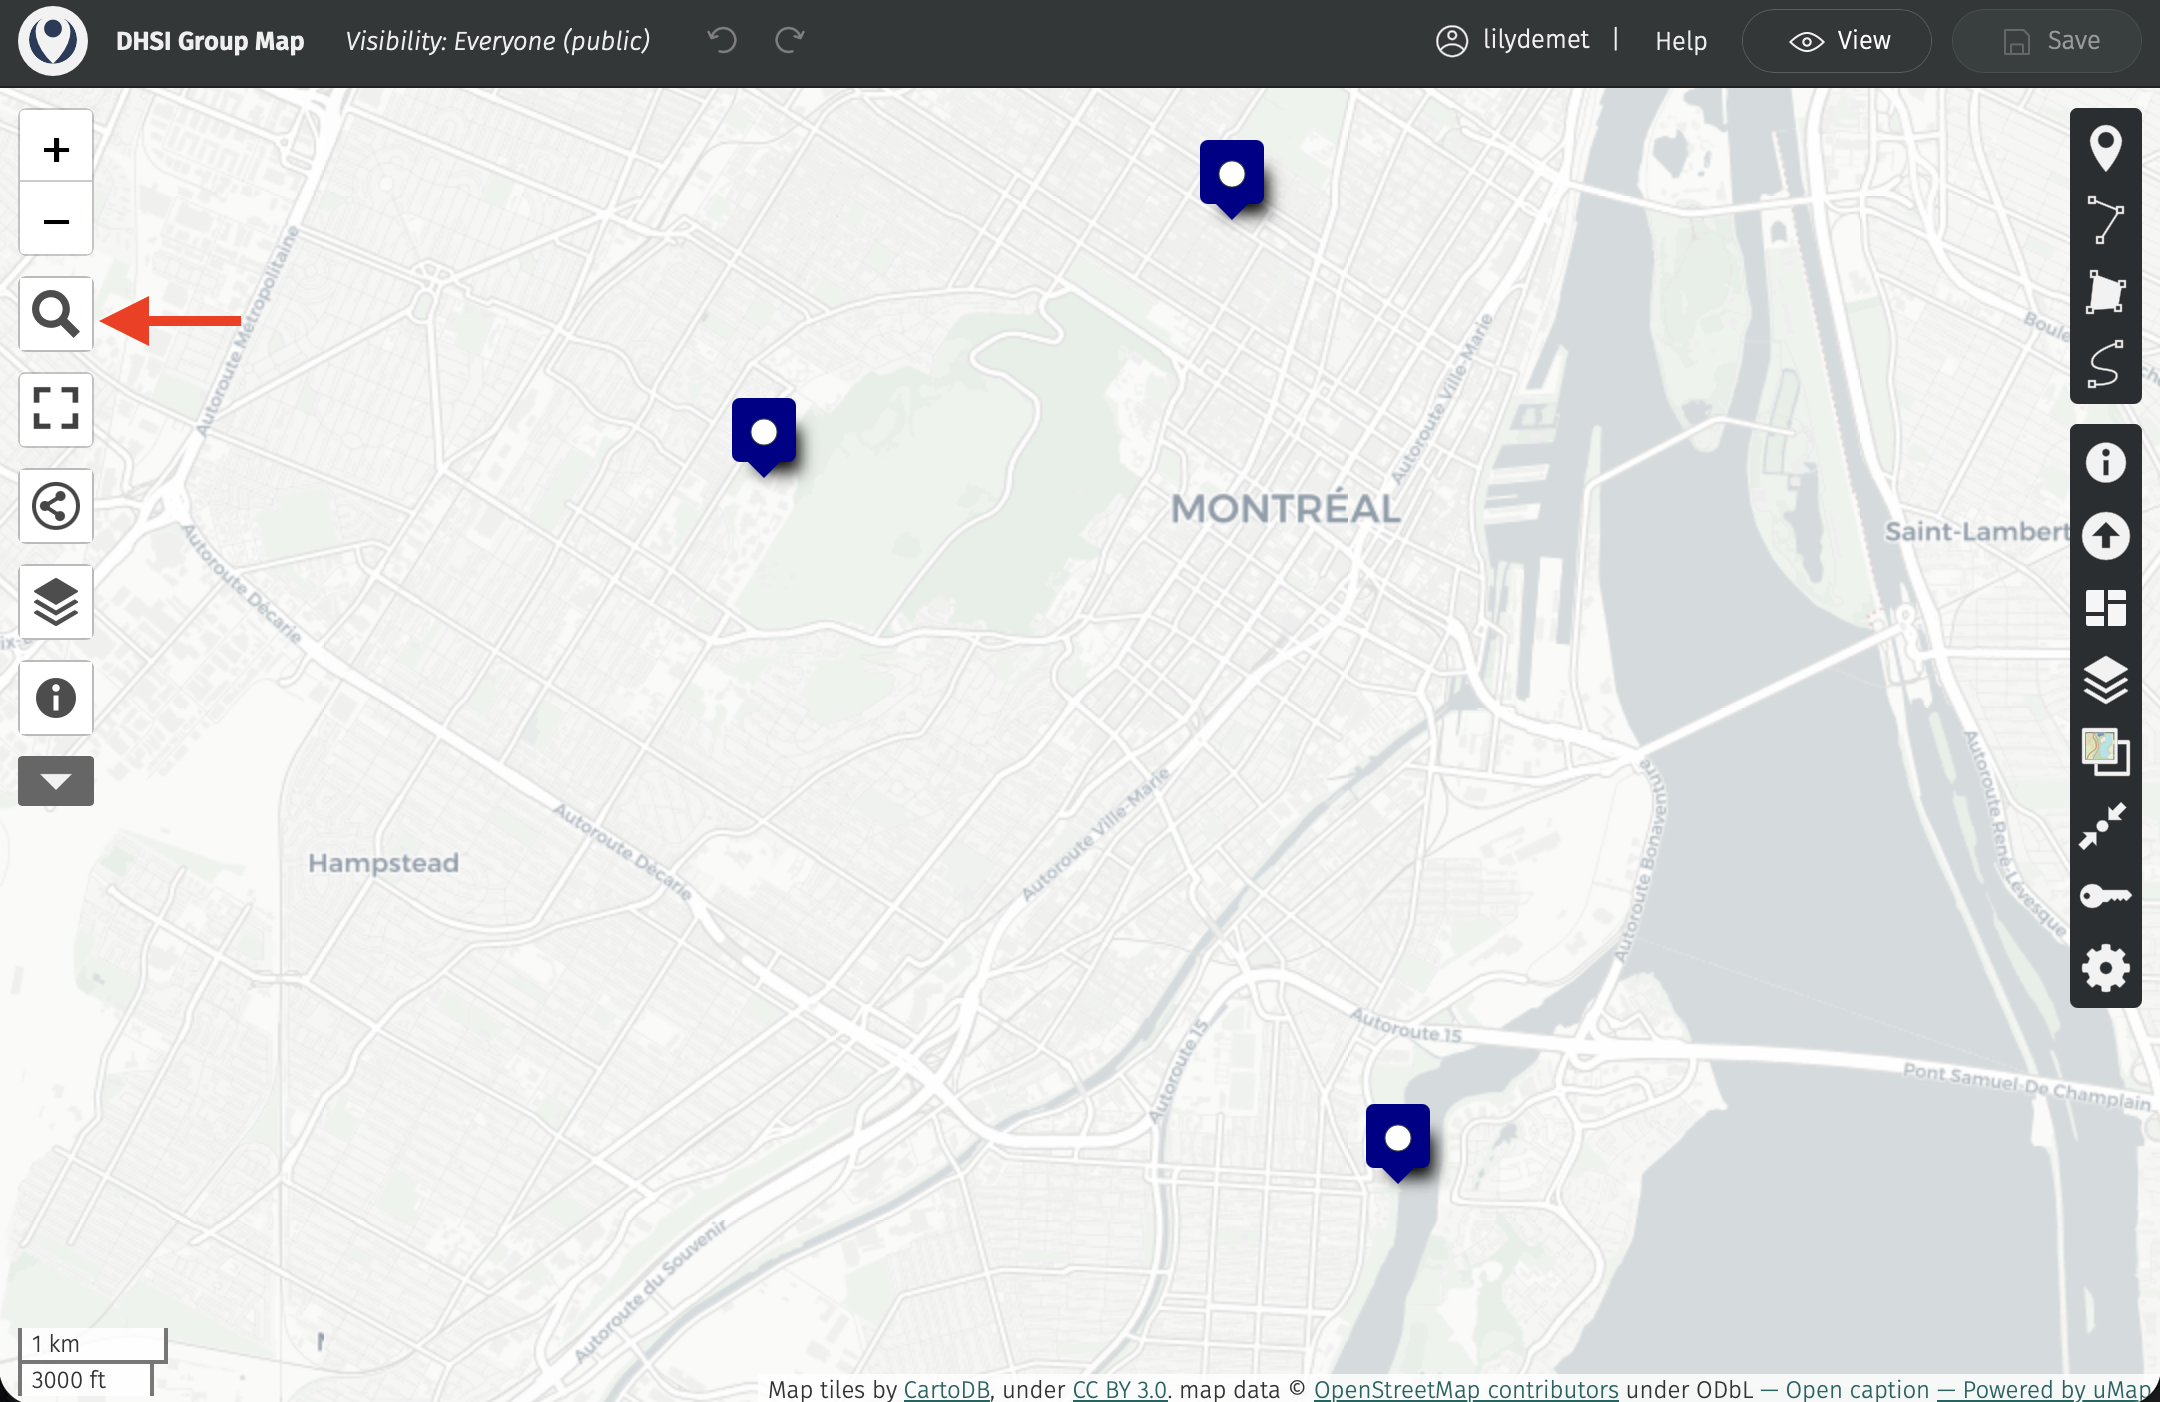
4 Now, if your point of interest has a common name, such as a library, university, park, business, or restaurant, or know the address or coordinates of your point of interest, you can simply search for it using the “Search Tool” in the left-hand panel. This is the easiest way to add a point of interest.
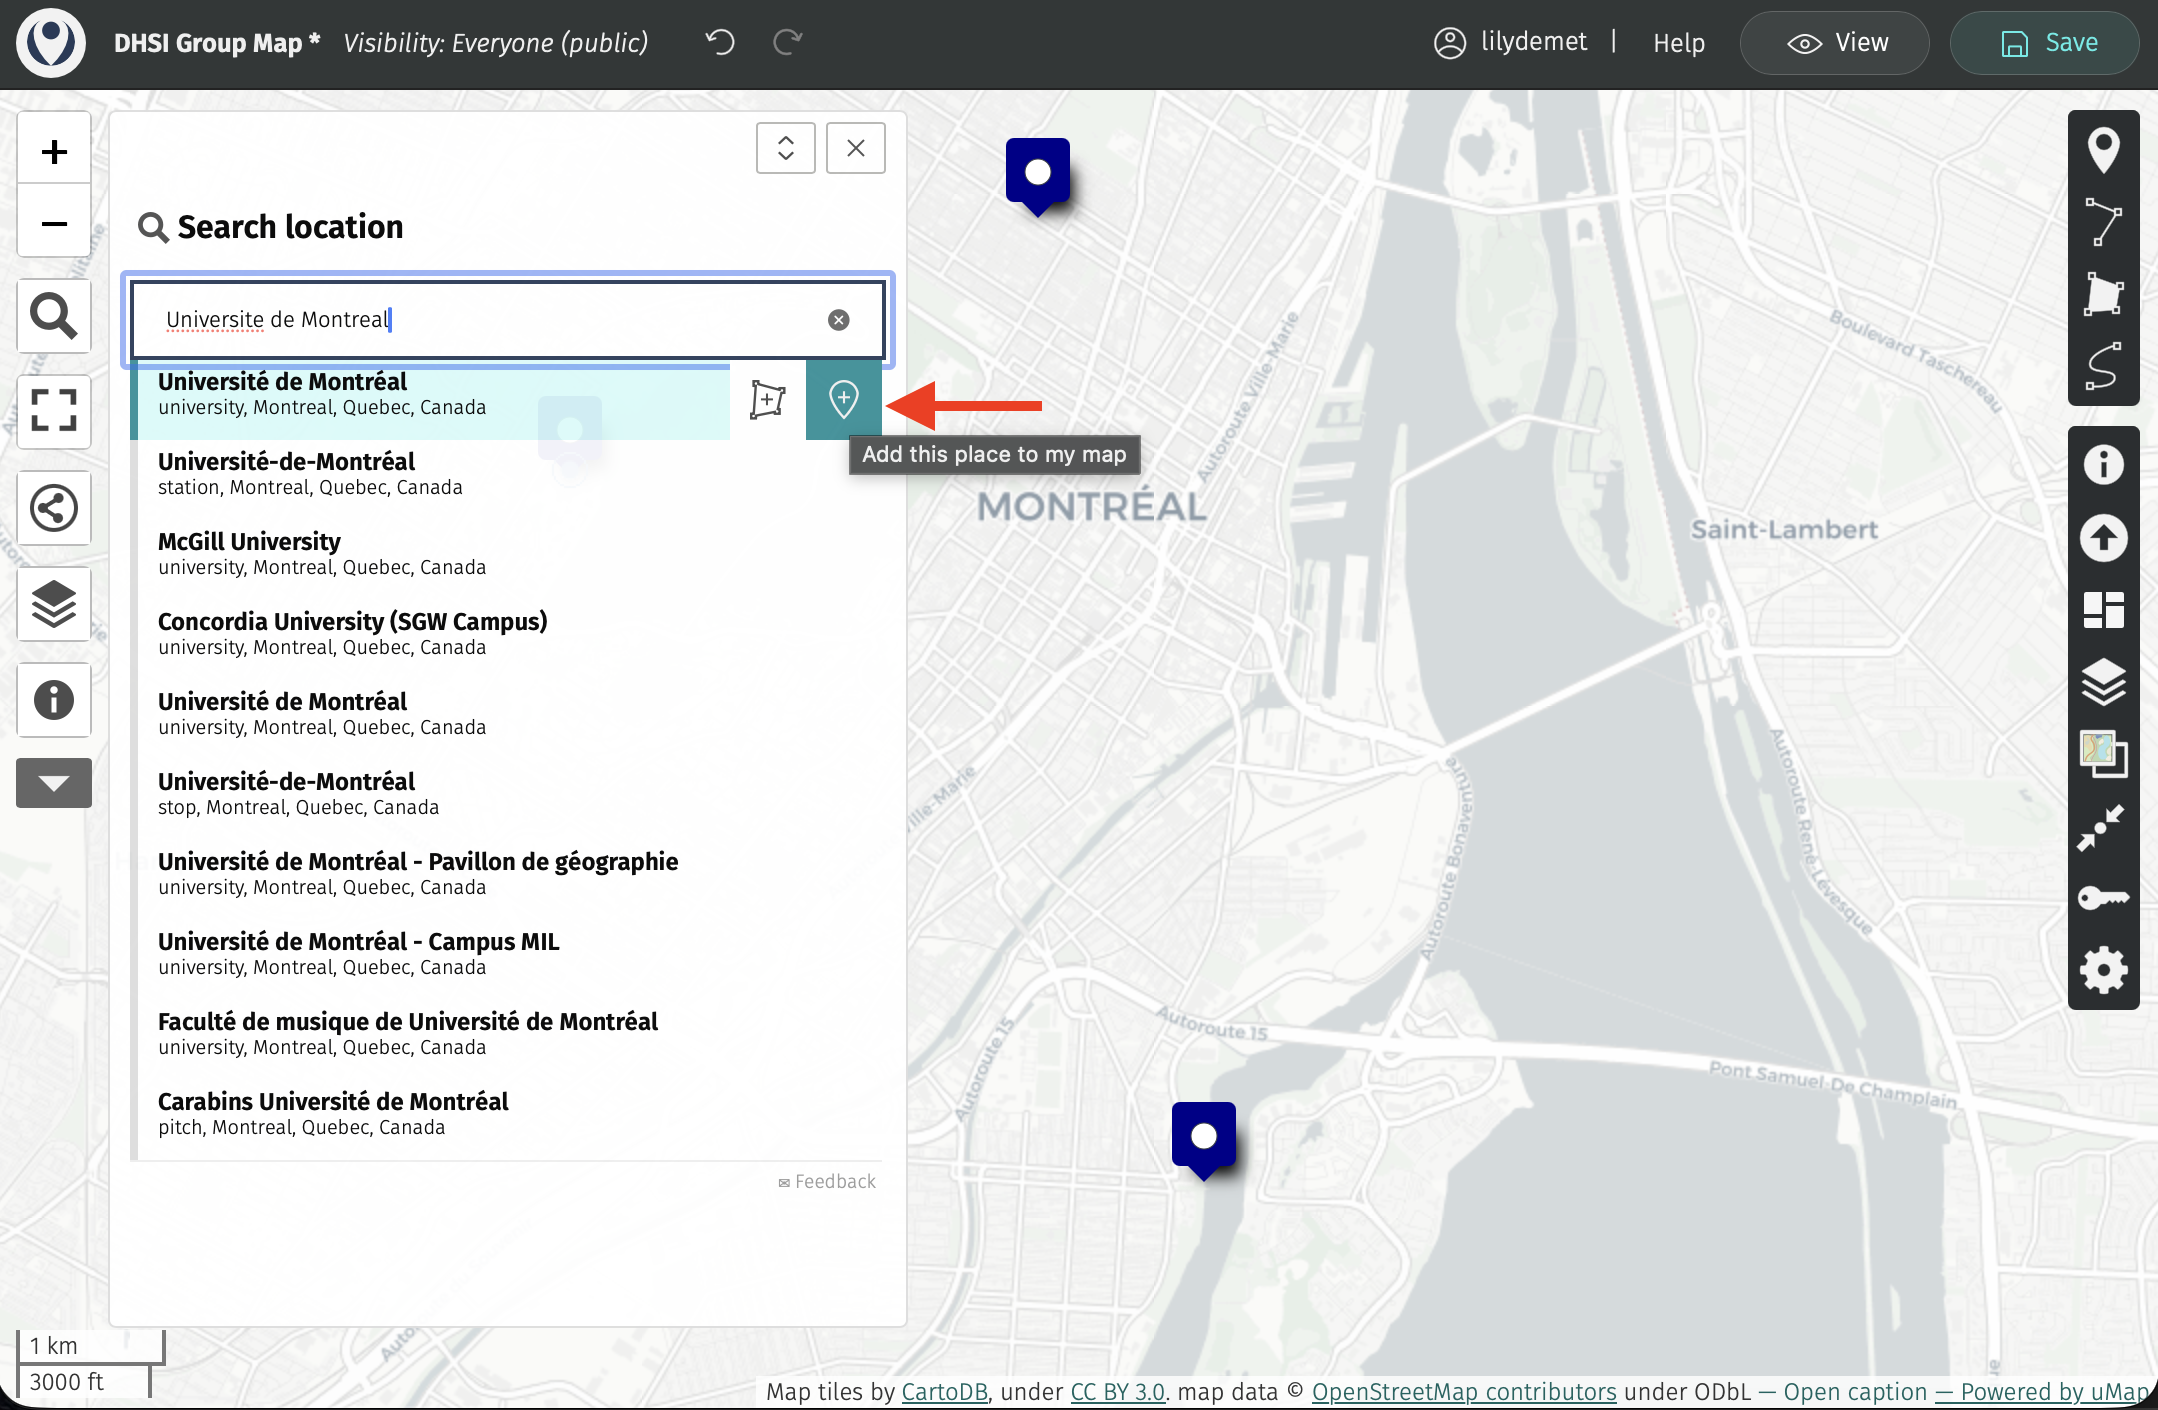
Once searched, click on the marker icon that prompts you to “Add this place to my map”.
In the “Feature Properties” side-panel that opens, scroll down and add a description in the Comments field. (Add any image credits you wish here as well.)
Then, paste the Google Drive link to your relevant image in the ImageURL field.
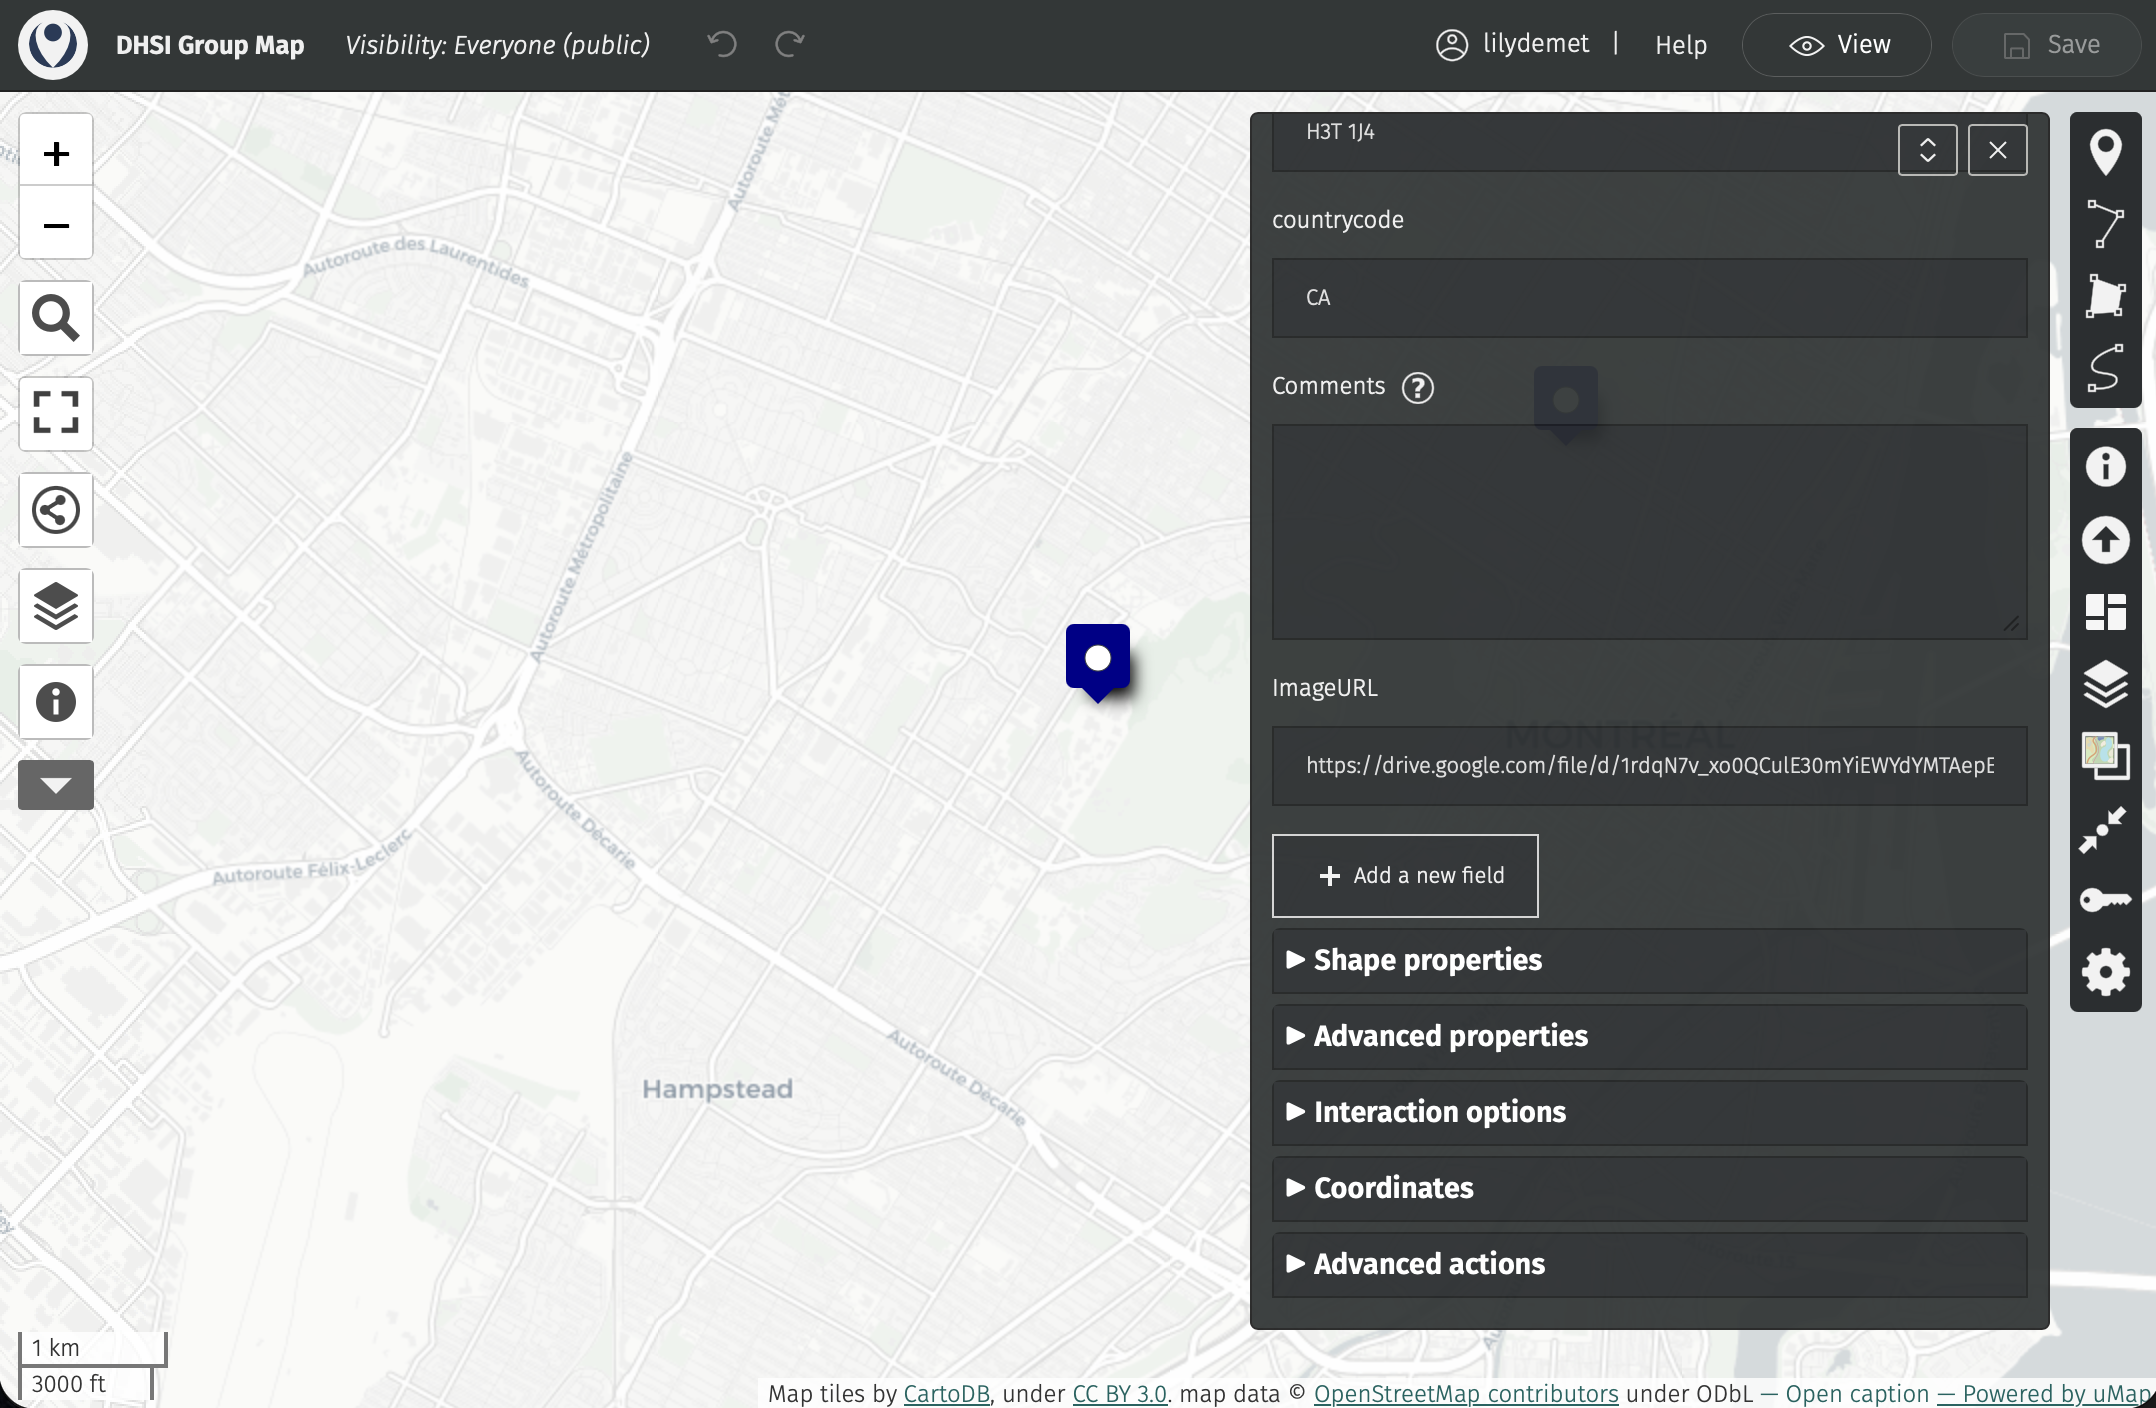
Close the “Feature Properties” side-panel.
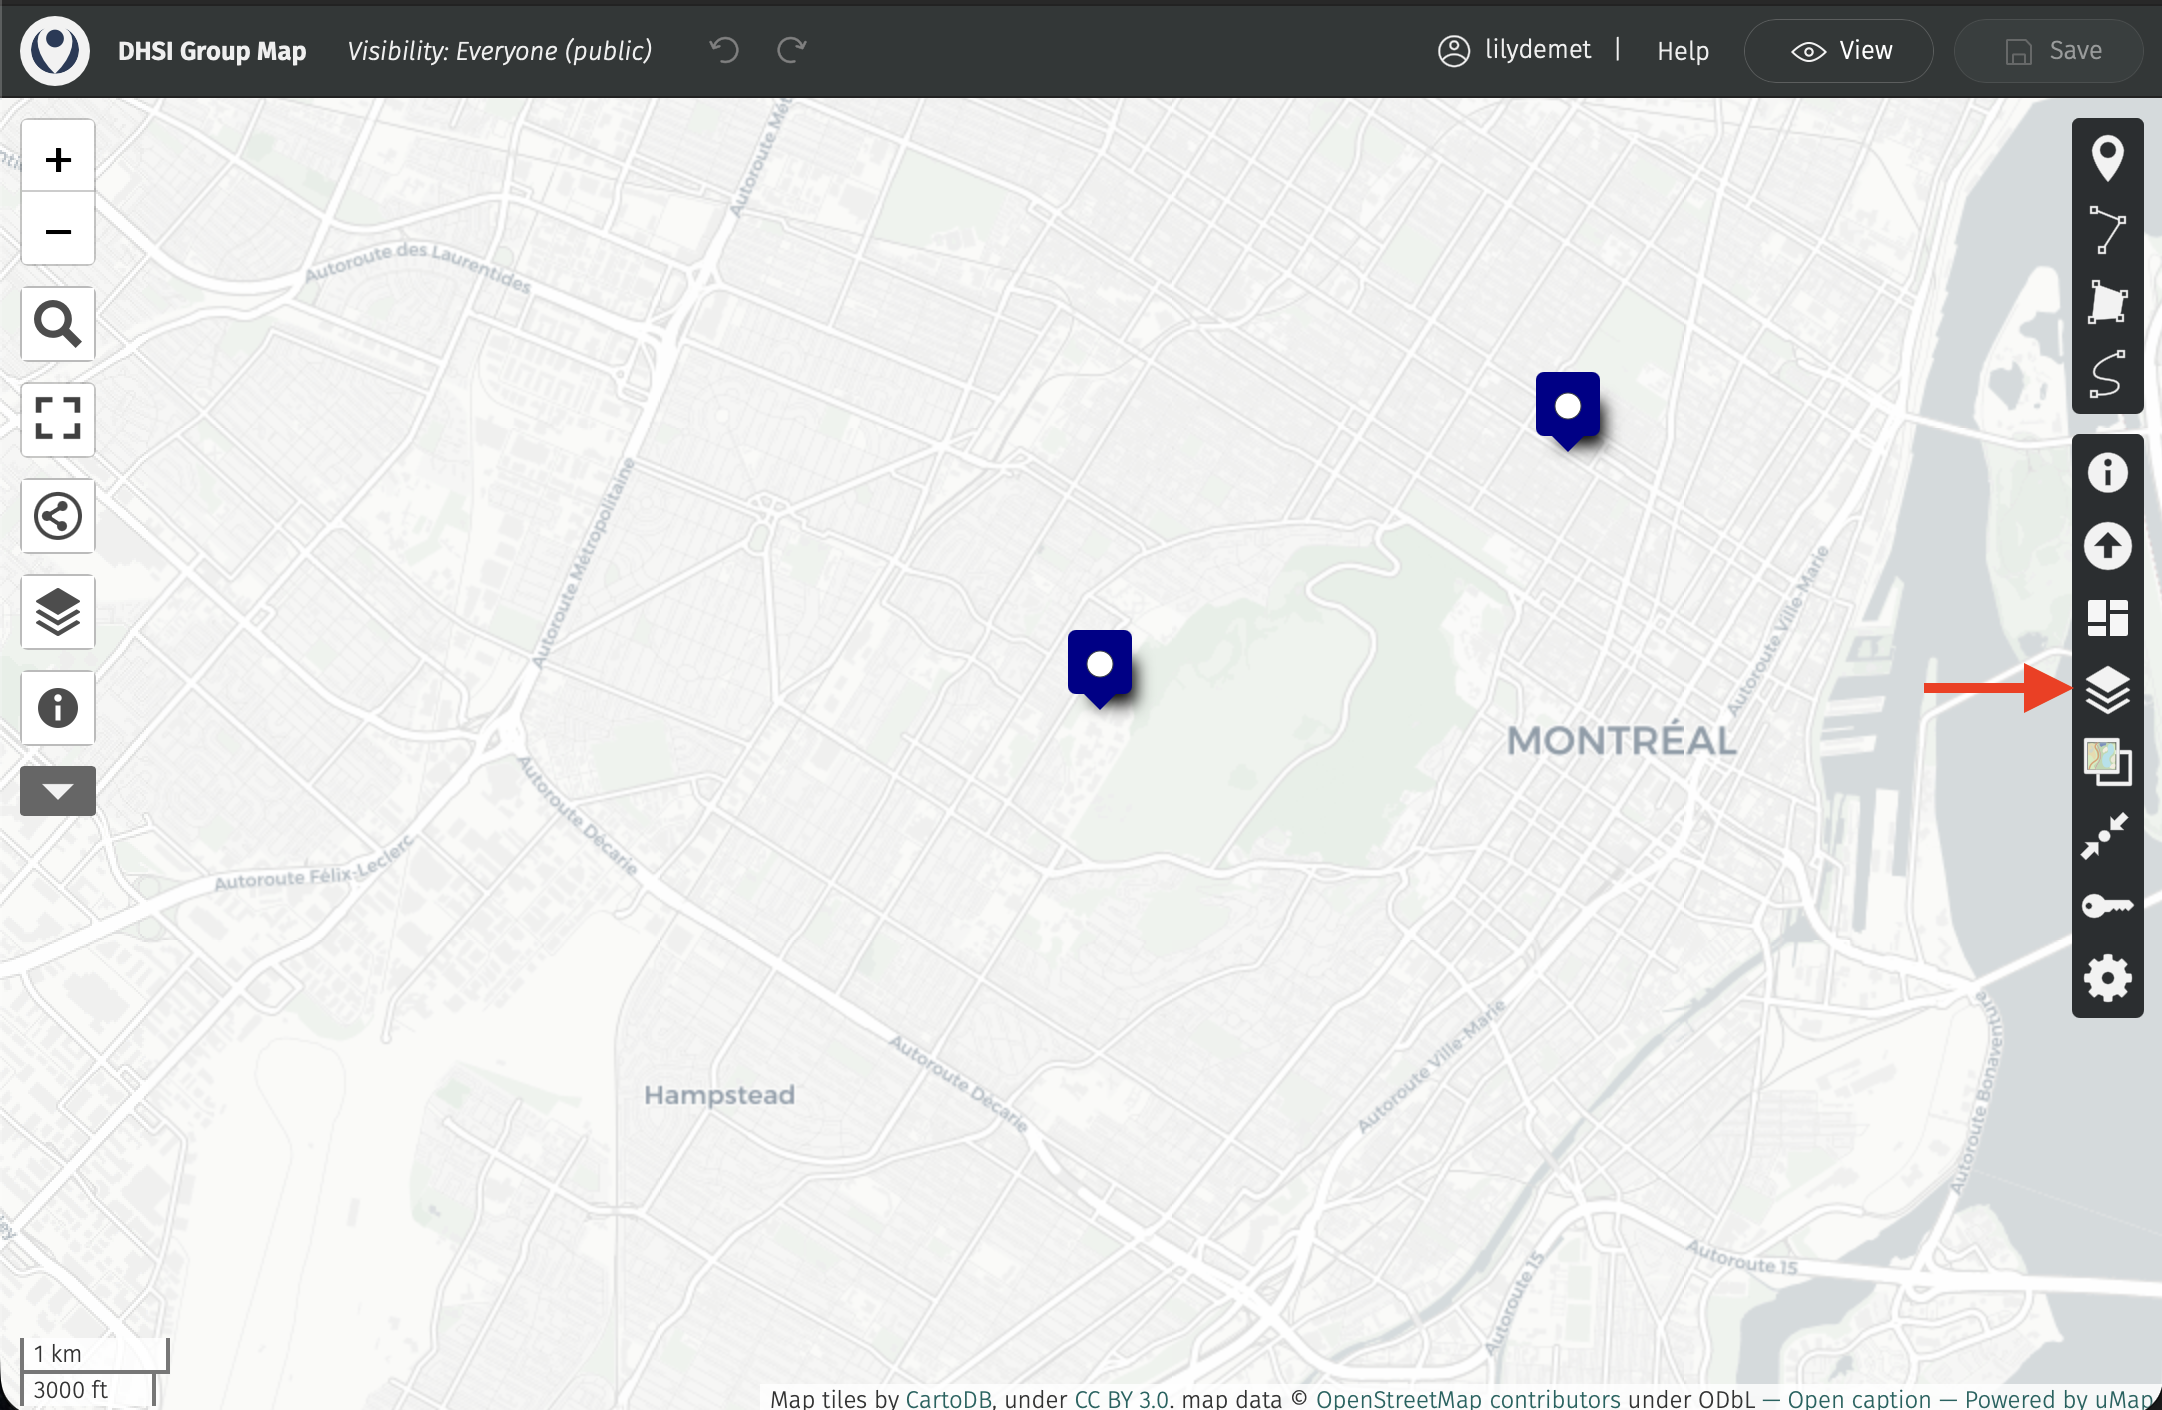
4 All the points we add are part of a single data layer called “Points of Interest”. If you accidentally closed the panel early, or want to add more information to your point, you can do so by opening the data table for “Points of Interest” and editing it directly.
To do this, open the “Manage layers” tool from the right-hand toolbar.
Then open the table.
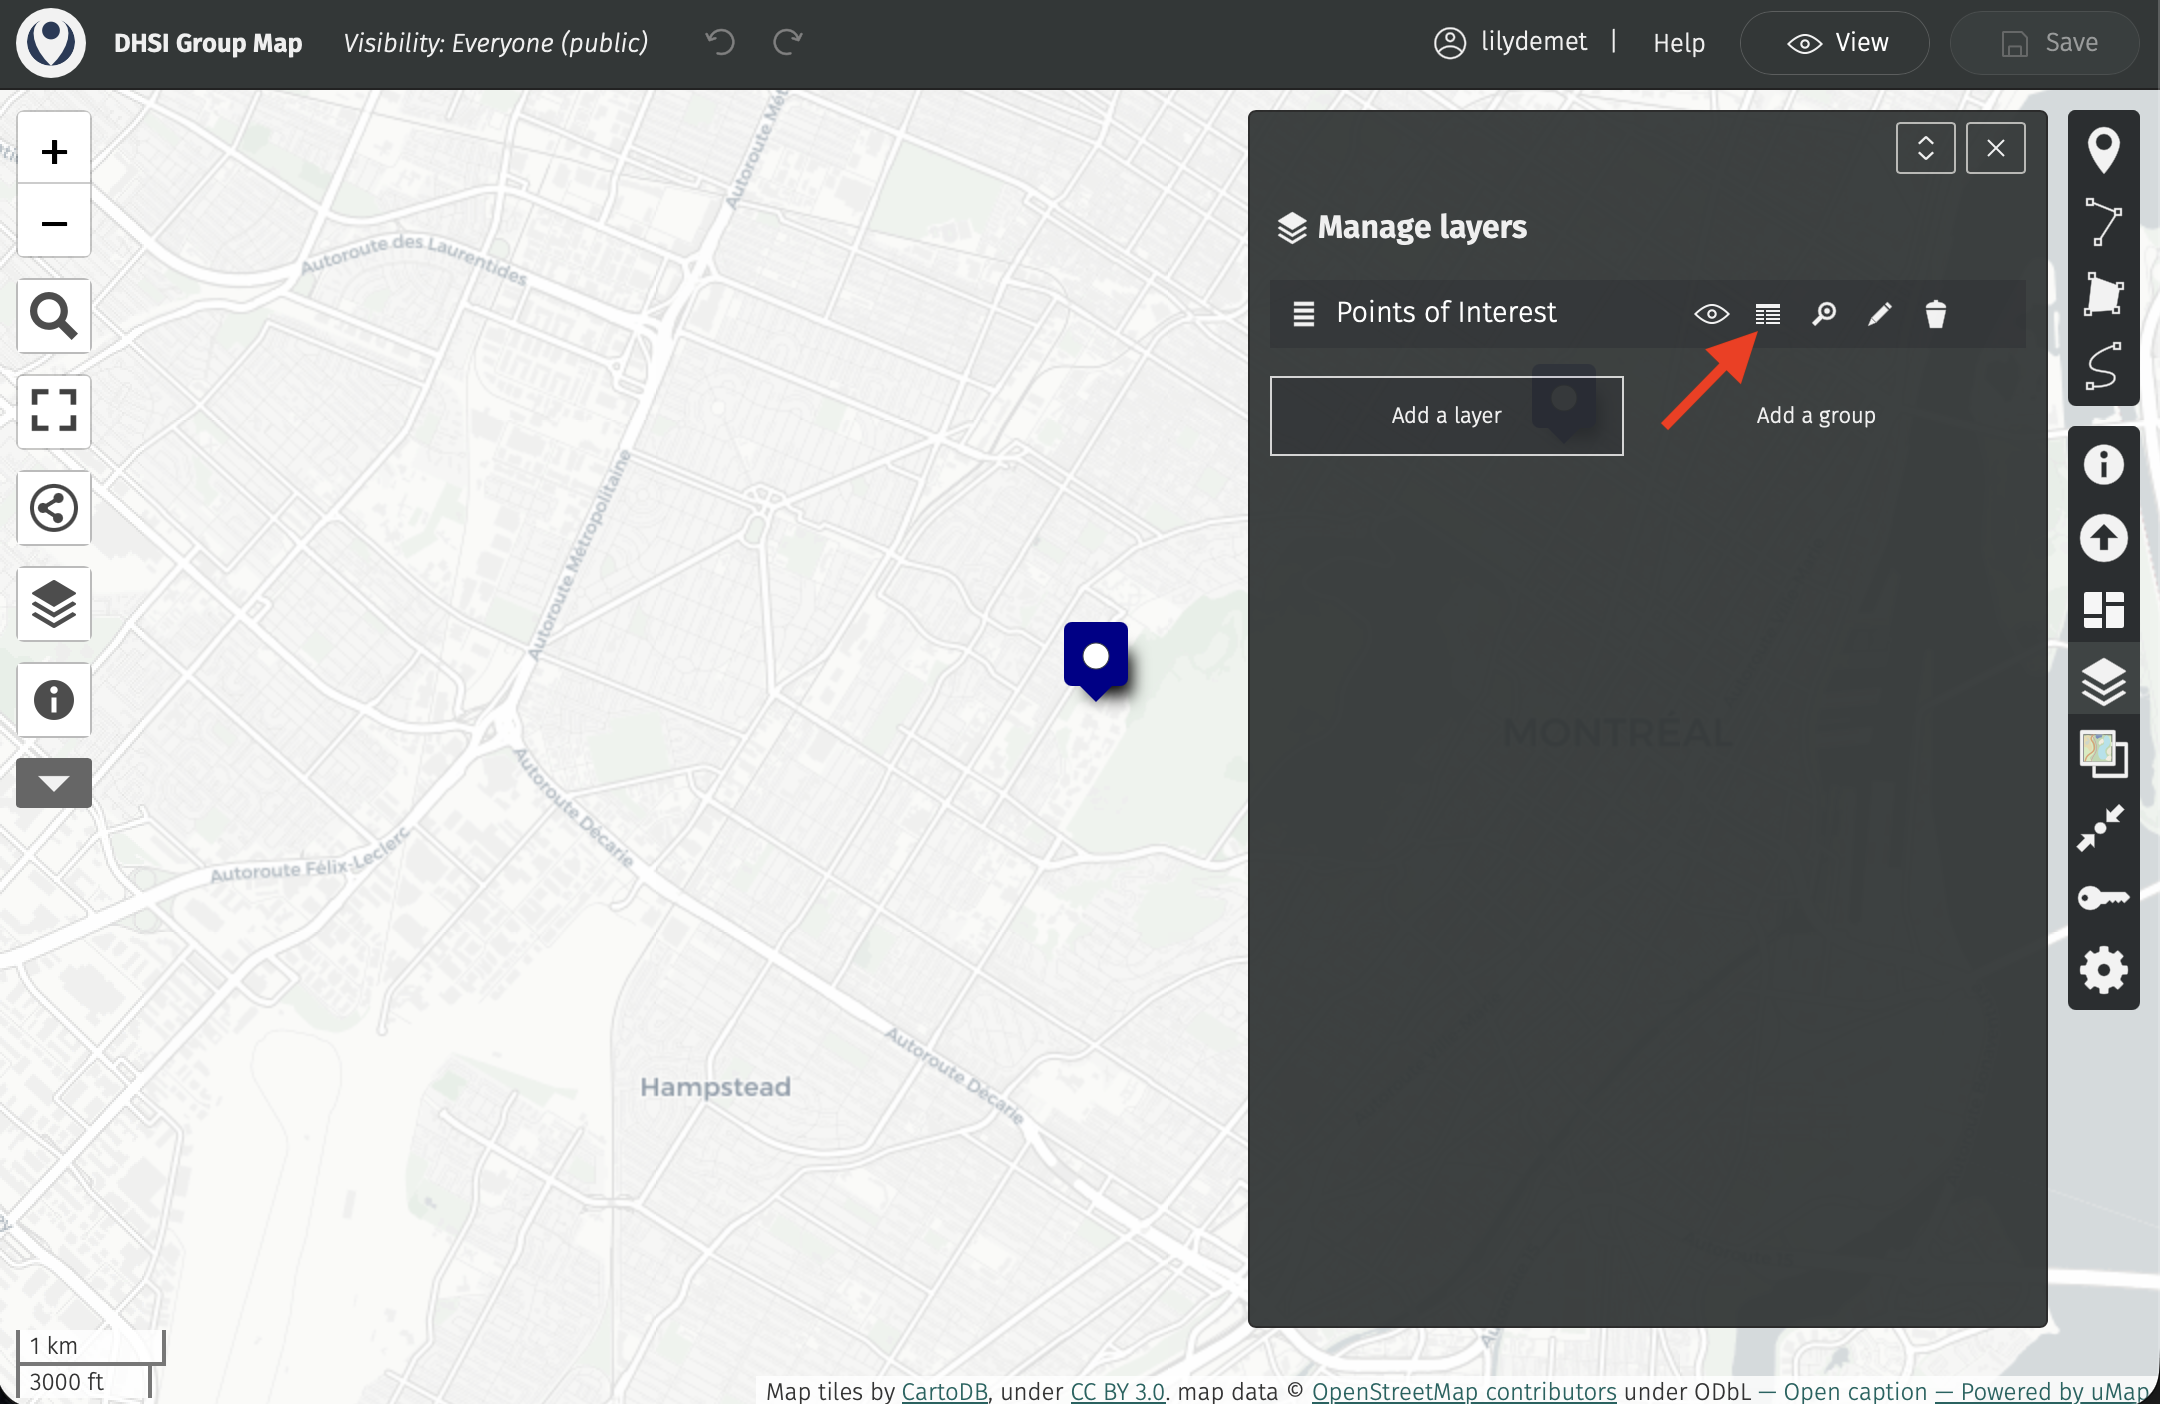
Double click a field to edit it directly.
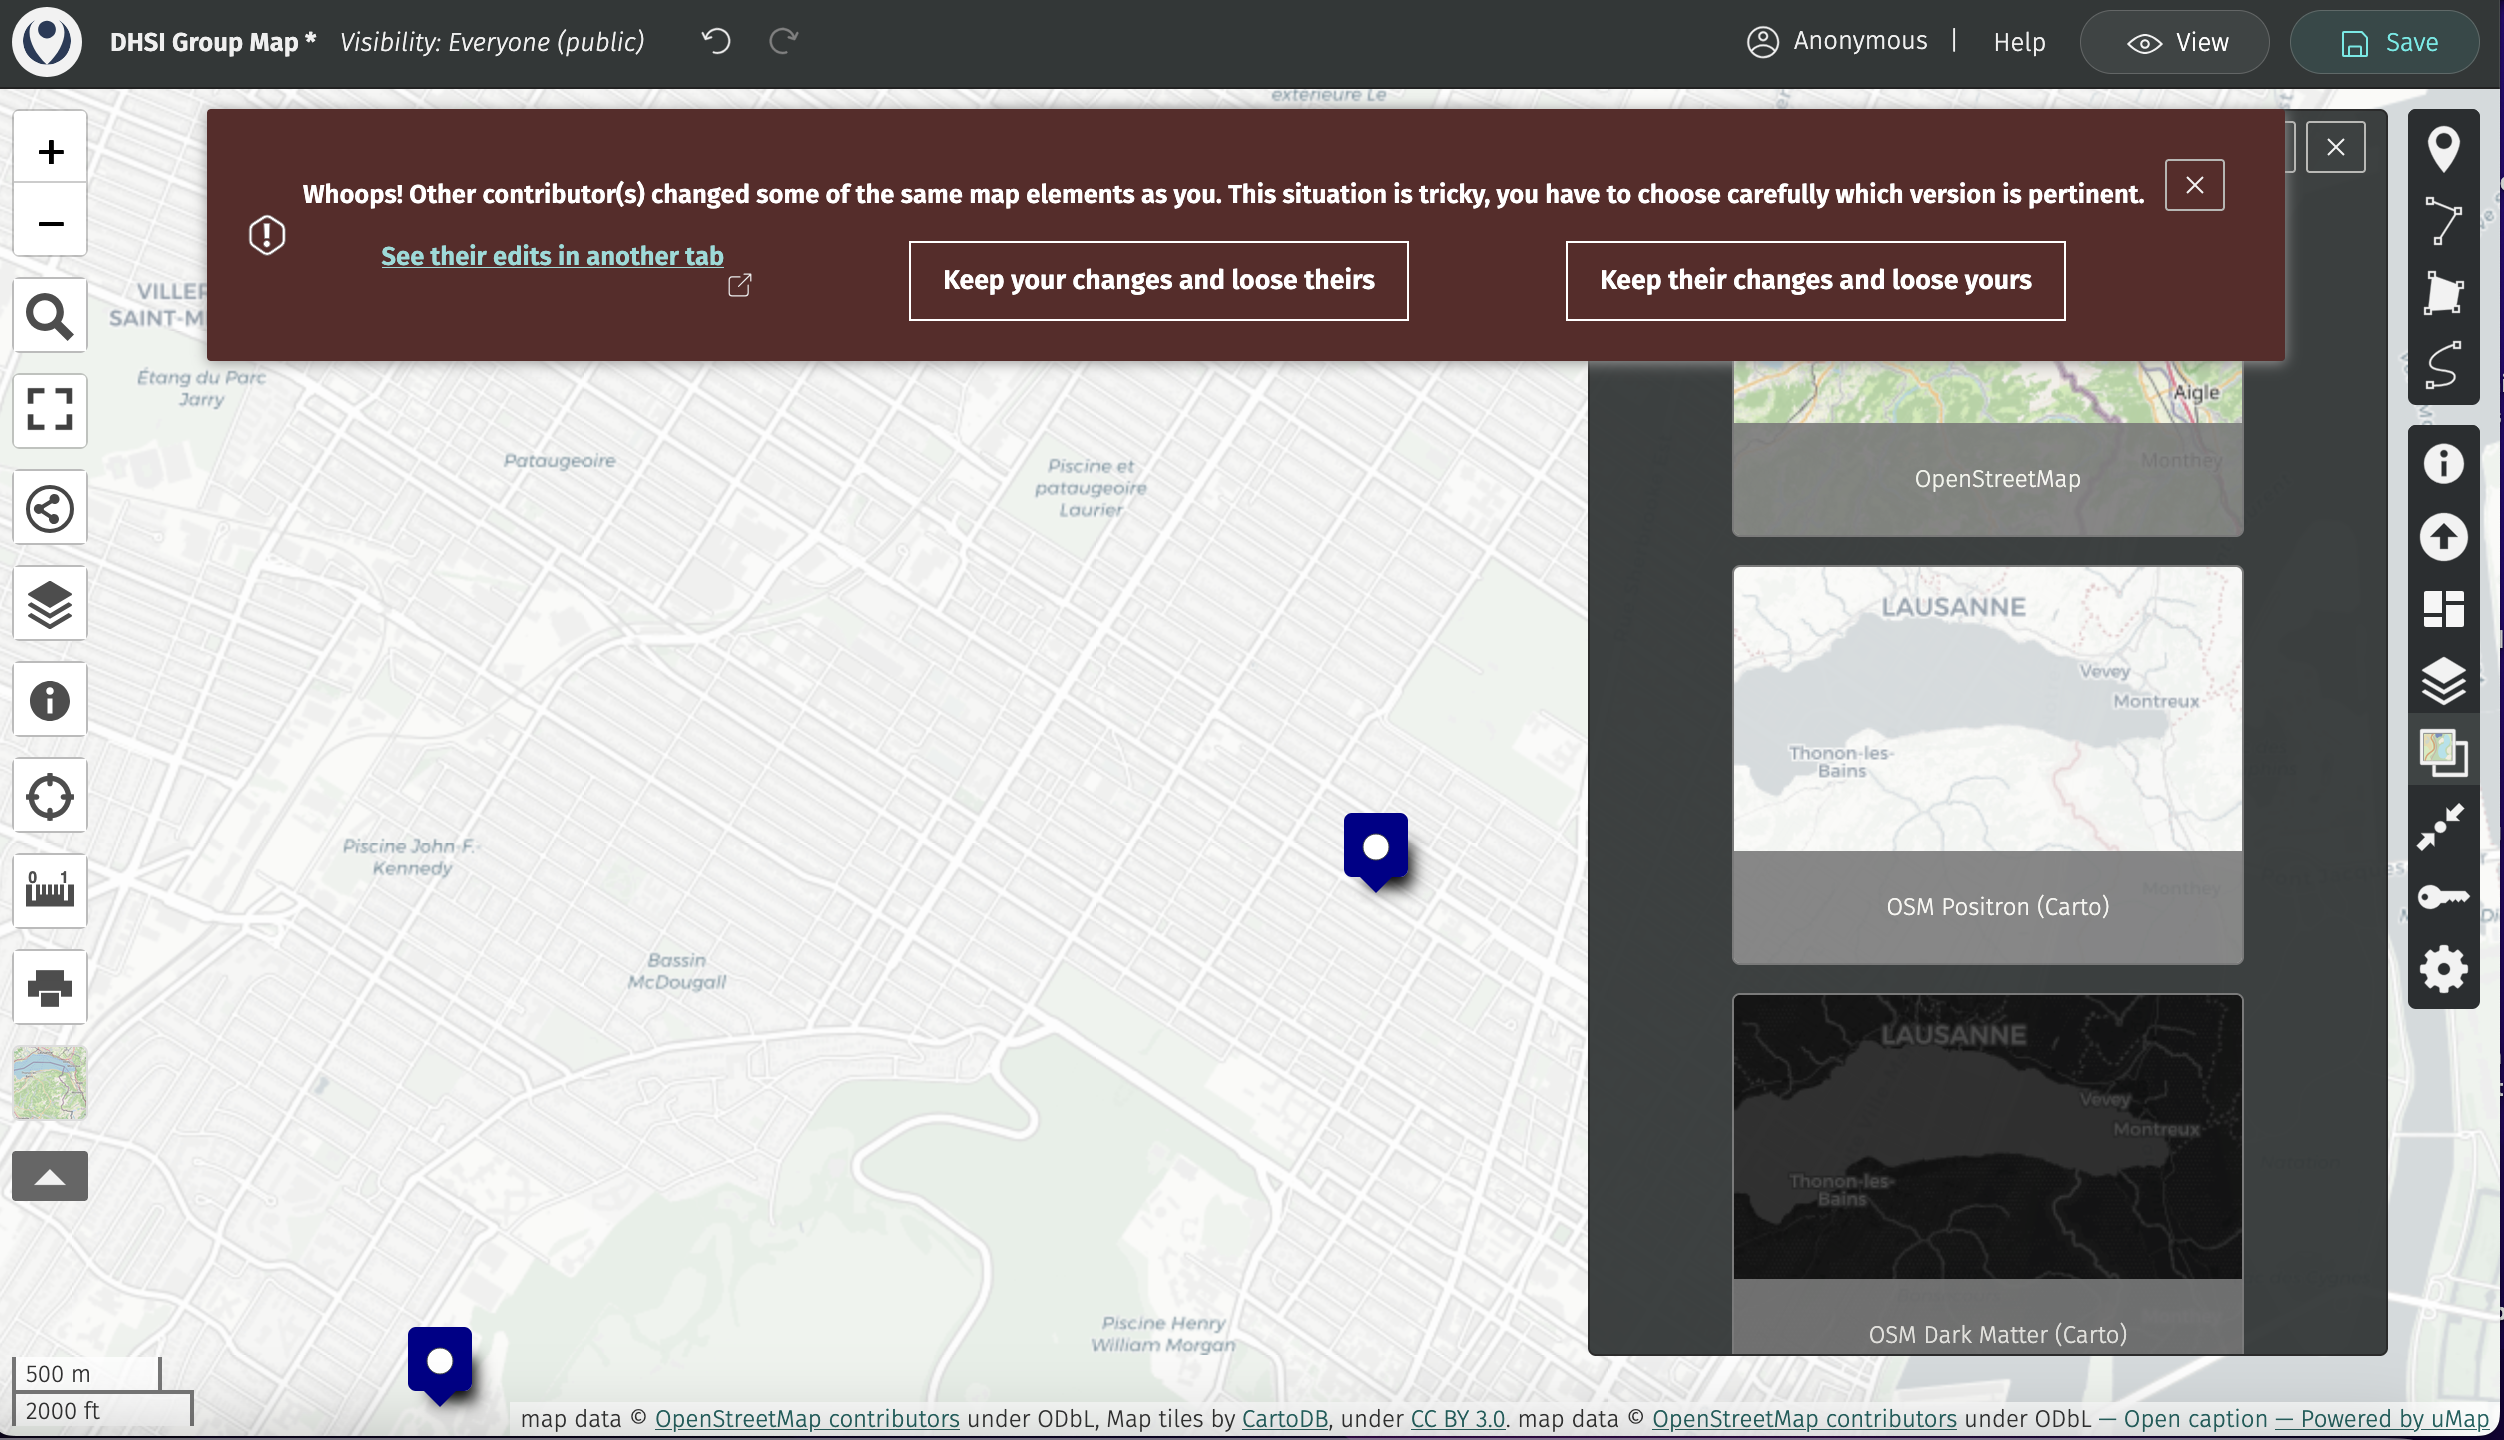
5 Save your work in the top right-hand corner. Notice you may get an error if someone else is actively contributing to the map at the same time. Try not to override someone else’s edits. Additionally, please be sure to close your browser tab once you are done contributing. We have tried to reduce conflicts by staggering our additions through asynchronous contributions.
Loading last updated date...